FL Studio is one of the most popular DAWs of today. It’s especially beloved by Hip Hop, Pop, and EDM producers.
It’s fast, easy to use, and tons of huge hits have been made with it. Whether you’re new to production, or just looking for a fresh program, FL is a great option.
But getting started can be tricky.
This quickstart guide will help you clear through the confusion so you can focus on writing. By the end of this tutorial, you’ll have everything you need to make music in FL Studio.
I’m guessing you’re here because you want to make your mixes sound professional. Well, you don’t need expensive gear or software to do that – you just need the right knowledge. We put together a brief training that covers a totally new approach to music production. Until now, everyone has been teaching production totally backward. Just click below to watch. Get industry-quality every time (steal this framework)
But if you just want to learn about FL Studio specifically, keep reading.
Creating Patterns in FL Studio
Let’s start with one of the most unique parts of FL Studio: patterns.
Patterns are loops that you create in your FL session.
In most DAWs, you record things in a specific order. For example, writing a song in Logic would look like this:
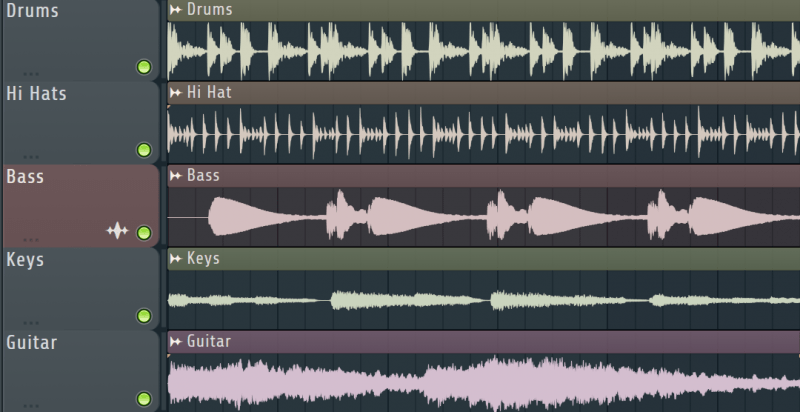
But FL splits it up. When you write a musical part, FL stores it as a pattern.
All of the patterns in a song are kept on the left.
You can then drag and drop them wherever you want in the arrangement view.
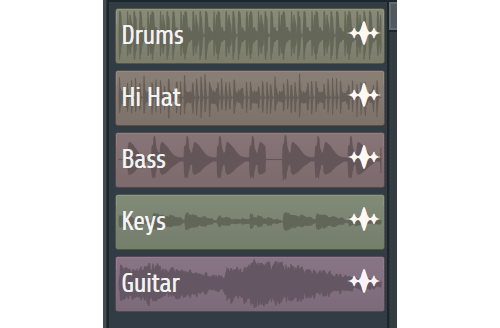
You can create patterns that have multiple instruments in them. Or patterns of single instruments.
I recommend making single instrument patterns.
You’ll have more flexibility with single instrument patterns. Plus they’ll be easier to mix in the long run.
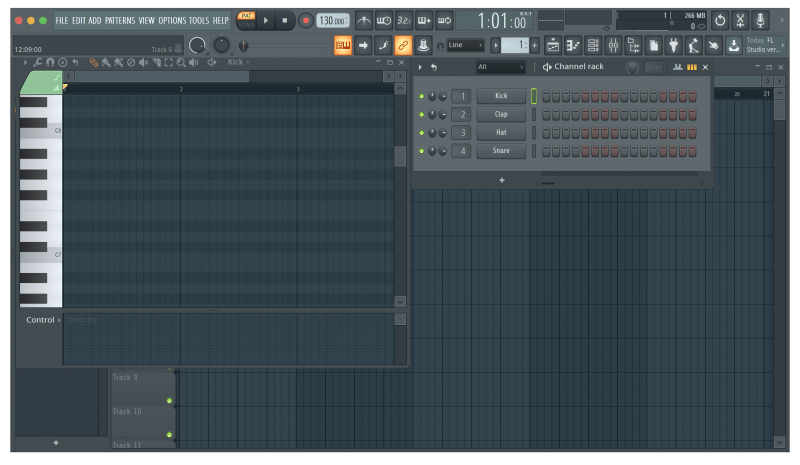
Using FL’s Channel Rack
The channel rack gives you an overview of all the instruments in a pattern.
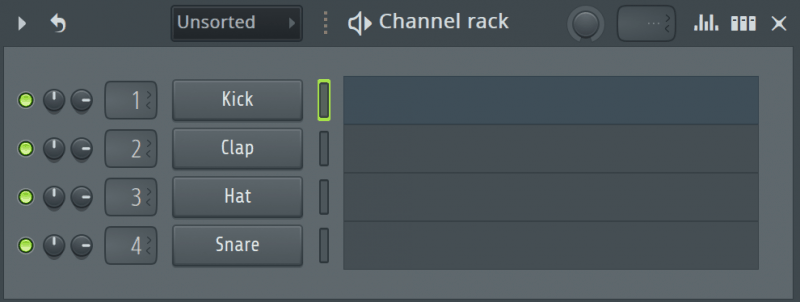
So if you want to tweak an instrument’s settings, you can easily do it from here.
You can also use it as a step sequencer, which makes it really handy for writing drum parts.
Recording MIDI
There are two ways to record MIDI.
You can use a MIDI instrument to perform the part you want to record. Or you can write it into the DAW by hand.
The first one is self-explanatory enough.
Just connect your MIDI instrument to FL. Select the virtual instrument you want to use.
Press record and start playing!
If you’re writing MIDI in by hand, you can use the step sequencer or the piano roll.
The step sequencer can help when working with drums. But if you want something with melodies and chords, you’ll want to use the piano roll.
You can draw notes into the piano roll with the draw tool. You can also make them longer or shorter and move them around.
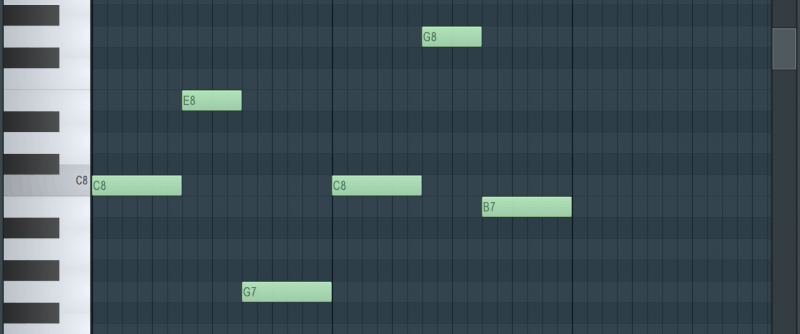
Clicking on notes with the delete tool enabled will erase them.
It’s as simple as that!
Piano Roll Pro Tips
FL’s piano roll has plenty of other tools to kick your music up a notch. Get the most out of your production by using them.
Quantization
If you use a MIDI keyboard to record, your notes may be a little off time. Some imperfection is ok (and even preferable), but notes that are totally off beat need to be fixed.
Quantization will move your MIDI notes perfectly onto the piano roll’s grid. They’ll be exactly in time with the song.
There are a few different ways to quantize in FL. But I recommend pressing “alt” and “Q” on your keyboard. This’ll open up an in-depth quantization tool.
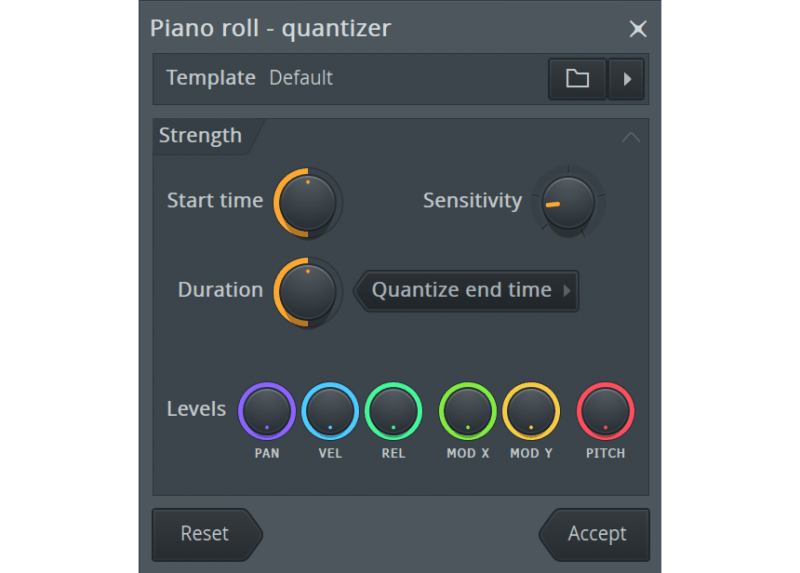
For stronger quantization, turn up the sensitivity.
You can quantize the beginning of notes and even the ends. Just change the start time and duration.
But be careful! You don’t want it to be too perfect. Hence the next tip.
Humanize
If notes are perfectly on the grid, they’re going to sound robotic. You want to have some natural imperfections.
That’s where humanizing comes in.
Humanizing does exactly what it says. It makes MIDI sound more human by pulling the notes slightly off the grid.
With the quantize tool I just talked about open, click on the template button at the top.
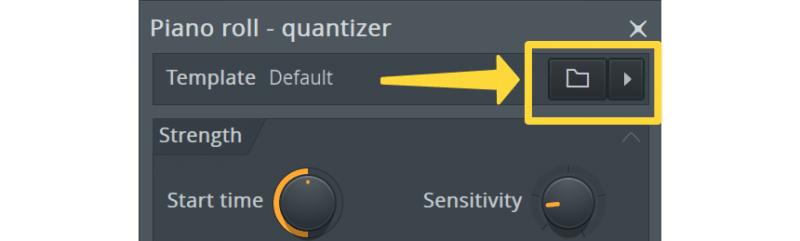
It’ll open up a handful of quantization templates, including some humanization ones.
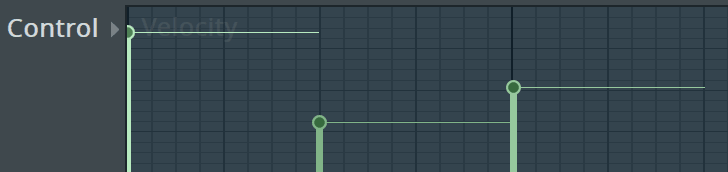
Velocity
Velocity lets you change the volume of notes.
If you’re writing MIDI in by hand, you’ll definitely want to change the velocity. Real musicians won’t play every note at the same volume, after all.
Fortunately, FL makes this really easy to change. Just hover your mouse over the note you want to turn up or down.
Then hold “alt” and scroll up or down. It’ll change the note’s velocity accordingly.
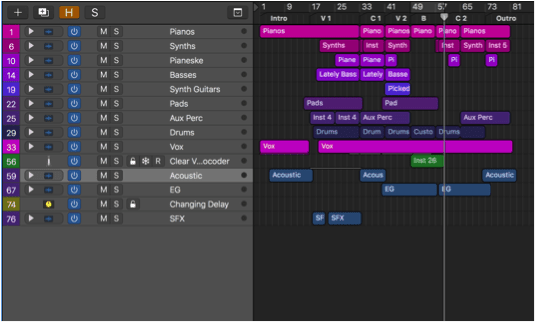
Arranging the Song
Once you’ve got some solid patterns, it’s time to start arranging them.
Arranging is where you nail down the structure of your song. And it’s super easy to do in FL.
Just drag and drop the patterns into the arrangement view.
I’m assuming you’re creating patterns that only include one instrument each. So I recommend laying out each track so it only has one instrument on it.
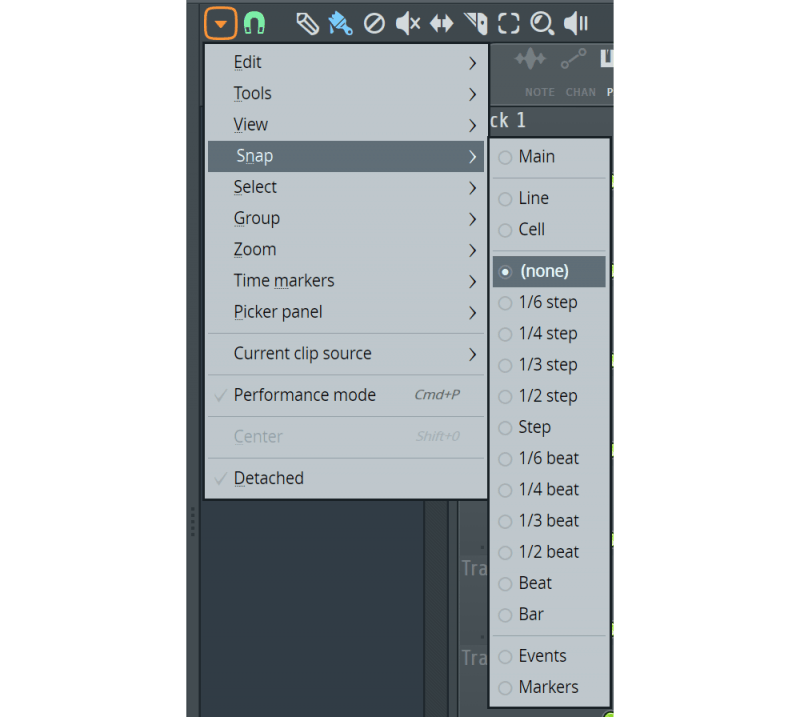
By default, patterns will automatically snap to the grid when you drop them in. But sometimes you may want more flexibility while placing patterns.
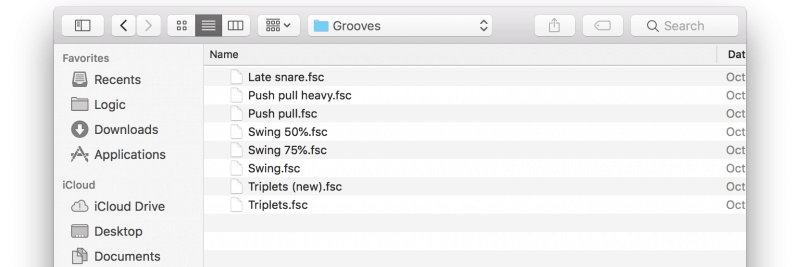
If you want to turn snap to grid off, click the drop-down arrow in the upper left. Navigate down to “snap” and select “none.”
Now you’ll be able to place patterns wherever you want.
Working with Audio in FL
Due to some early limitations, FL is a bit infamous for not being great at handling audio. But Image-Line has worked out the kinks.
Now it’s got all the bells and whistles you need to get pro results.
Unfortunately, the cheapest version of FL doesn’t support audio recording. You’ll need to get the Producer version to do that.
Otherwise you’ll want to record audio in another software. You can import it into FL after that.
Recording Audio
To record in FL, you’ll need to link a track from the playlist to one of your mixer channels.
Just right-click on a track in playlist view, and scroll down to “track mode.” Select one of the audio inserts.
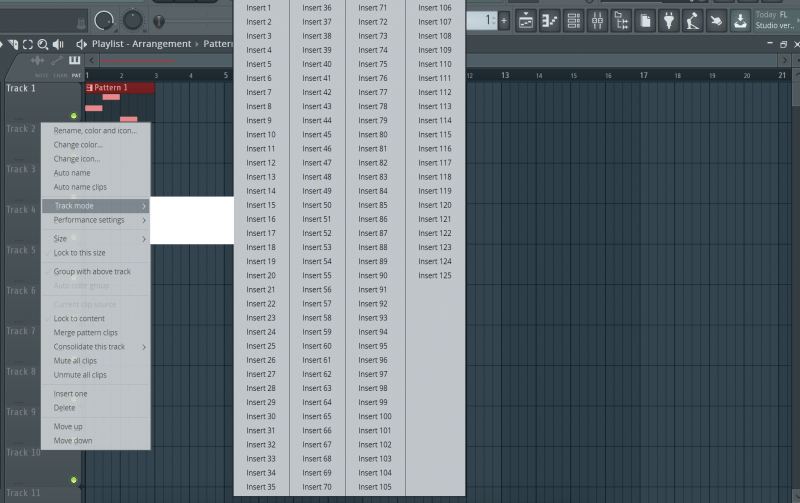
The number of insert you choose will correspond with the mixer channel with the same number.
Then open up the mixer view and double-check that the channel(s) you want to record has the correct inputs.
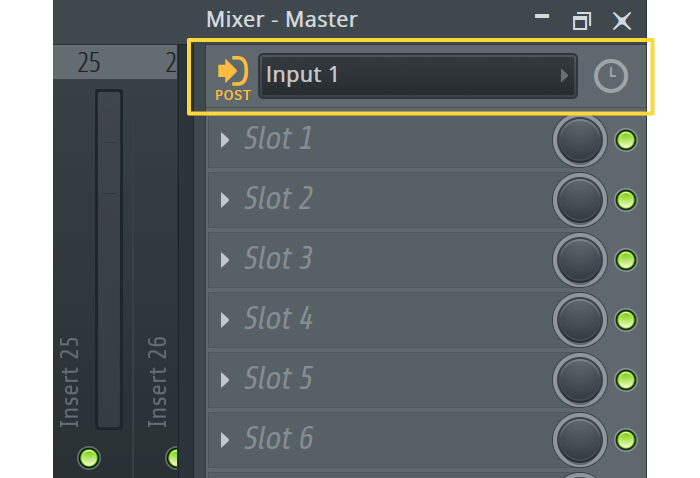
Now you just need to arm the track so it’s ready to record.
Click on the gray circle at the bottom of the mixer channel. When the circle turns red, it’s ready to record.
Just press “R” on your keyboard and you’ll be tracking!
You can also use Edison to do some loop recording.
Editing with Edison
There are many ways to edit audio in FL, but Edison is the most robust.
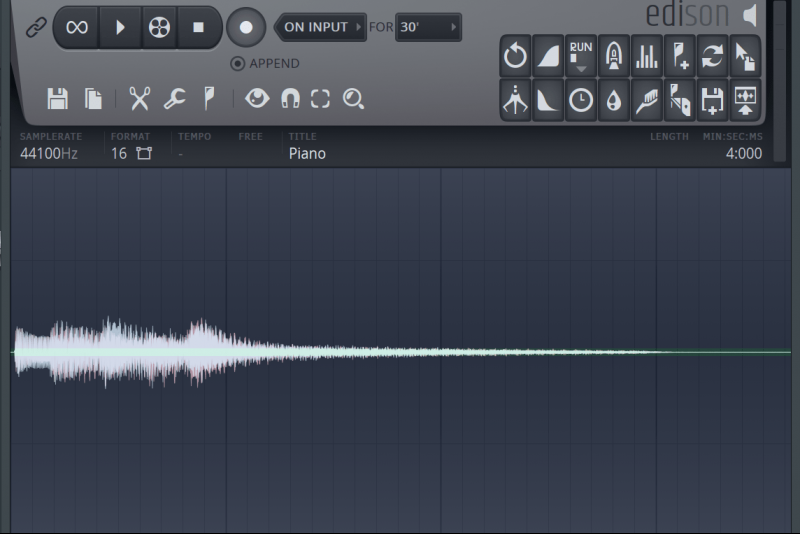
First, open an instance of Edison on a mixer track. Then drag an audio file into Edison.
In Edison, you’ll be able to easily chop the audio up, add fades, and even trim unwanted noise.
To delete part of a track, highlight the section you want to get rid of and hit delete. You can also hit “control” and “X” if you want to paste it elsewhere.
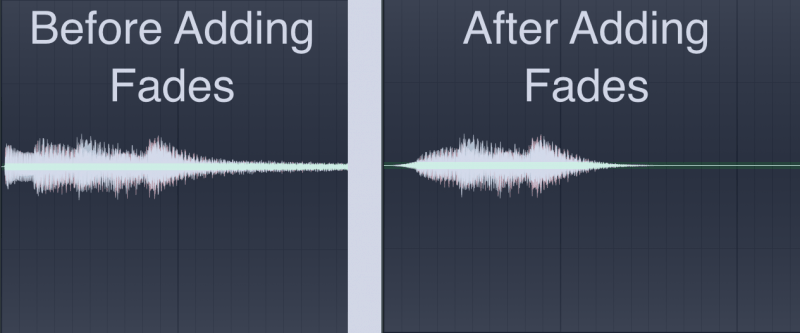
To add fades, highlight the area you want to fade in or out. Then click the fade in or fade out button.
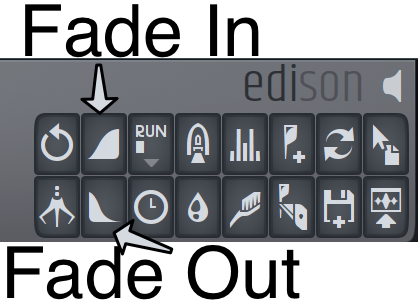
Voila! The track will now have fades.
Once you’re done editing, click and hold on the “drag file” button in Edison. Then drag it into a pattern’s empty audio channel.
Make sure you drag the file back into the arrangement view! Otherwise, you won’t be hearing the edited version when listening to your song.
All in all, Edison makes editing easy.
Mixing in FL
Once your song is totally written, recorded, and edited, it’s time to mix.
You can open the mix window by clicking on “view” in the top left and selecting “mix.” You can also press “F9.”

As you can see, it looks pretty similar to the mix view of any other DAW.
Mixer Channels
You’ve got individual channels for each track. Each channel has a volume fader and a pan knob to move the sound to the left or the right.
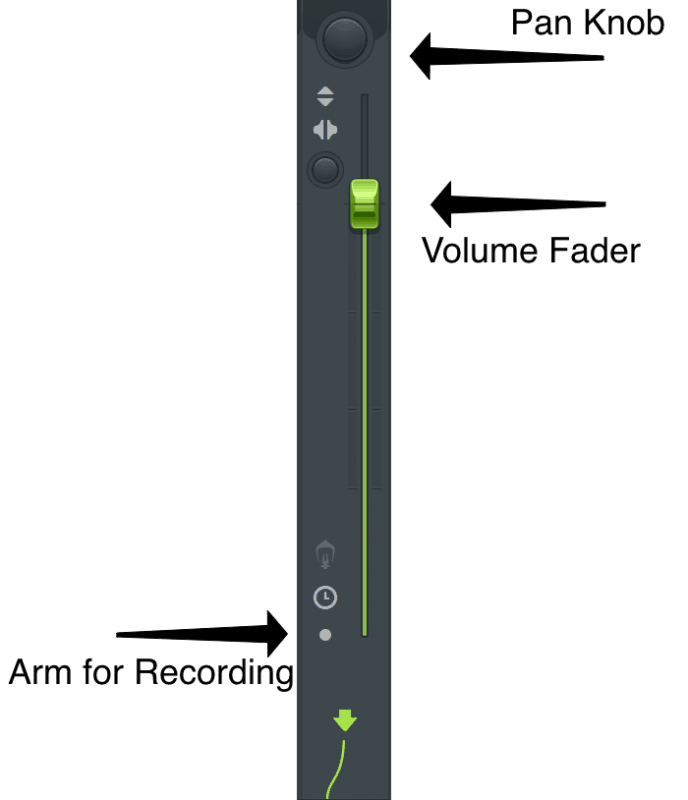
Most of these are pretty self-explanatory. The volume fader lets you turn the volume up and down.
The pan knob lets you pan sounds to the left and right.
If you want to record a track, you can click the little dot at the bottom of the channel. This will arm it for recording.
Using Effects
On the right, you’ll notice the insert section. This is where you can add plugins and effects to your channels.
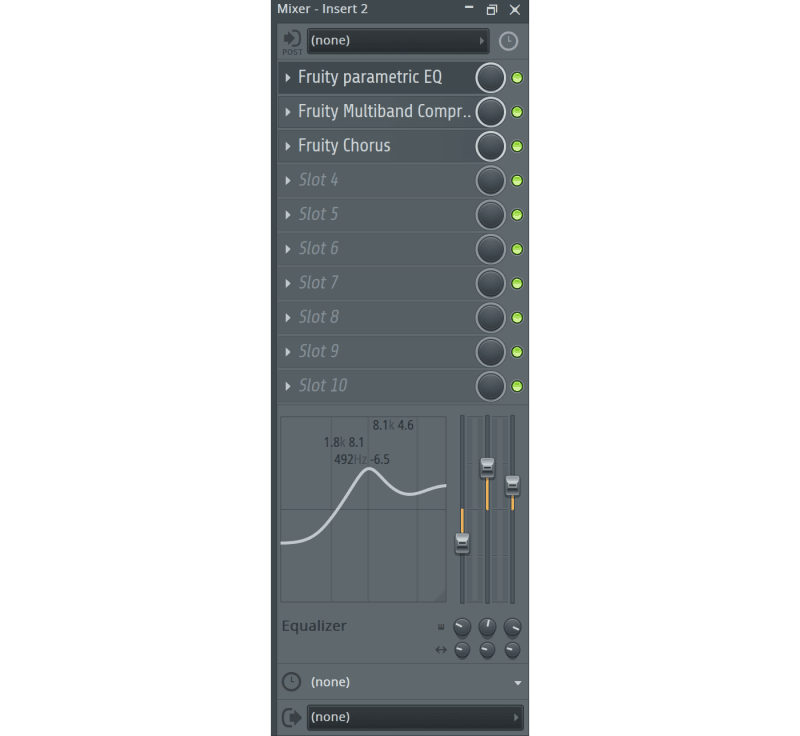
Simply click on the channel(s) you want to affect. Then right-click an open box in the insert view.
You’ll see all the different plugins available to you.
So if your sound needs EQing, this is where you’ll do it. Likewise with adding compression.
Using Sends
Using aux sends in FL is very easy.
First, click on the track you want to use as your aux bus. You’ll know it’s selected when the volume fader is highlighted green.
Then click the arrow at the bottom of the channel(s) you want to send to the bus. This’ll create a send.
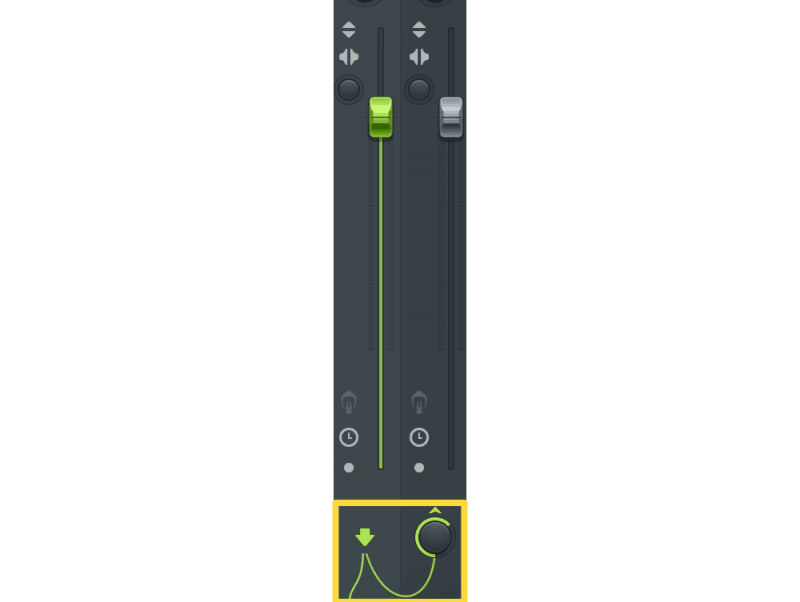
Turn the send knob up or down to change the amount you’re sending to the bus.
This is really handy for creating submixes, reverbs, and parallel effects.
Bonus Tips:
Here are a few other tools on each mixer channel that can really help while recording and mixing.
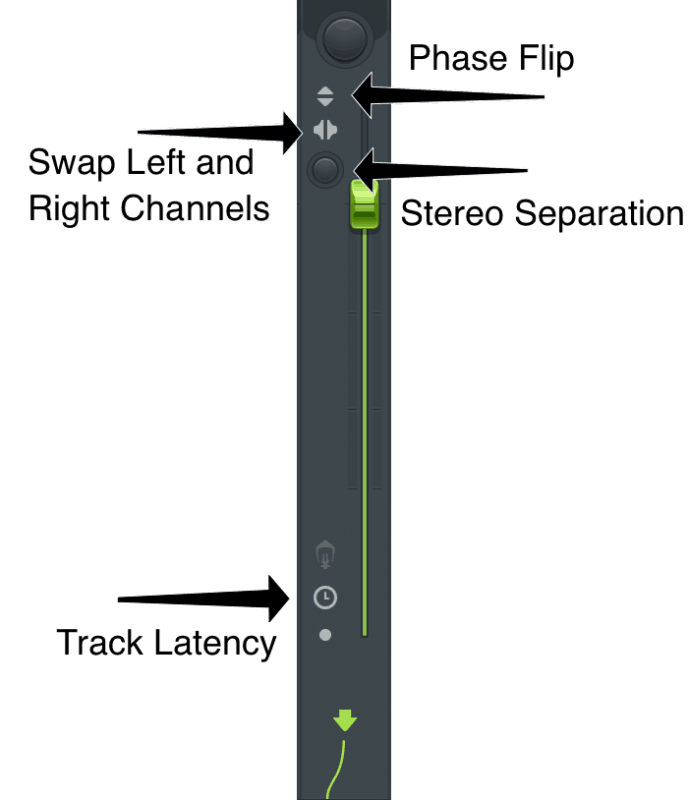
First off, you can change the latency of your track by clicking on the “Track Latency” button. So if your recording is weirdly delayed, you may want to change that.
By clicking on the phase flip button, you can change the phase of a track. So if you’re recording snare top and snare bottom, you don’t need to worry about phase issues.
You can swap the left and right channels on a dime. So if you’ve got a stereo recording and you want to change things up, you can swap the left and right channels in an instant.
And finally, the stereo separation tool lets you make your track mono or stereo. By turning this knob to the right, you get a completely mono sound. By turning it to the left, it’ll sound way more stereo.
Making bass and kick tracks mono is a great way to make room for the rest of your mix. Meanwhile, background elements like keys and acoustic guitars sound great in stereo.
Automation
If you want your sound to change over time, you’ll want to use automation.
This is a great way to make sure the vocal maintains the right volume throughout the whole song. You can also change panning between sections or totally switch up effect settings.
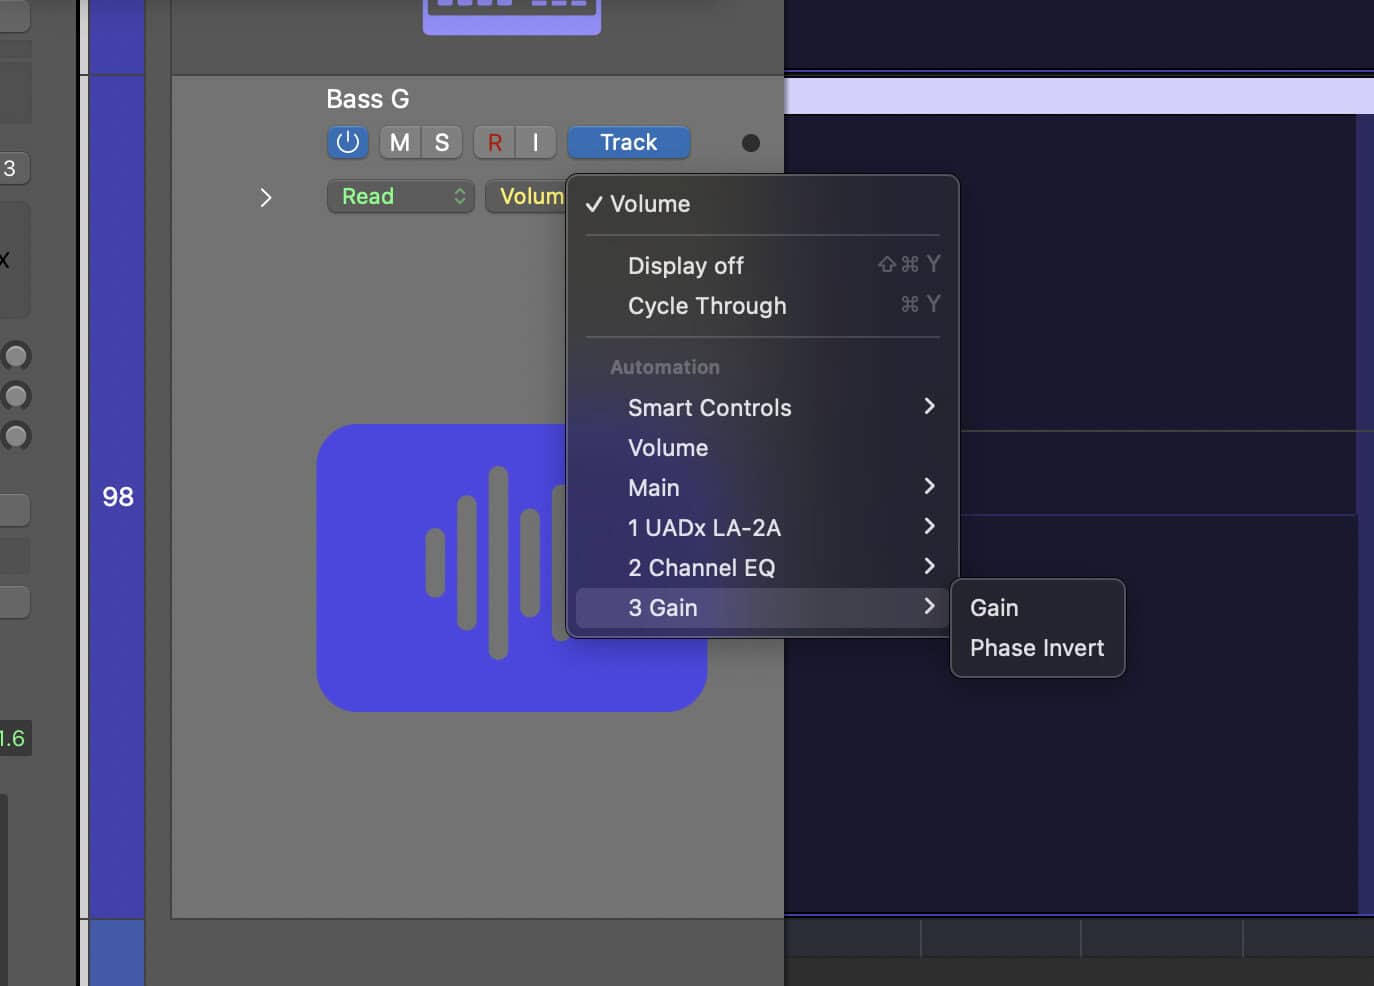
First, you’ll need to make an automation track, which is super easy. Click on the parameter you want to change. Move it slightly, then set it back where it was.
If I want to automate the volume, I’ll just wiggle the clip’s volume knob slightly.
Then go up to tools. Click on “last tweaked” and then select “Create automation clip.”
This will create an automation track for the last parameter you changed.
You can add automation nodes by right-clicking the clip. Dragging the nodes up and down will change the automation curve.

There are a few other ways to create automation tracks. But generally speaking, this is the most straightforward.
Exporting
Once your song is mixed, it’s time to export.
This is the easiest part of all. Just click “file” and then navigate down to “export.”
Or you could press ”control” and “R” on your keyboard to export a WAV file.
And done! Your file is ready to send off for mastering!
Bonus Tips
Here are a few other features that’ll help you speed up your workflow in FL.
Hot Keys
Hot keys are incredible time savers. By simply pressing a button or two, you can knock out tasks that would otherwise require opening multiple menus.
Here are a few hot keys you’ll probably use all the time in FL:
Start or Stop Playback – Spacebar
Start or Stop Recording – R
Copy – Control + C
Paste – Control + V
Save – Control + S
Save As – Control + Shift + S
Export Wav – Control + R
Export mp3 – Control + Shift + R
Duplicate Selected Channel(s) – Alt + C
If you’re using a Mac, replace “control” with “command.” You’ll also use “option” instead of “alt.”
There are plenty of others though, so read up on them.
Gross Beat
With Gross Beat, you can make super intricate sounds in a matter of seconds.
It’s a powerful plugin that uses noise gating and pitch shifting to change sounds. You can make really interesting, rhythmic effects with it.
Check it out:
Patcher
Patcher is an incredibly powerful tool. You won’t want to use it until you’ve gotten comfortable with FL, but you should have it on your radar.
It allows you to chain different modules and plugins within FL. You can create entirely new instruments and effects from scratch.
It’s powerful. Once you’ve got the hang of FL, you should definitely start tackling Patcher.
Check out this tutorial from In The Mix:
As you get comfortable with FL, you’ll want to try out some more advanced techniques. I highly recommend you check out In The Mix’s channel for deep dives into the many incredible tools FL has to offer.
Conclusion
FL Studio can look daunting at first. But it’s actually one of the fastest, easiest to use DAWs out there today.
With a little experience, it’s an incredibly powerful tool. With some time, practice, and the info from this guide, you’ll be ready to produce your own hits with FL!
If you want to dig deeper into music production and learn what it actually takes to make mixes that sound pro… And you’re an intermediate or advanced producer… Be sure to check out the free masterclass: Enjoy!Next Steps