Ever wondered how the pros make incredible synth sounds for their tracks? Oftentimes, wavetable synthesis is the secret.
Wavetable synths can fill your song out with lush modern electronic production.
I’ll be showing you all the basics of wavetable synthesis so you can start using it in your own songs. So keep reading if you want to elevate your songs with rich synth sounds.
I’m guessing you’re here because you want to make your mixes sound professional. We put together a brief training that covers a totally new approach to music production. Until now, everyone has been teaching production totally backward. Just click below to watch.Get industry-quality every time (steal this framework)
But if you just want to learn about wavetable synths specifically, keep reading.
What Is Wavetable Synthesis?
Wavetable synths have been around since the late 1970s. But they’ve really hit their stride in recent years.
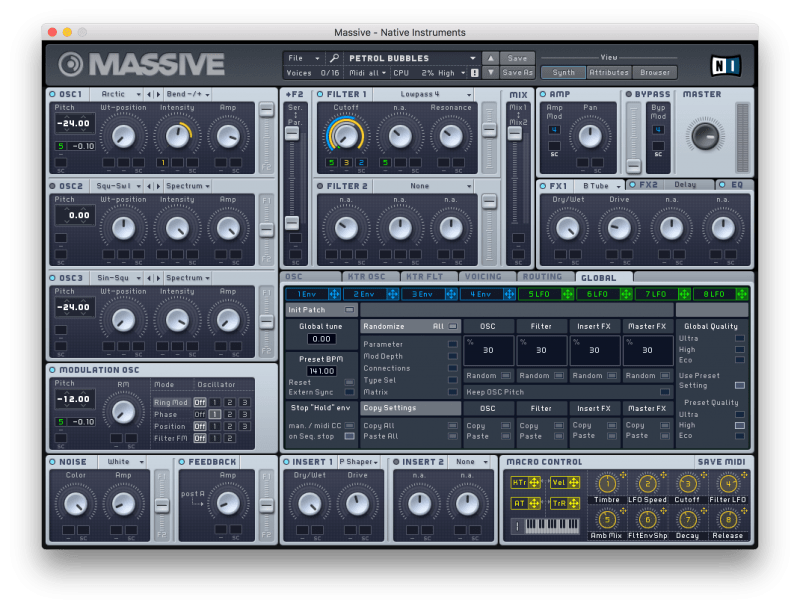
In 2007, Massive by Native Instruments took the electronic music world by storm.
The more recent Serum has enjoyed similar success. It’s made its way into the hands of musicians from all genres.
Wavetable synths have dominated the airwaves for the past decade. And for good reason!
Let me show you how these synths work. Then I’ll show you how you can make cool sounds of your own with these powerful tools.
Where to Get a Wavetable Synth
There are plenty of great wavetable synth plugins out there. But I’m afraid there aren’t a ton of free ones that are beginner friendly.
Some DAWs like Logic Pro, Ableton Live, and Reason have stock wavetable synths. It’s worth Googling the name of your DAW and “wavetable synth” to see if you already have one.
Otherwise, you may need to drop some money to get into wavetable synthesis.
I honestly think wavetable synths are well worth the money. So if you’ve got the extra cash, I would get one.
But there are plenty of equally amazing synths out there.
Maybe you can’t spare the extra money. I’ll bet your DAW already has a great subtractive synth that you can start out with.
How Wavetable Synths Work
Wavetable synthesis is kind of like sampling. But instead of playing back a full recording, wavetable synths just play bite-sized pieces of a sample.
Imagine you’re at a huge party.

You’re having a great time and know you’ll want to remember it later, so you take a picture. One tiny snapshot to remember the whole evening by.

Wavetable synthesis does the same thing with audio. It takes a tiny snippet of a recording and plays that back.
These little snapshots are called wavetables.
The oscillators loop these wavetables over and over so you can hear them as continuous notes.
That’s all pretty theory-heavy though. Let me show you what wavetable synthesis is.
Wavetable in Action
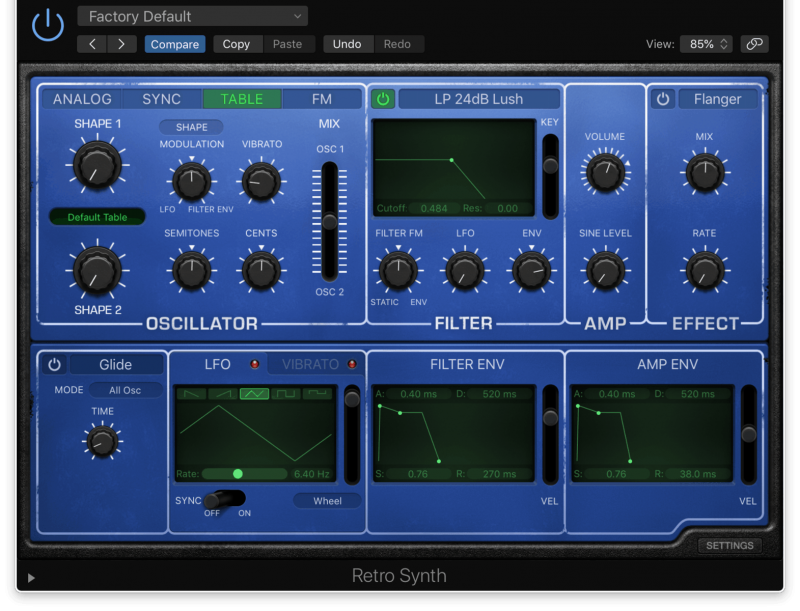
Now let’s go from start to finish and make a new synth sound. I’ll be using Logic’s RetroSynth, which has a wavetable setting called “Table.”

First things first, let’s find a recording to use as our wavetable.
Any wavetable synth will come with plenty of stock wavetables you can use. But for the sake of demonstration, we’ll be using a custom one.
Not every wavetable synth will let you use your own wavetables. But everything else I’m about to do should translate over to your synth of choice.
I’ve picked out a sample that sounds pretty cool. Check it out:
First I click the “custom table” button on RetroSynth. Then I select “Create Wavetable from Audio File” to load this recording into the synth.

The synth will then chop this recording up into tiny pieces. These tiny pieces can be played as individual notes.
Let’s see how it sounds now that it’s a synth instead of a sample!
Pretty cool! But it’s not ready to go in a song yet.
Adding a Filter
Not every sound needs a filter. But when it comes to synths, they’re usually pretty handy.
The high end feels a little harsh to me, so let’s slap a low pass filter on here.
Remember, a low pass filter cuts out high frequencies. But it allows the lower frequencies to pass through.
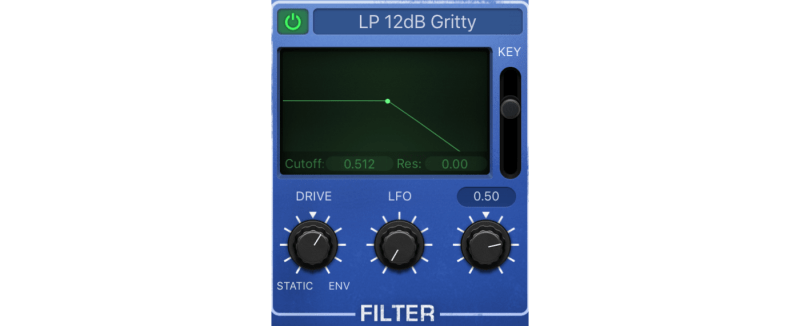
RetroSynth has a low pass that’s labeled “Gritty.” This filter adds distortion at the resonance, so it’s great for thickening up a sound.
I’ve set the low pass filter so it’ll start turning all the sound above 6 kHz down.
Now let’s move on to the ADSR.
ADSR
The ADSR, also known as the amplitude envelope, allows us to change the timing of our synth. If we want it to take a while for the synth to fade in or out, we can do that here.
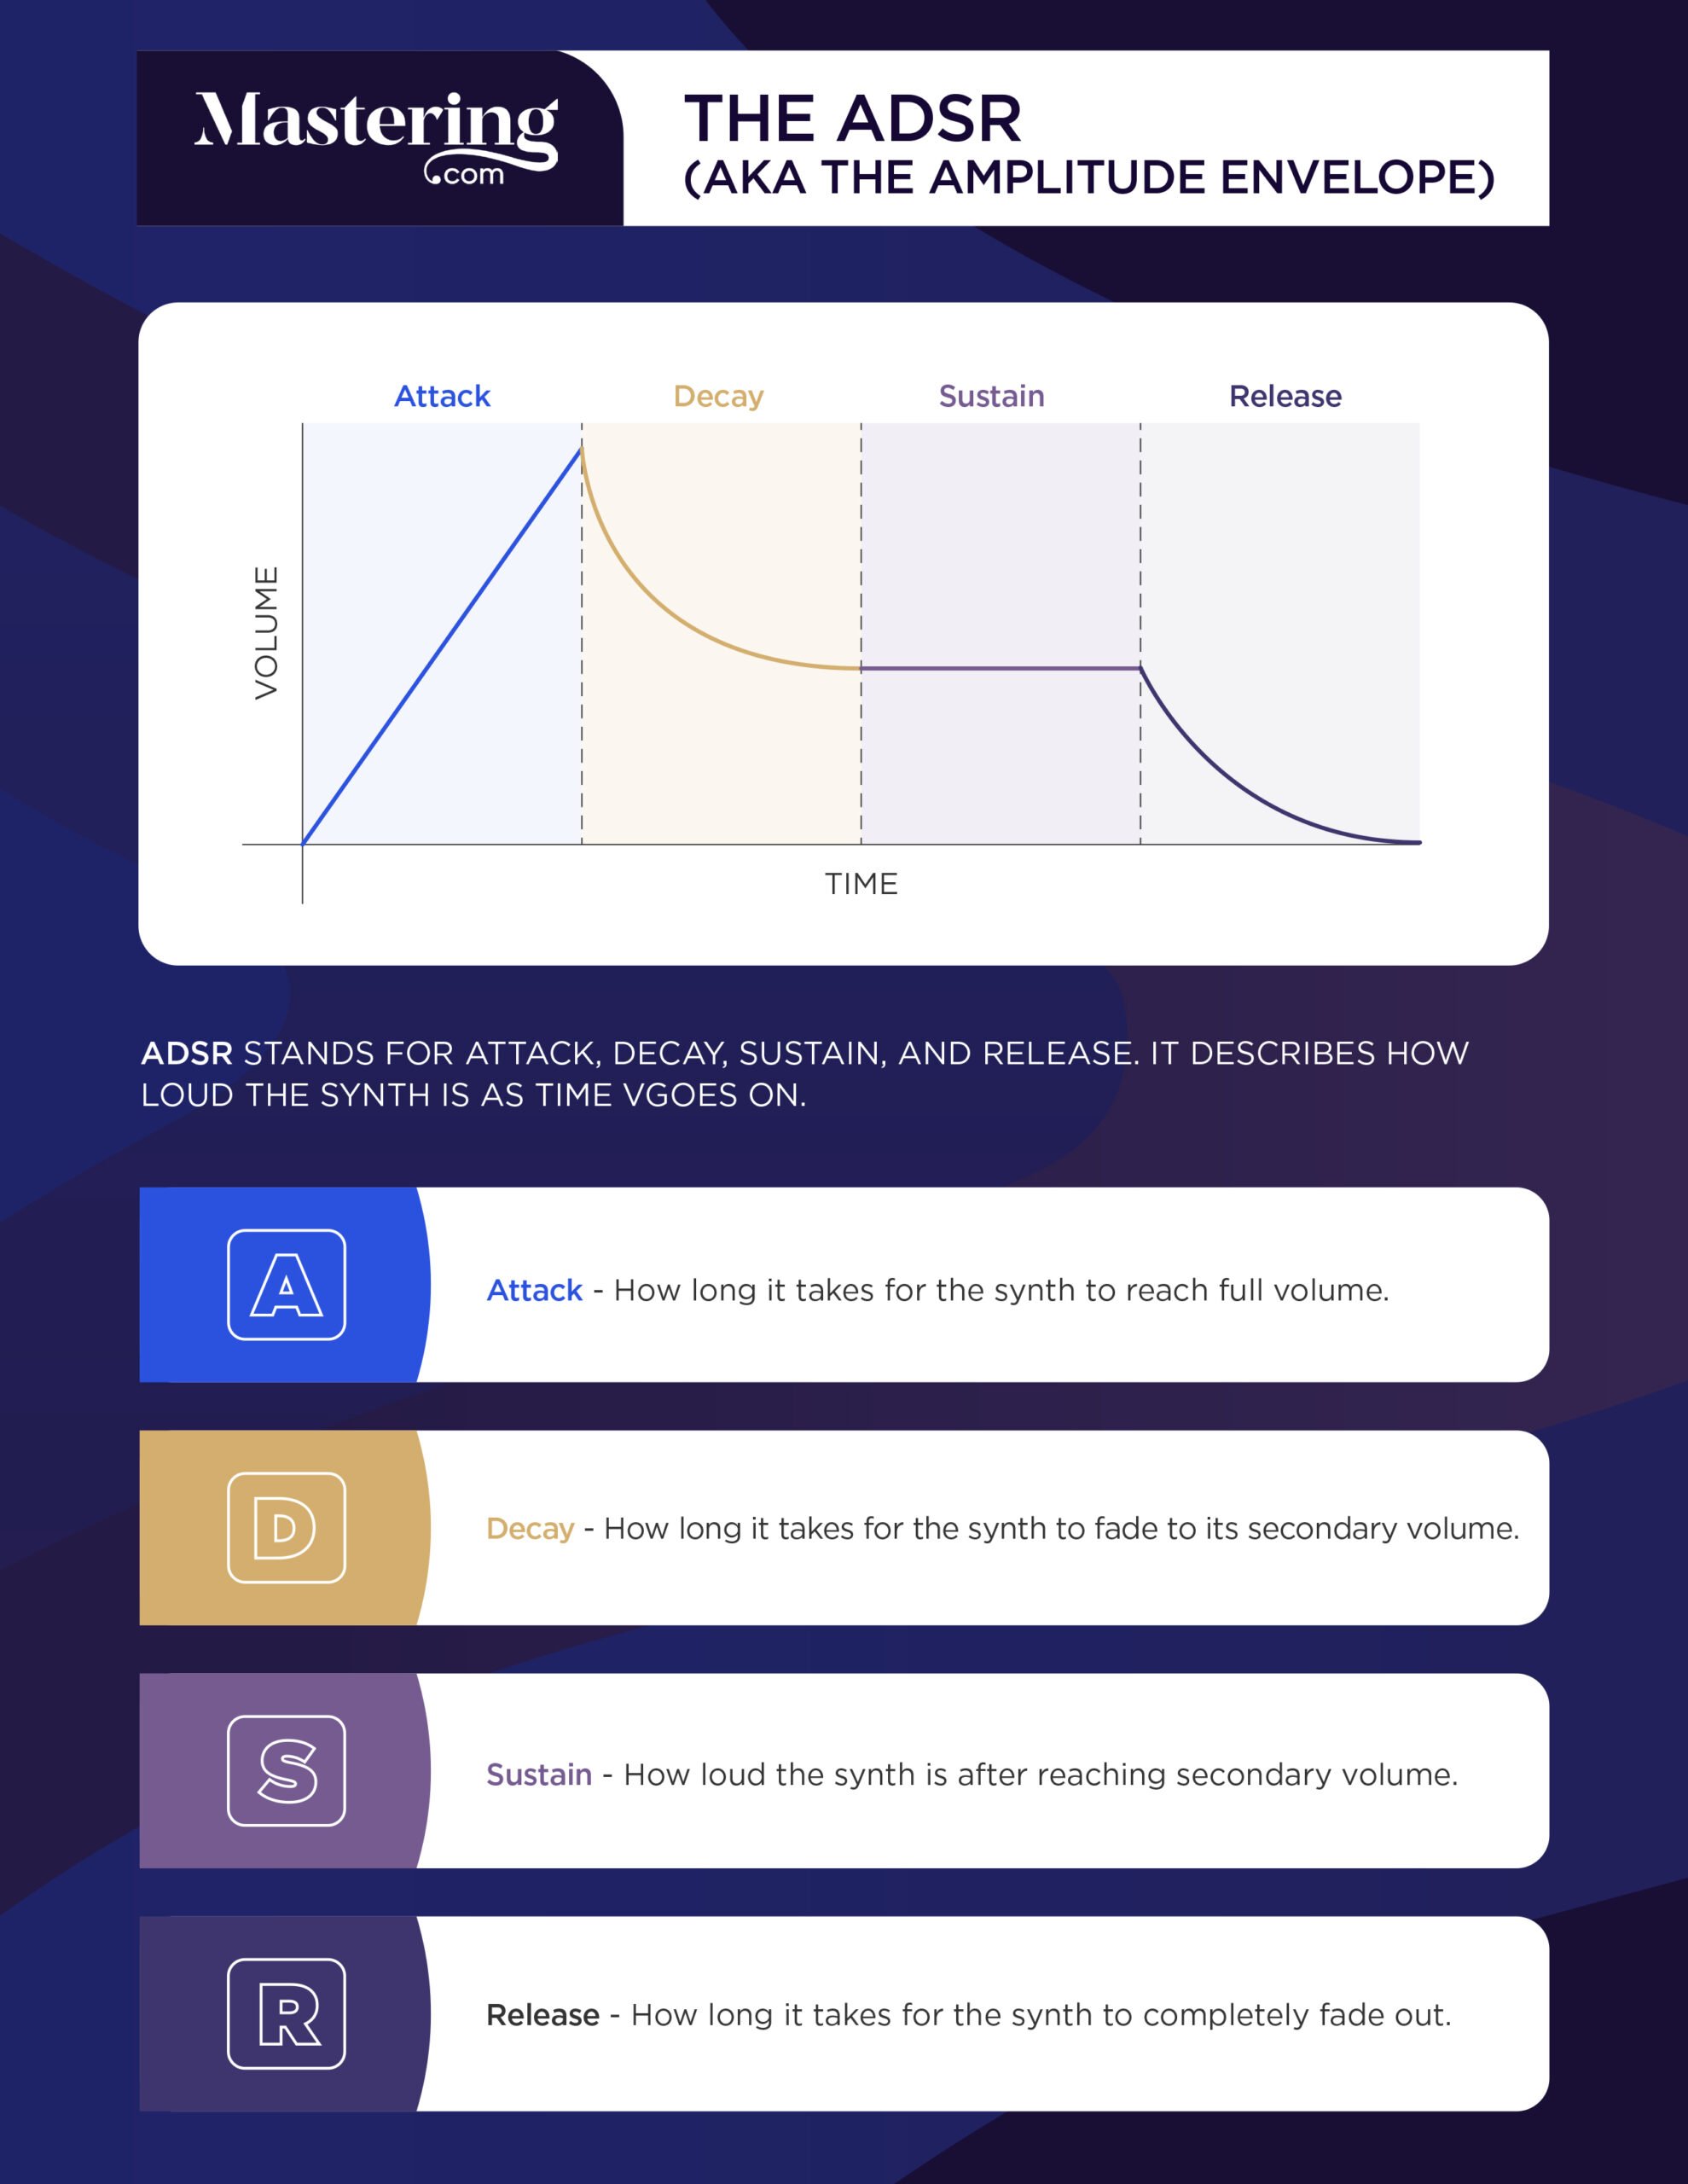
To brush up on everything the ADSR can do, check out the first article in this series.
I think this sound would make a good lead.
As the name suggests, a lead is usually a synth that plays the melody or countermelody. It’s usually pretty front and center.
To push this sound to the front, let’s give it a really fast attack. This means the sound will come in right away.
We can also accent the initial hit and make it feel more impactful by turning down the decay and sustain. The synth will come in and then turn down very quickly, really driving home the impact each time it hits.
Then we can draw the release out just a little. This’ll give it a nice fade out to make it sound more natural.
Let’s see how it sounds now!
It’s a subtle difference, but shaping the tone of your synth like this is really important.
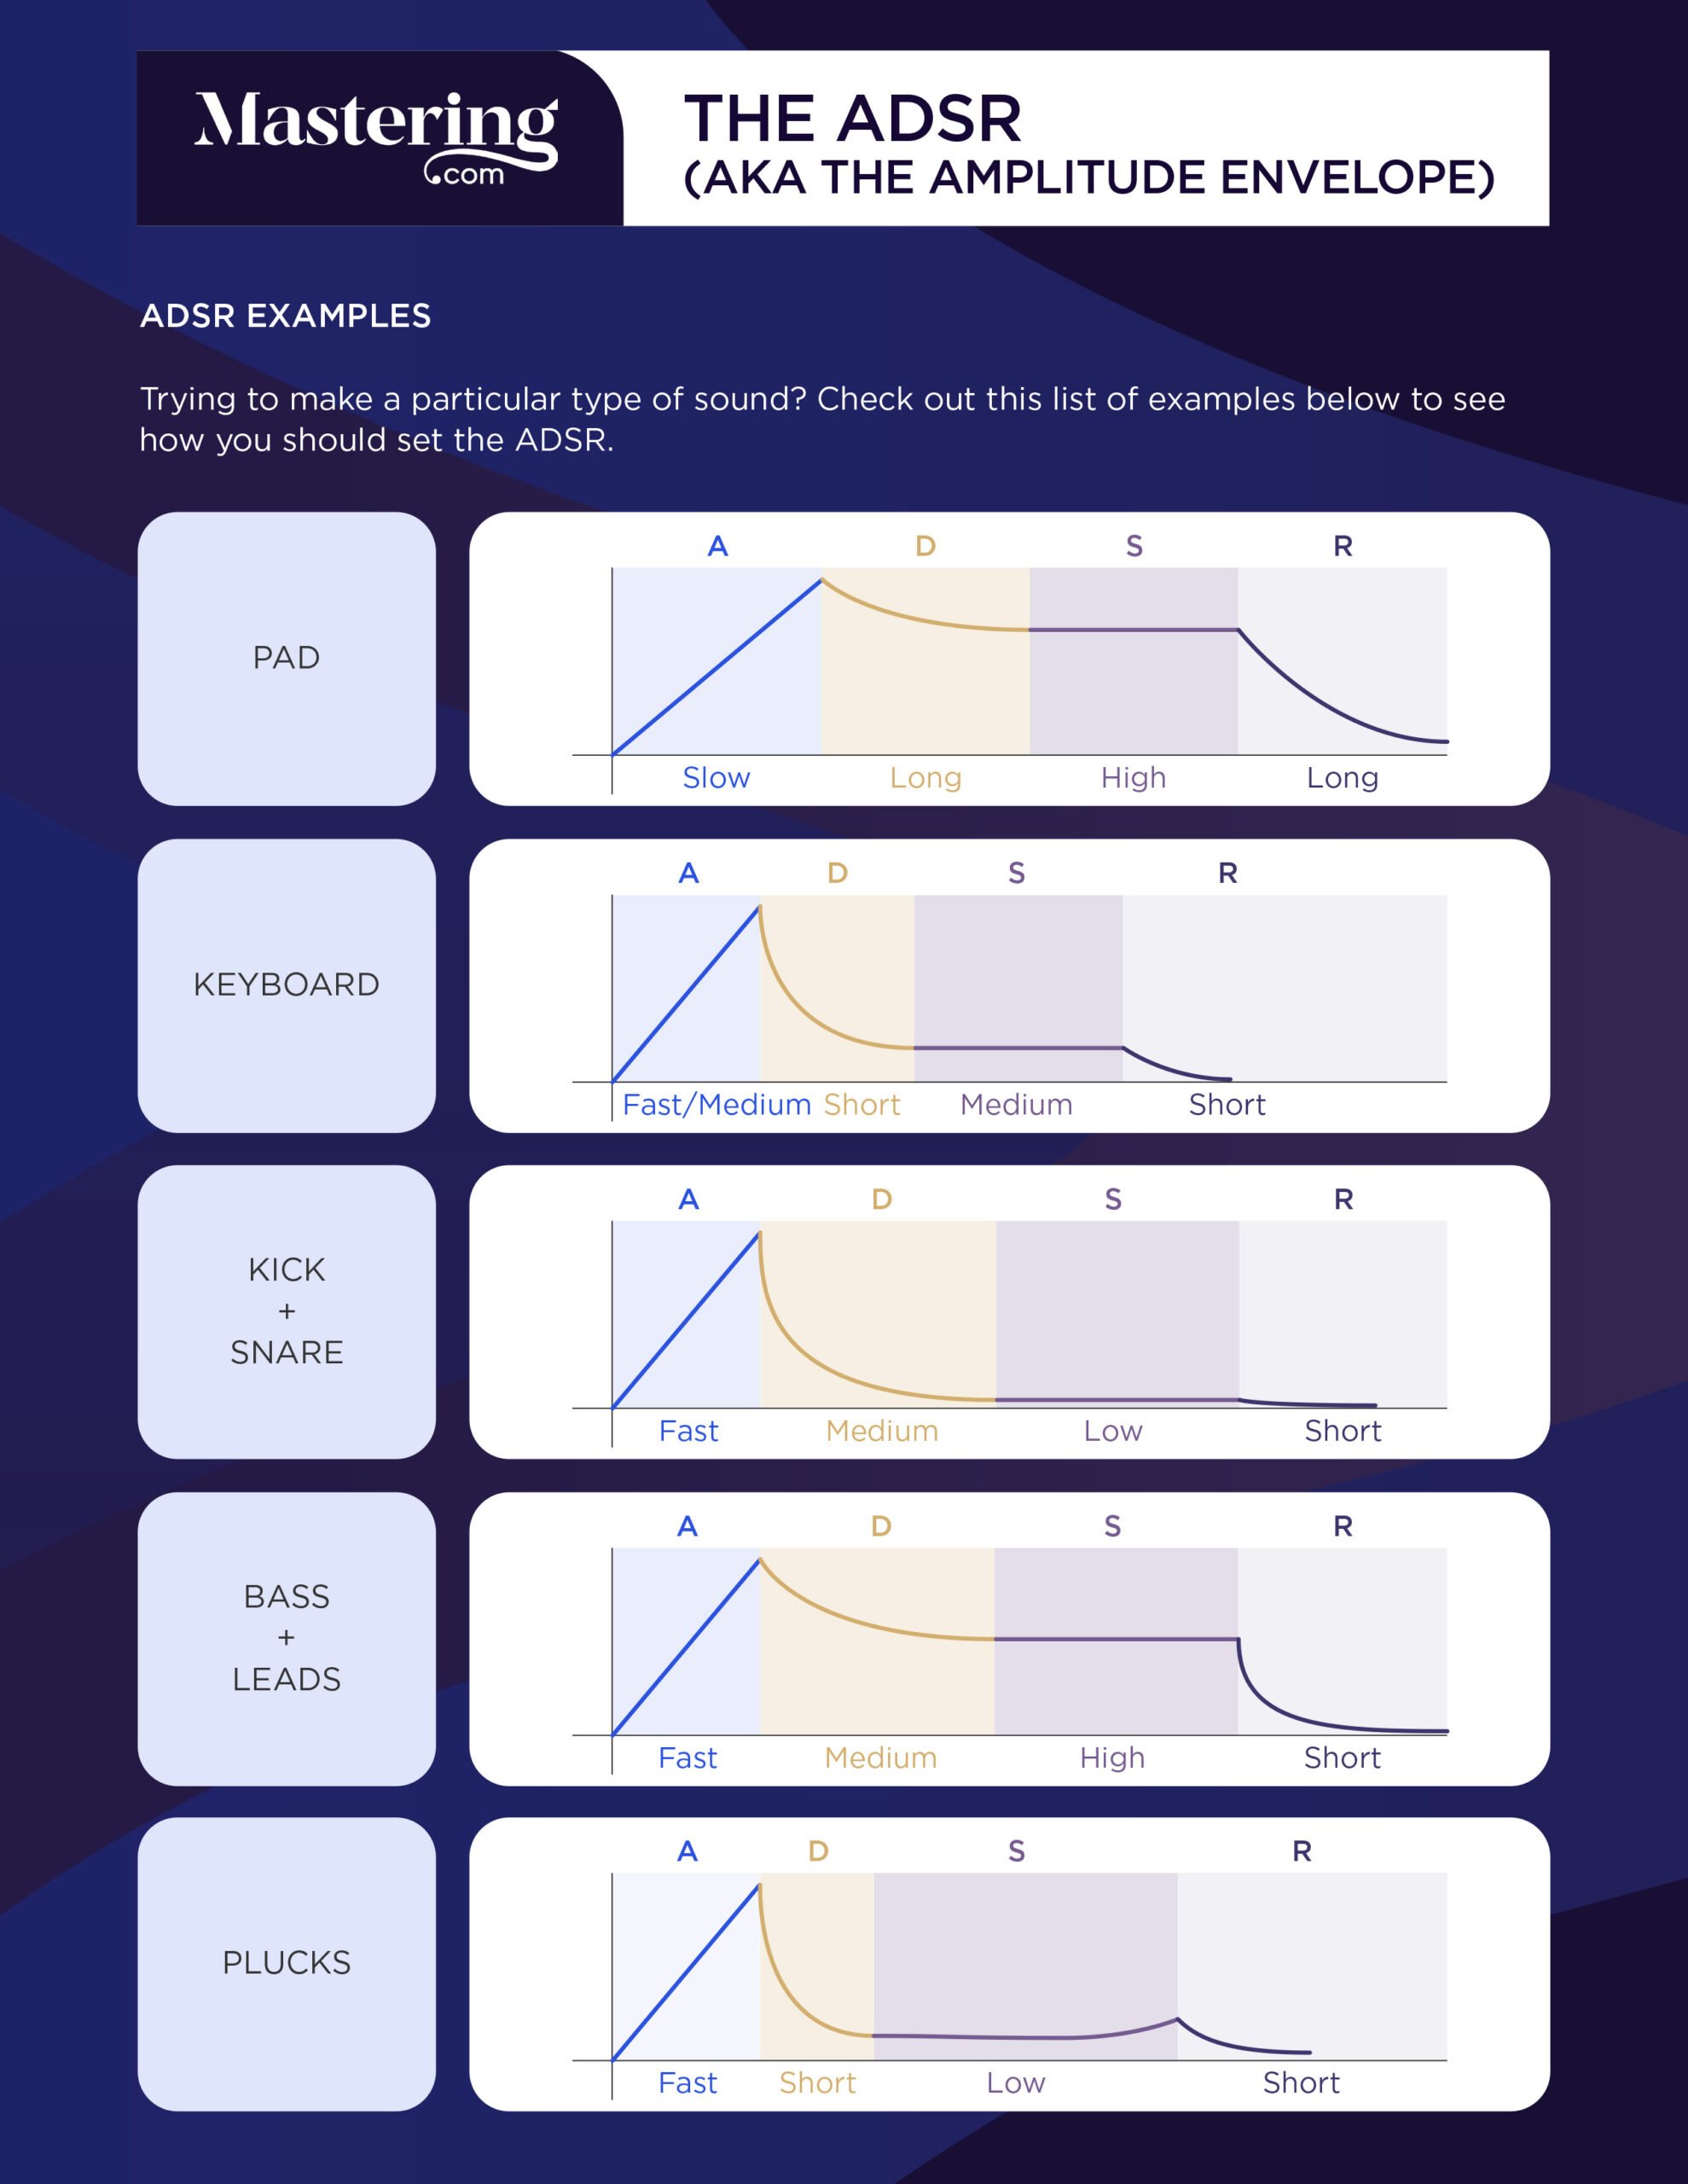
Check out these ADSR settings. They should give you a good idea of how you should set the ADSR to get some iconic synth sounds.
Effects
Last but not least, let’s give this synth an effect.
I’ve decided to put a chorus on this synth.

A nice chorus can really help glue a synth in with the rest of the mix.
If you’re struggling to make a synth blend with the rest of your song, try mixing a chorus in with it. It should help spread the synth out, giving it a sense of space without pushing it back in the mix.
Getting Creative with Wavetable Synths
One of the most obvious ways to get creative with wavetables is to upload your own samples as wavetables. This is a great way to start out with a sound that’s already unique.
But one of the most exciting things about wavetable synths is how they can evolve over time. They have a built-in function that makes it easy to keep the sound from getting repetitive.
You may have noticed that your wavetable synth has a knob called “wavetable position.” This is a feature most wavetable synths have, and it’s a great way to add excitement to your track.

When a wavetable synth cuts a recording up into pieces, it usually makes more than one wavetable. The wavetable position knob lets you fade from one wavetable to another.
Moving from one wavetable to another sounds like this:
The sound of the synth subtly morphs over time, giving it a nice sense of movement. It really makes the synth sound feel a lot more natural since most sounds naturally change over time.
You can always automate the wavetable position, but for a quick and easy fix you can use an LFO.
Just assign the LFO to the wavetable position knob. The LFO will automatically sweep through different wavetables.
Different synths have different ways of assigning the LFO. So check out a tutorial on the LFO for your wavetable synth of choice.

If the effect is way more obvious than you want it to be, just turn down the speed of the LFO. If you don’t notice the effect at all, try increasing the LFO’s rate or depth.
Whether you’re using automation or an LFO, modulating between wavetable positions is a great way to take your sound design and synth production up a notch.
There is another great way to get creative with wavetable synths. Study the kinds of sounds other people are making with them.
There are tons of tutorials online on how to make different sounds with wavetable synths. Like this one:
A lot of these tutorials are geared towards Massive or Serum. You can still get some helpful tips from them if you don’t have either of those synths, though.
Conclusion
Wavetable synths are wildly popular these days.
They have tons of possibilities for making exciting new sounds. So they’re perfect for anyone looking to add some lush production to their songs.
Now that you’ve got the basics, start experimenting with the possibilities in your own synth.
Don’t forget to try that wavetable position trick! I think you’ll like how it keeps the synth from getting stale and repetitive.
If you want to dig deeper into music production and learn what it actually takes to make mixes that sound pro… And you’re an intermediate or advanced producer… Be sure to check out the free masterclass: Enjoy!Next Steps
Before You Head Out…
This is the third article in our “Synthesizer 101” series. The first guide of the series covered the basic building blocks of the synth.
If anything in this article confuses you, I probably talk about it there. Feel to click here to check it out.
Also, check out our other tutorials on other kinds of synths. I’m sure you’ll find them useful.