Want to hook your listeners with new and exciting sounds? Today you’re going to learn the nine fundamentals of sound design.
Maybe you want to make cool synths or craft the perfect drums for your track. These are going to help you get it right every time.
So if you want to wow your audience with incredible sounds, you’re in the right place!
I’m guessing you’re here because you want to make your mixes sound professional. We put together a brief training that covers a totally new approach to music production. Until now, everyone has been teaching production totally backward. Just click below to watch.Get industry-quality every time (steal this framework)
But if you want to learn about sound design specifically, keep reading!
Pick Your Target
Before we go over the fundamentals, any time you’re making a sound, you need to have a target in mind.

I used to just create sounds with no real direction. I didn’t have a plan for whether I was trying to make a pad, a lead, or a bass.
I wasted a lot of time aimlessly tweaking knobs. And what I ended up making was never very useful.
So before anything else, you need to make sure you know what type of sound you’re trying to make. That’s going to inform every decision you make along the way.
So let’s pick a target for today. As I go over these fundamentals, I’m going to show you what I mean by creating a kick drum from scratch.

That way you can see all of these ideas in action.
Fundamental #1: Amplitude Envelopes (ADSR)
First up is the amplitude envelope, aka the ADSR. In my opinion, this is actually the most fundamental thing you need to understand for effective sound design.
ADSR stands for attack, decay, sustain, and release. It shows how the volume of a sound changes over time.
Let’s break it down.
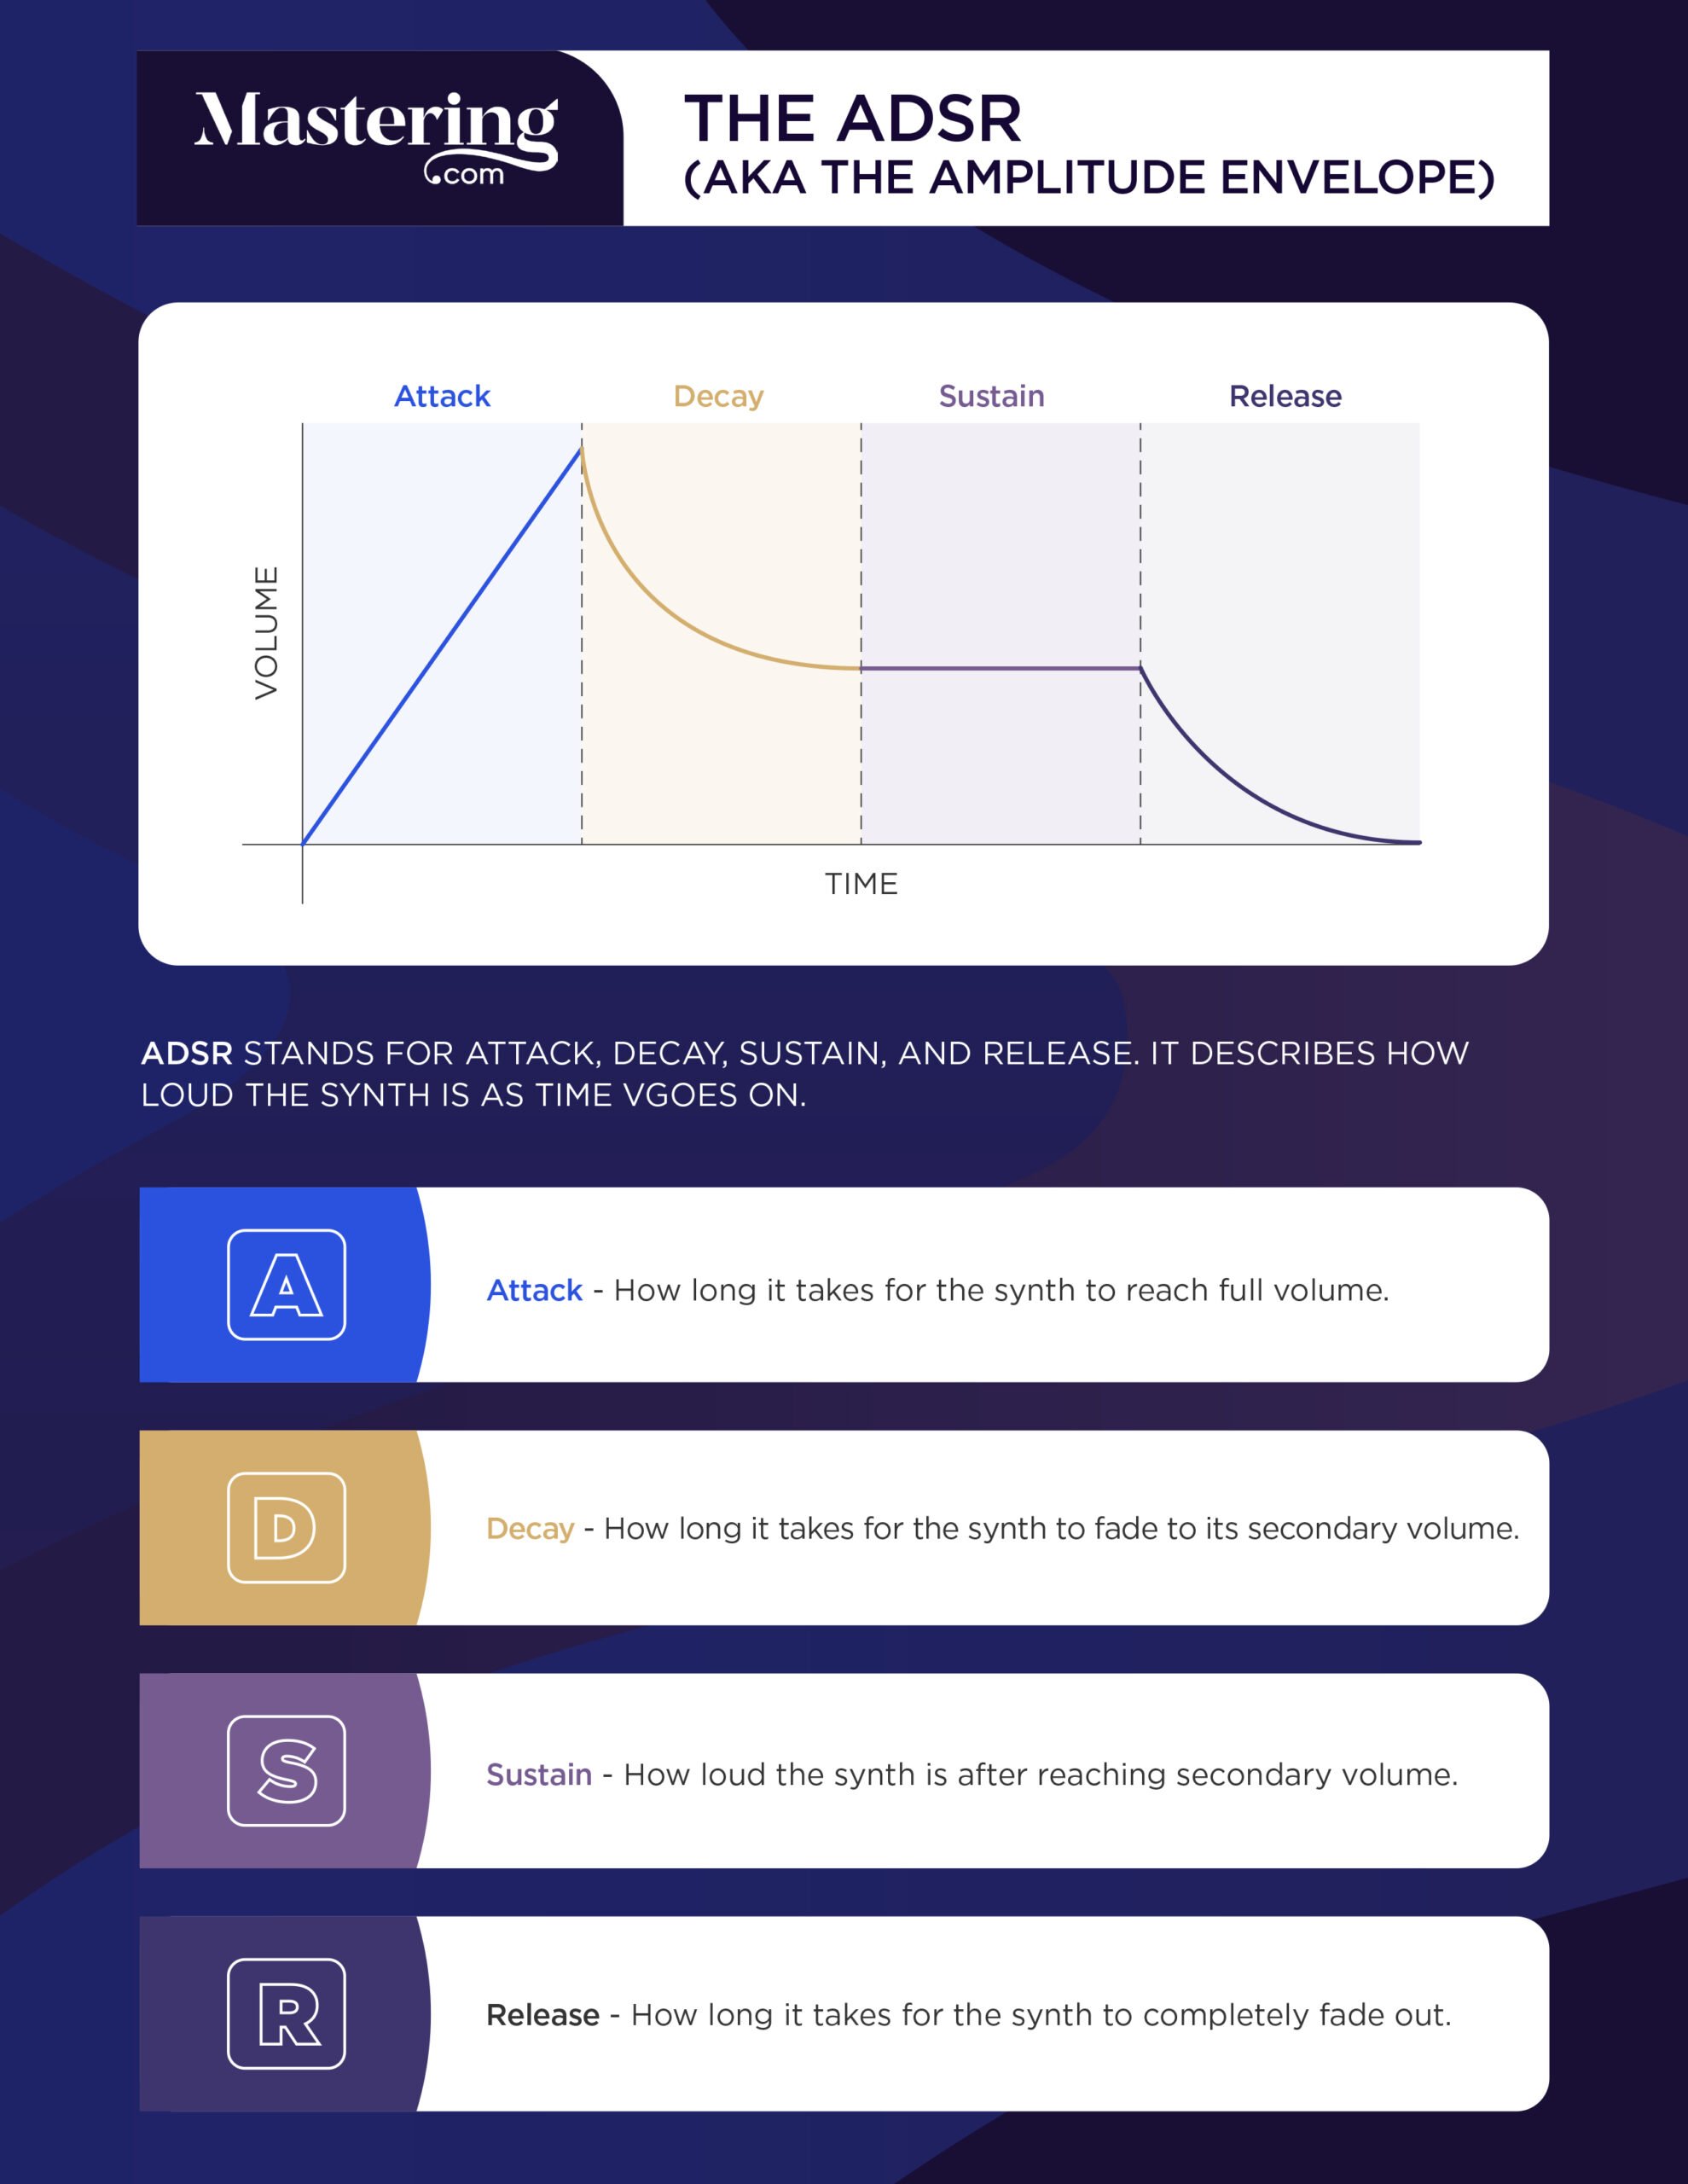
Think about the sound you’re trying to create. What kind of ADSR curve does it have?
You can use layers and effects to change a sound pretty much however you want. So if your sound has the same ADSR curve as your target, you can get it pretty close to whatever you’re trying to make!
For example, a kick drum would have a fast attack and a short release. So I need a sound that has those same characteristics.
This recording I made of me dropping a textbook should work nicely:
Fundamental #2: Pitch
Once you’ve got a sound with the right ADSR settings, it’s time to think about pitch.
It goes without saying that pitch is an important part of your sound. If you want a bass synth it’ll need to be in a lower octave.
But you can get more creative than that! For example, you could add a second oscillator to your synth.
By pitching it up or down an octave, you can really fill out the tone. Or you could change the formants to get a cool digital effect.
In the case of the kick drum we’re creating, we’ll want to pitch down the recording we have. That way we can get the bassy thud of a kick.
Fundamental #3: Layering
Layering sounds will help you get a fuller, more realized tone.
So consider using multiple sounds while building your sound! As long as the sounds are within 35 ms of each other, we’ll perceive them as coming from the same source.
For example, if you were making a synth sound, you could turn up the unison.
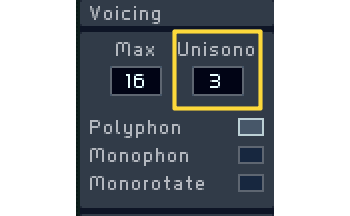
This will add copies of the synth’s sounds that will be layered on top.
But you can do this with recordings as well.
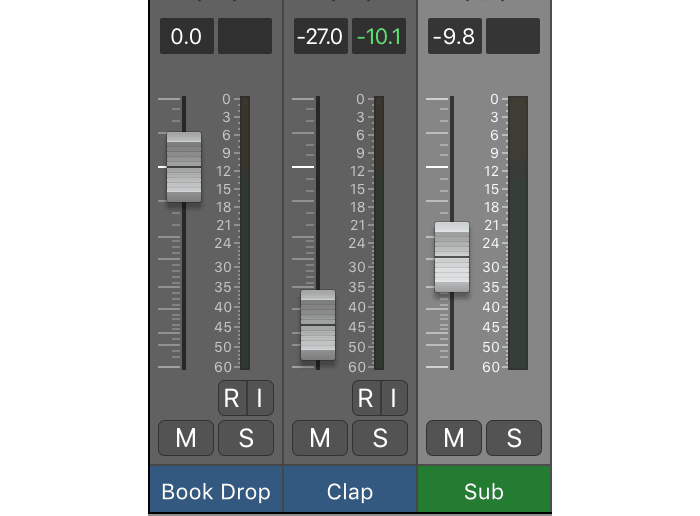
Let’s think about the characteristics of a kick drum. We’d hear that characteristic thud around 100 hz, the boom of some sub frequencies, and some smack around 1 or 2k.
We’ve already got the thud, but I’ve added a clap for the smack, and a low sine wave for the subs. Now we just need to set the volume balance for all of our layers.
Let’s see how it sounds.
It may not sound like a kick drum yet, but it’s a solid foundation to create one!
Fundamental # 4: Keep It Simple
Before we start adding more effects, we need to take a moment to think about what the sound really needs.
It can be easy to just go overboard, throwing different effects on for no reason. But that can actually make it sound way worse!
It’s best to keep things simple and only use what you really need.
You may not need a ton of effects or layers to get the right sound. And piling on unnecessary noise won’t help.
Fundamental #5: Cleaning
This one kind of goes hand in hand with keeping things simple.
When layering sounds, it’s really easy to make something that sounds great by itself but takes up way too much space in a full mix.
So make sure you clean up anything you don’t need. Add fades and filter out unnecessary frequency content!
For example, the clap and sine wave are intended to fill the mids and subs for our kick drum. We don’t need the recording of the book drop taking up those frequency ranges.
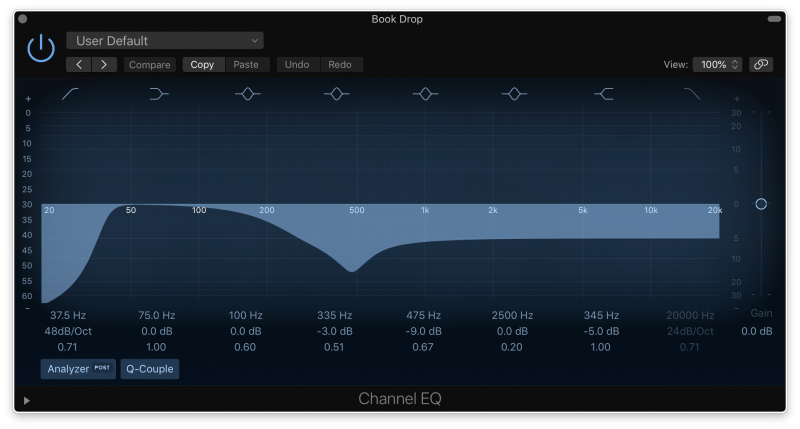
Aside from making it easier to mix, this can also just improve your sound in general. Just by cutting out what we don’t need, it already sounds a little bit more like a real kick!
Fundamental #6: Tone
Everything you do will change how your sound feels. The layers you choose, your eq and compression settings, and your effects will all change the tone.
So make sure you know what kind of tone you want!
It could be boomy, snappy, light, crunchy. The list goes on.
And there are all sorts of things you can do to get the right tone.
Right now I think the kick drum could sound a little bit more textured.
As you change a sound, you may notice it starting to feel less “real.” So to bring things back down to earth, you can use texture.
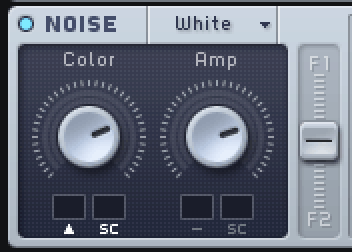
I am a huge proponent of using noise oscillators to add texture. I’m going to use a noise oscillator to fill out the smack of our kick.
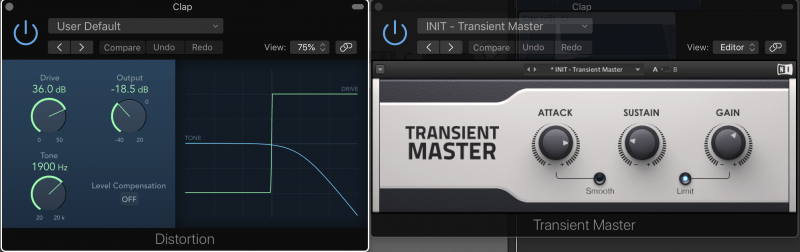
I’ve also added some distortion to the clap. There’s also transient shaper punctuating the attack. These will both make the smack of the kick drum forward.
Fundamental #7: Size
Think about how large the sound should feel. Maybe you want it to be huge, or maybe it should be laser-focused on one spot.
Obviously, panning will be helpful for placement if you want it to sound like it’s to your left or right. But you can do more than that!
If you want the sound to be really small, you can use a bandpass filter to hack it down. Or at least roll off all of the low and mid frequencies.
But what if we want this kick to be big? There are a number of ways to do this.
We could use a chorus to make it feel doubled or the Haas effect to widen it out.
But a good way to beef things up is to use distortion. If something sounds a little weak, or maybe a little too clean, try some distortion.

By adding some distortion to the low end of the book drop, we can make it sound much bigger.
Fundamental #8: Movement
A lot of the time you might want your sound to have movement. One way to get movement is automation.
You could automate some keyboard chords so that they pan from left to right. Or you could automate the volume on an arpeggio so it fades in and out to the beat.
Envelopes are also really handy in this kind of situation.
Remember the amplitude envelope from the first fundamental?
It allowed you to change the volume of a sound over time. You can use envelopes to change other things as well.
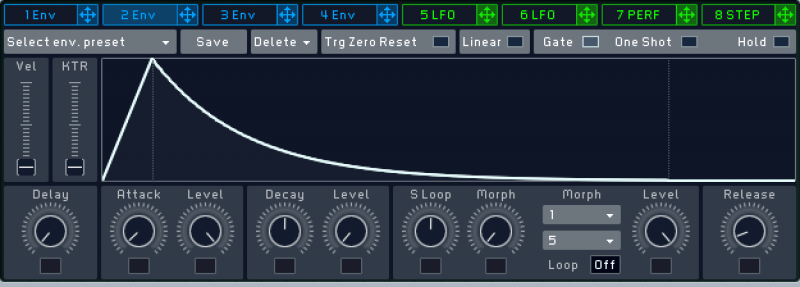
So I could use an envelope to change the pitch of the sub over time. I could make it drop down from a higher pitch like this:
Fundamental #9: Depth
Finally, you need to think about the space around your track.
Do you want the sound to be really up close or way in the back? If it’s meant to be atmospheric, you’ll want to use plenty of reverb and delay.
But even if you want it to be in your face, delay can help.
For example, if I want this kick drum to sound really close and powerful, I can use a short slapback delay.
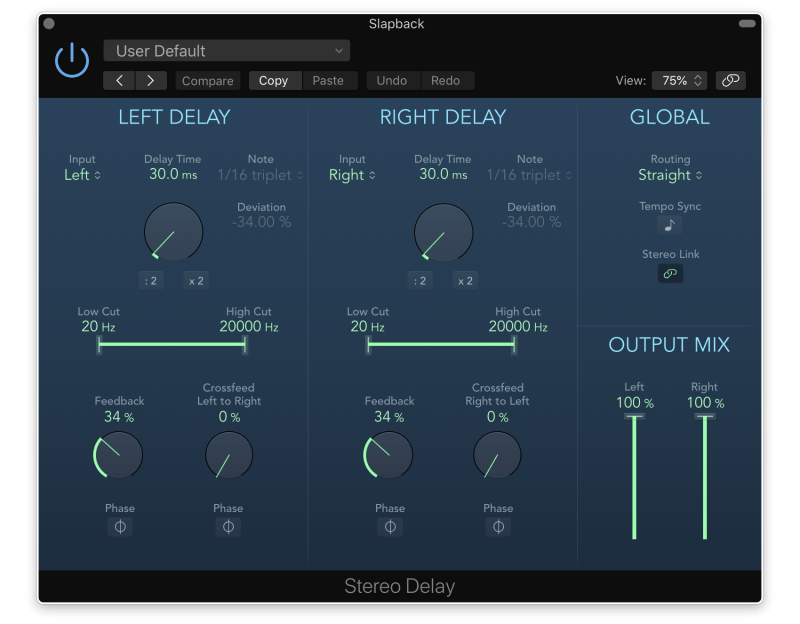
By setting the delay somewhere between 15 and 30 ms, I can actually make it sound closer.
It’s subtle, but when you compare the sound with and without the delay, you’ll notice the kick feels a little more front and center.
Kick Without Delay:
Kick With Delay:
This is a common trick for getting powerful vocals. But you can use it for anything that needs to be in your face.
Just don’t use it on too many parts of a mix! Otherwise you’ll turn a good mix into a mess.
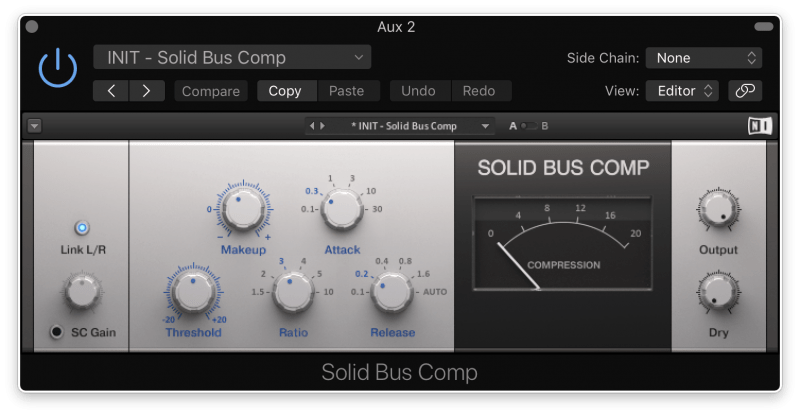
Bonus Tip: Bus Compression
Use a bus compressor to compress all the layers of your sound at once. This will help glue these tracks together, making them sound like they belong together.
Start out with a fast attack and a medium or long release. It’s best to shoot for just 2-4 dB of gain reduction.
Conclusion
The 9 fundamentals of sound design are:
- Amplitude Envelopes (ADSR)
- Pitch
- Layering
- Keep It Simple
- Cleaning
- Tone
- Size
- Movement
- Depth
These fundamentals will give you a map directly to the sound you’re trying to create.
And remember to keep things simple. Just because these things are fundamentals doesn’t mean every sound needs them.
Any time you use an effect, make sure you have an idea for how it’s going to help the sound.
If you want to dig deeper into music production and learn what it actually takes to make mixes that sound pro… And you’re an intermediate or advanced producer… Be sure to check out the free masterclass: Enjoy!Next Steps