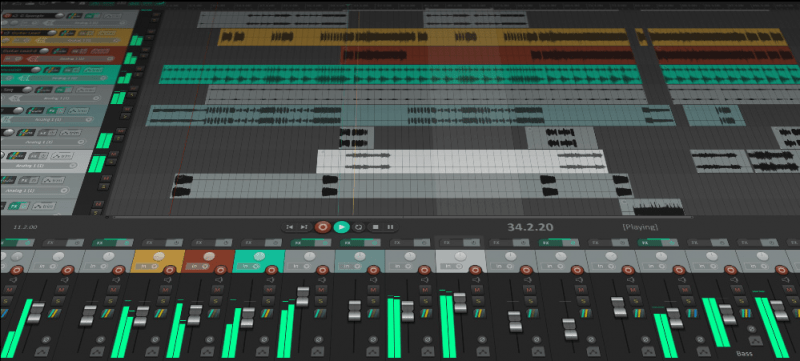
Thinking about using Reaper as your DAW of choice?
You’ve landed in the right place.
There’s a ridiculous number of options when it comes to digital audio workstations.
So to help you figure out if Reaper is a good fit for you, this guide will take you through the basics. From getting set up to recording and editing your first track.
A Quick Introduction to Reaper
Reaper is a DAW that lets you do pretty much anything the big guys can do. Except Reaper is free or affordable.
It supports VST, VST3, AU, DX, and JS plugins.
It comes with plenty of built-in plugins and effects. I use the stock EQ, compression, reverb, and delay to mix my music with great results.
If you want to download Reaper, you can get the full version for free, no strings attached.
After the trial period, you’ll still have access to the full version. But you will get a reminder to buy a license every time you open the program.
Fortunately, Reaper is just $60 if you’re using it
- for personal use
- commercially but your annual gross revenue is $20,000 or less
- for an educational or nonprofit organization
Otherwise, a license is $225, which is still very affordable.
When you buy a Reaper license, you get unlimited updates through version 7.99. And updates happen once every few weeks.
Even after you update, your preferences and settings stay how they were.
What You Need to Get Started
Before we dive into the nitty-gritty of using Reaper, you’ll need a few essential pieces of equipment.
The Right Operating System and Computer
You’ll need to make sure your computer and operating system are up to the task.
Honestly, running Reaper doesn’t require anything very different. But it’s best to be safe.
Here’s what Reaper supports:
- Mac OS X 10.5-10.13 (32-bit / 18MB)
- Mac OS X 10.5-10.14 (64-bit / 20MB)
- Mac OS X 10.15 Catalina (20MB)
- Windows XP/Vista/7/8/10 (32-bit / 12MB)
- Windows XP/Vista/7/8/10 x64 (64-bit / 13MB)
You can also use Linux OS, but those builds are “experimental and unsupported,” says Reaper.
Audio Interface
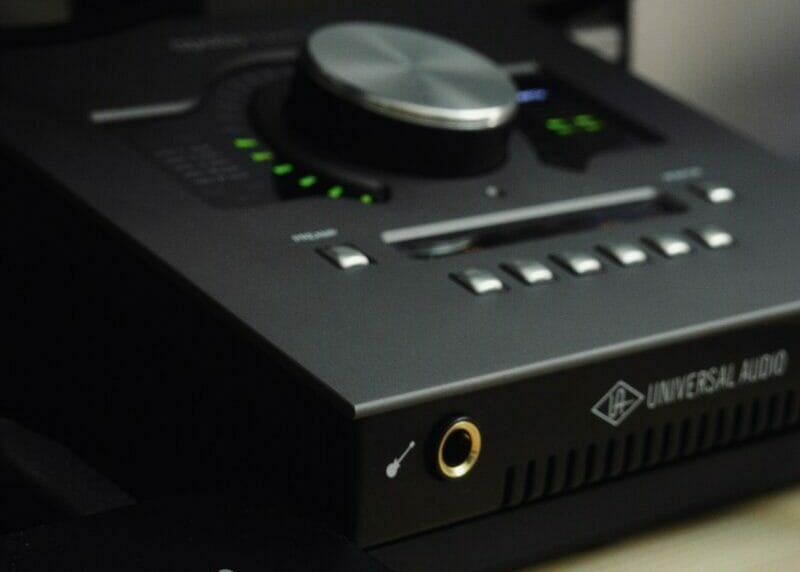
When you get an audio interface, make sure it works with one of Reaper’s supported audio systems.
On Windows, Reaper supports ASIO, WASAPI, Kernel Streaming, and waveOut/DirectSound. And it supports the macOS Core Audio.
Here are a few audio interfaces I’d recommend checking out, especially if you’re new:
- Focusrite Scarlett 2i2
- PreSonus AudioBox USB 96
- Behringer U-Phoria UMC404HD
Headphones
The reason you need headphones instead of monitors is that you don’t want mic bleed.
If you record vocals while hearing the playback through your speakers, your mic will pick up that sound.
It’s best to get a pair of closed-back headphones. They minimize the amount of sound escaping the ear cups and reduce the chance of mic bleed.
Microphone
If you’re recording all electronic music, maybe you don’t need a microphone. But with any other type of music, you’ll definitely need one.
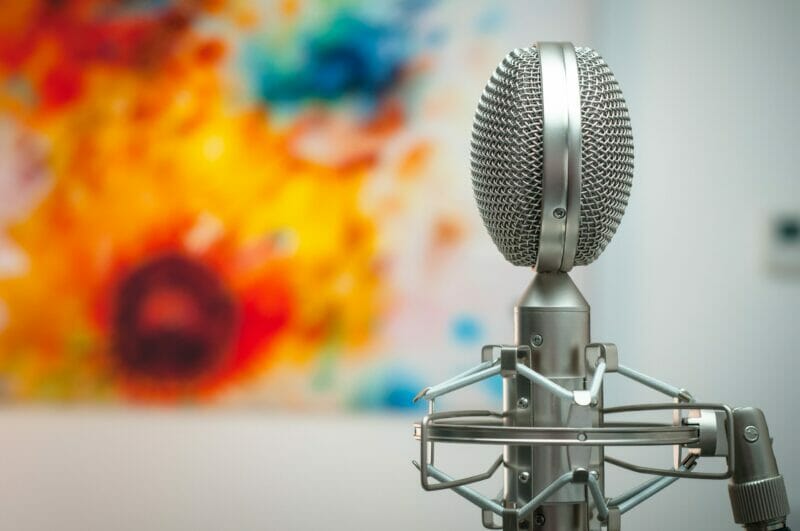
Just pay attention to whether or not the microphone is phantom powered.
If it does require 48v phantom power, your interface has to support that. (Most do nowadays.)
A Step-by-Step Guide for Getting Started with Reaper
Now for the fun part. This is where you learn how to use this very intuitive program.
Setting up the Drivers
The audio interface you decide to use will have instructions for installing its software and drivers.
Once installed, go to Options → Preferences to choose your audio device settings.
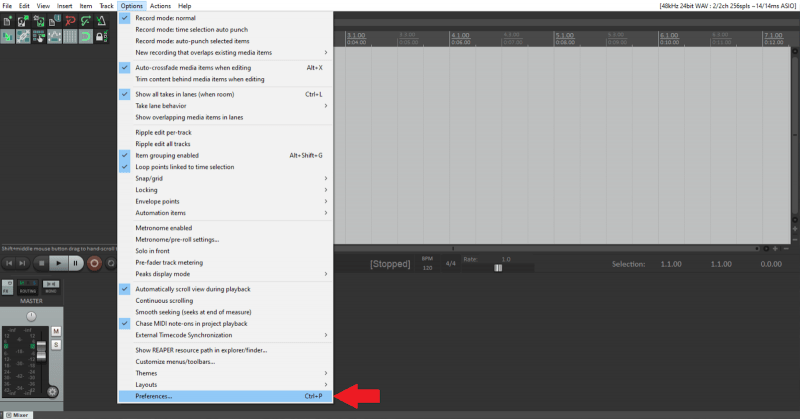
For this tutorial, I’m using a Focusrite Scarlett 2i2 interface. So I’ll choose ASIO.
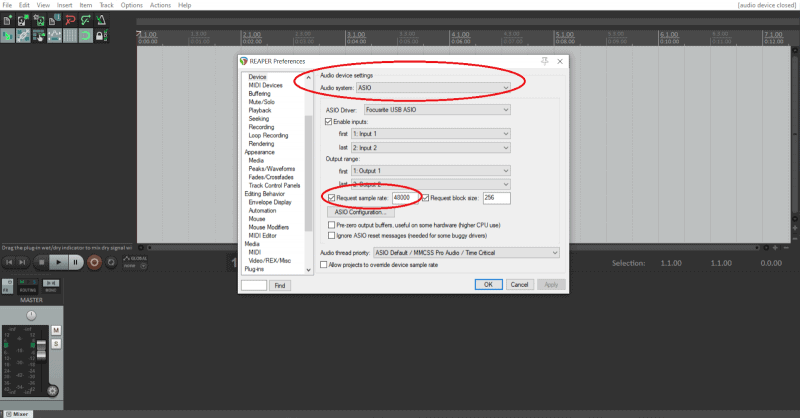
The standard sample rate is 44.1 kHz, but you can change it to 48 kHz. The former is perfectly fine to use, while the latter is better if your music will be synced with video.
You can learn more about sample rates and bit depths here.
Preparing Your First Track
Now you’re ready to create your first track.
To do this, go to Track from the main menu (top-left corner). Then insert the type of track you want.
You can also hit Ctrl+T on a Windows computer or Command+T on a Mac.
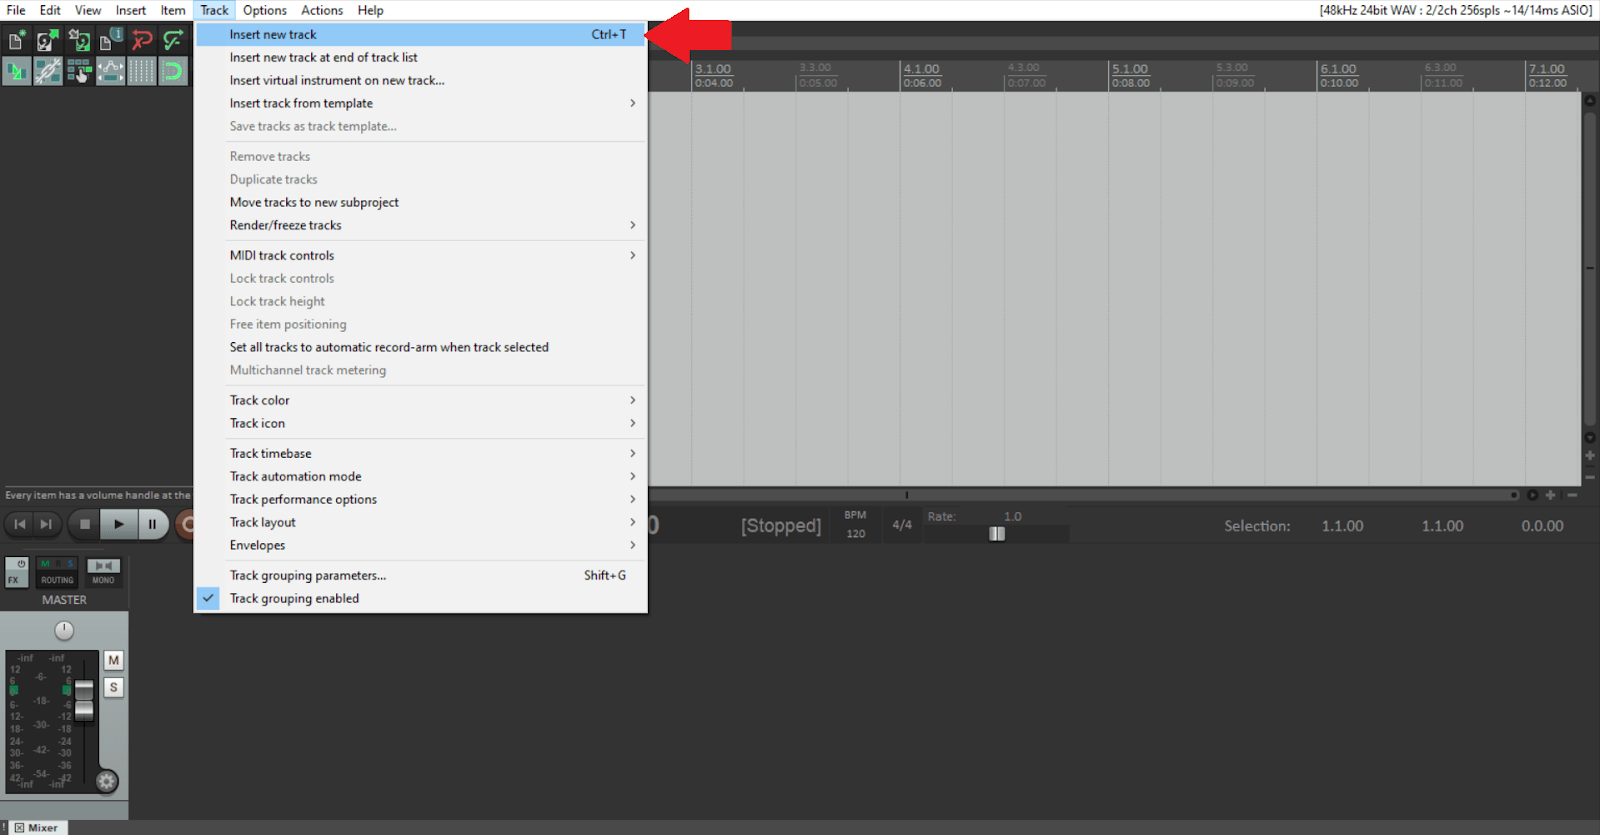
“Insert new track” will add an audio track that you can record guitar or vocals on. “Insert virtual instrument on new track” will add a MIDI-enabled track.
Next, you’ll want to make sure the input settings are correct.
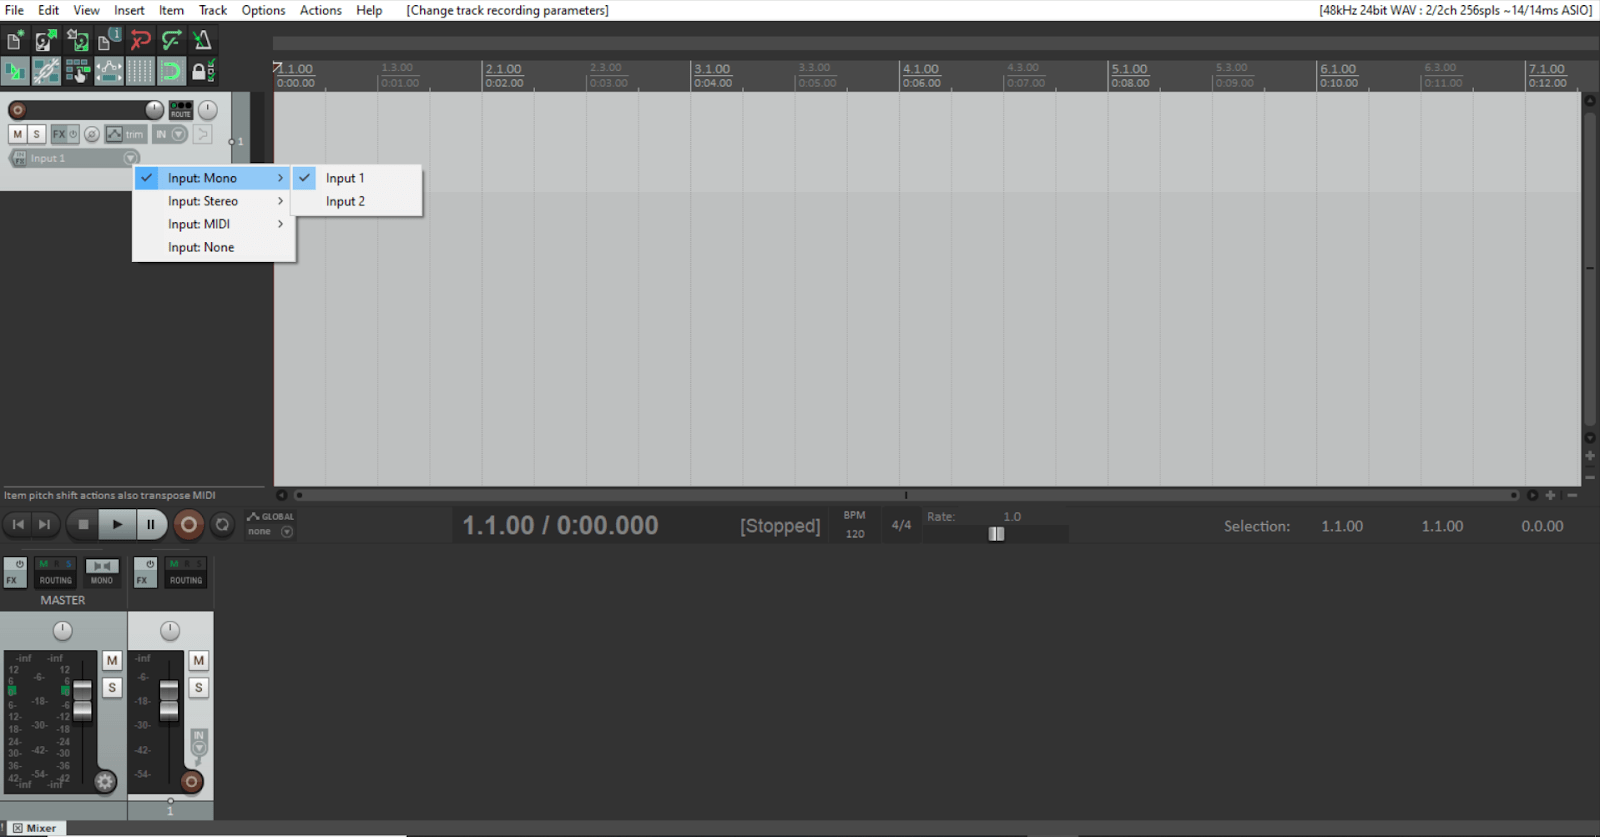
On the track, you’ll see a dropdown box that says “Input 1.” (If you don’t see it, expand the track by dragging the bottom edge downward).
From here, you can choose your input. You’ll see these options:
- Mono: records one channel at a time
- Stereo: records two channels at a time
- MIDI: records your MIDI instrument (like a keyboard)
- None: records nothing
Recording
You’re almost ready to record.
First, you’ll want to set the BPM and time signature, which you can do at the top of the mixer.
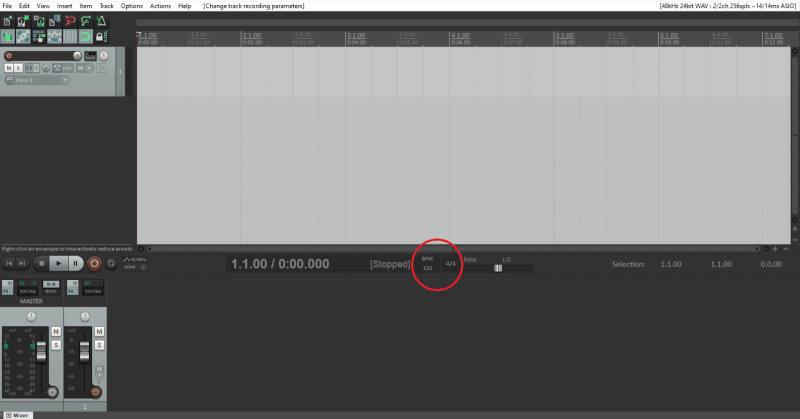
Hover over the letters “BPM” and it will say “Tap.” This lets you tap the BPM by clicking twice at your preferred speed.
You can also click on the “120” in the BPM box to type in the tempo.
Next to that, you’ll see the time signature of 4/4. Just click on that to change it.
Now you can enable your track for recording.
Go to your track and hit the dark red circle on the left side. It will turn bright red, indicating it’s armed for recording.
You’ll need to hear what you’re recording as you record it.
So click the little megaphone icon on the right side of the track settings. This enables record monitoring.
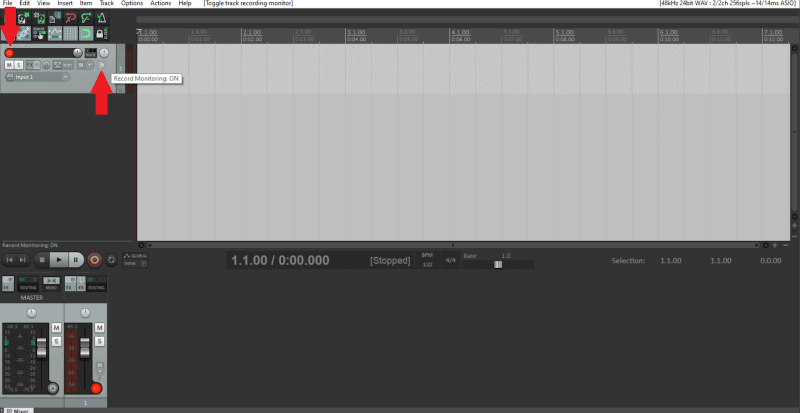
You’ll also see an M and an S underneath the bright red circle. These are the mute and solo buttons.
Sometimes, you may need to loop a section.
This could be useful for doing multiple takes without having to push any buttons. Or you can use it during the mixing stage.
To loop a section, do the following:
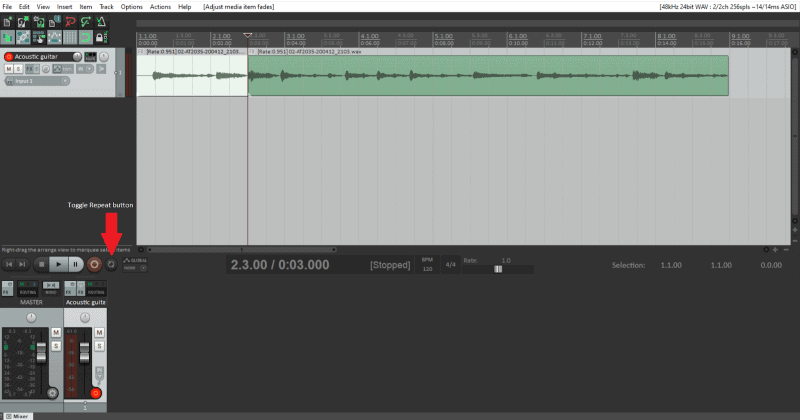
- Left-click in the area above the tracks that shows the time and measures
- Drag your mouse left or right
- Select the timeframe you want looped
- Hit the Toggle Repeat button or hit R
When you record or play your track, it will loop that section continuously. When recording with looping, it will automatically record a new take with each loop.
Editing
Now that you’ve recorded your first take on your first track, let’s talk about editing.
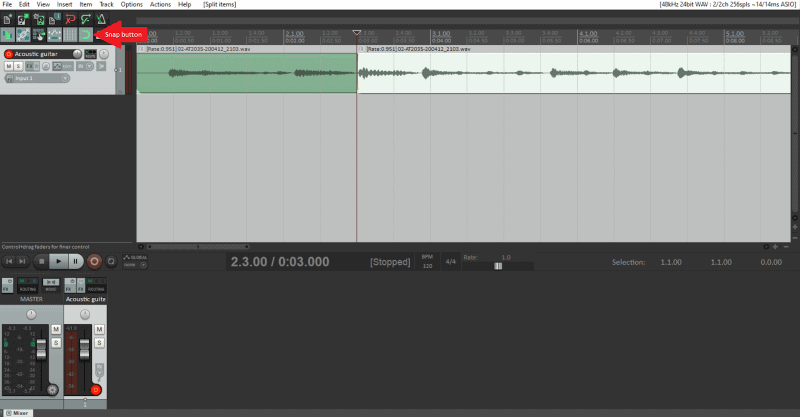
To cut or split an item, simply click on the item at the place where you want to make the split.
By default, the cursor will snap to the grid.
To turn this off, click the Snap button underneath the main menu in the top-left corner. You can also hit Alt+S to turn snap on and off.
Then to make the split, just hit S (you can also right-click and choose “Split items at cursor”).
If you’d rather, you can drag the edge of an item forward or backward, which removes that part of the item.
But you don’t actually lose what you’ve removed with this method. It’s still there.
You can drag the edge once more to get that part of the item back.
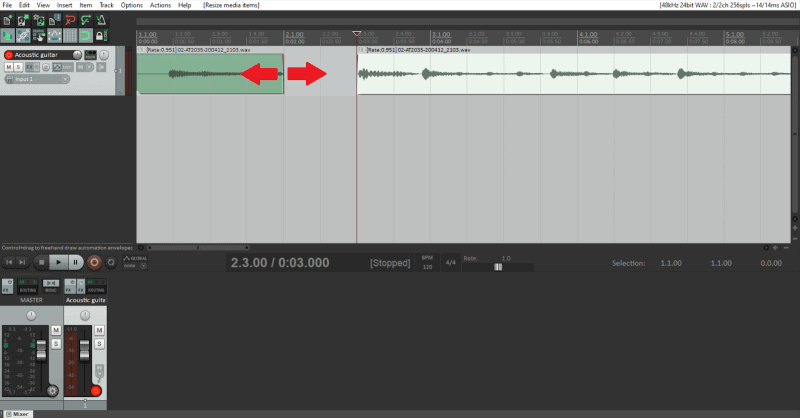
You can also stretch an item, which speeds up or slows down the audio.
Hover over the edge of an item, press and hold Alt, and click and drag the edge. (You’ll notice this drastically diminishes the sound quality of the audio.)
Nudging is another useful feature Reaper offers. This is great for shifting items to be lined up exactly where you want them to be.
Just click on an item, hold Shift, and press the left or right arrows on your keyboard. It will nudge the item ever so slightly.
When nudging, it may be easier to zoom in so you can get more precise.
To do this, make sure your mouse is hovering somewhere in the track field (where the actual recordings are shown). Then scroll up (zoom in) or scroll down (zoom out).
One more basic feature you’ll need is crossfading.
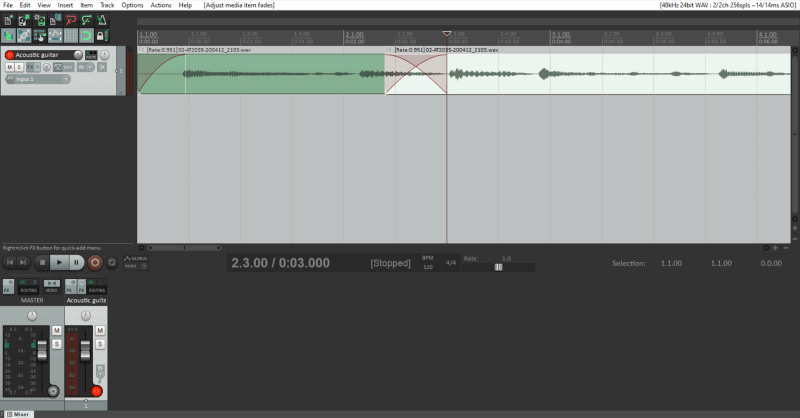
When you drag an item over another item, it will automatically apply crossfade. But you can manually adjust the crossfade as well.
Hover over the top corner of the item that’s overlapping another item. Click and drag to change the length of the crossfade.
This is also how you can fade an item in or out.
You can also highlight multiple items across multiple tracks. Here are a few ways to do that:
- Right-click and drag your mouse across all items you want to select
- Use Ctrl/Shift and click on the items you want to select
- Left-click and drag your mouse in the section above the tracks that shows the time and measures
- Hit Ctrl+Shift+C (to copy) or Ctrl+Shift+X (to cut)
These features allow you to split, shorten, and move items or sections of items around your project.
What about gain levels and panning? You can access those either on the left side where you’ll see your list of tracks or in the mixer at the bottom.
To add effects, hit the FX button on the track in question (on the left side or in the mixer). A new window will pop up, showing you all your plugins and effects.
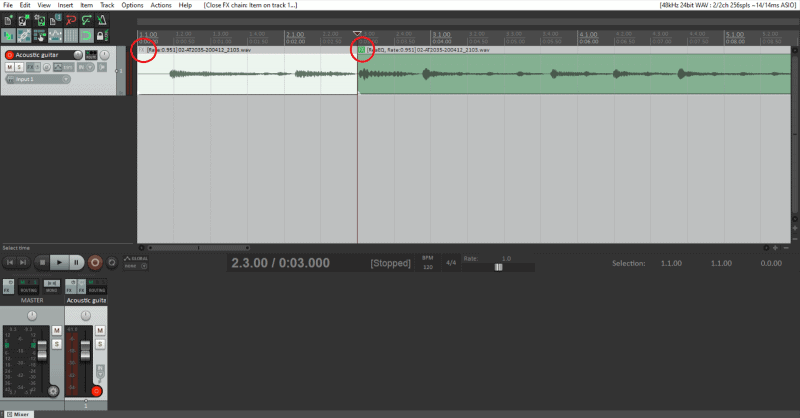
You can also apply FX to specific sections rather than the entire track.
You’ll see a little FX icon at the top-right corner of each item. Clicking it brings up your plugins and effects.
All these features have shortcuts. You can also set up custom shortcuts.
Go to Actions → Show action list, then choose the action you want to give a shortcut to. Click “Add…,” type in the shortcut key or combination of keys you want, then hit OK.
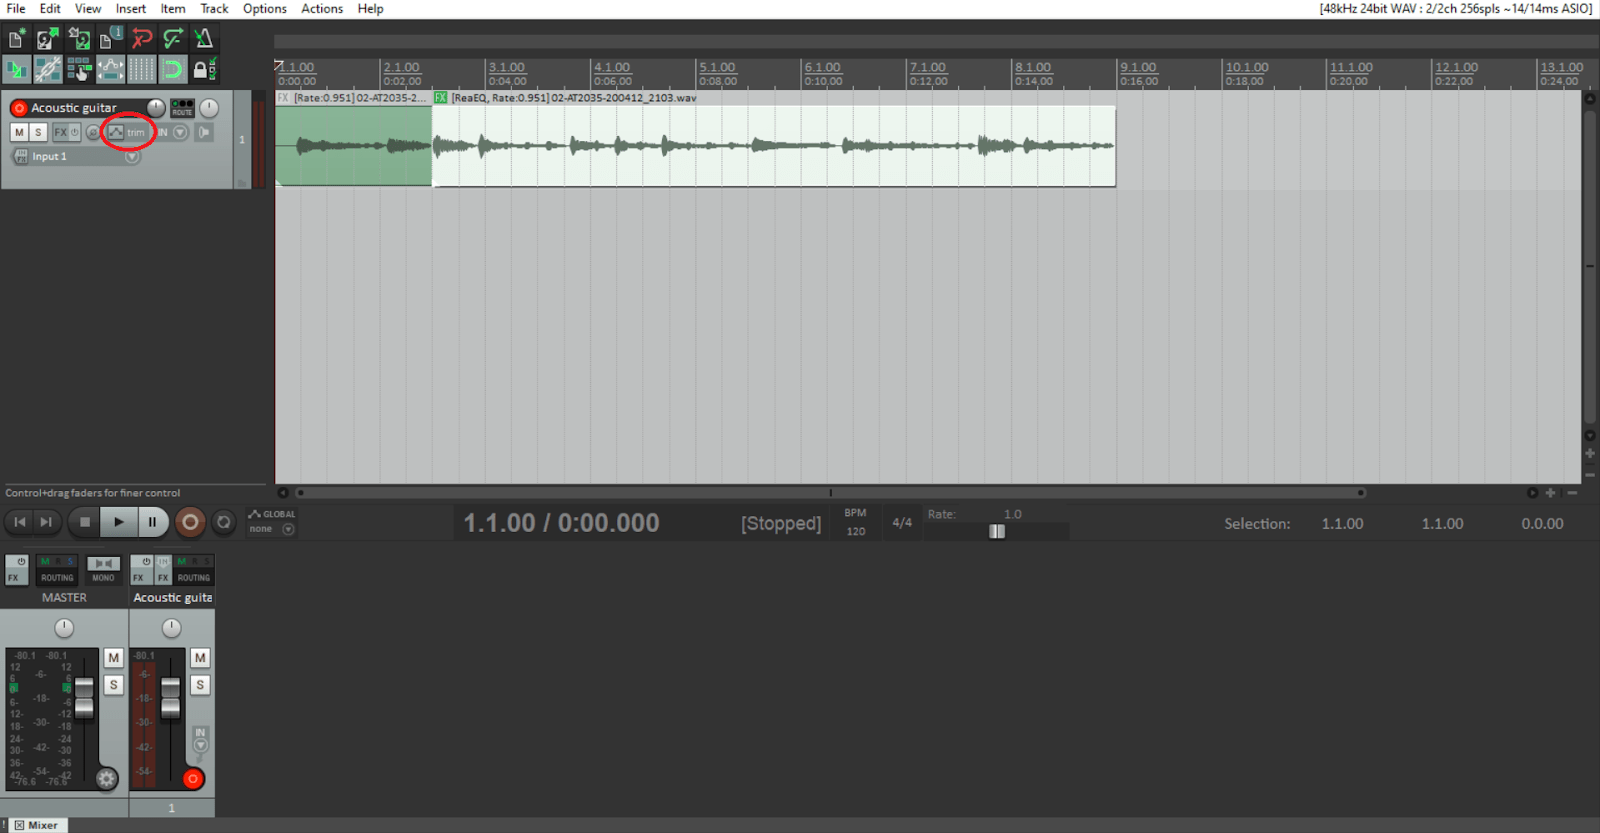
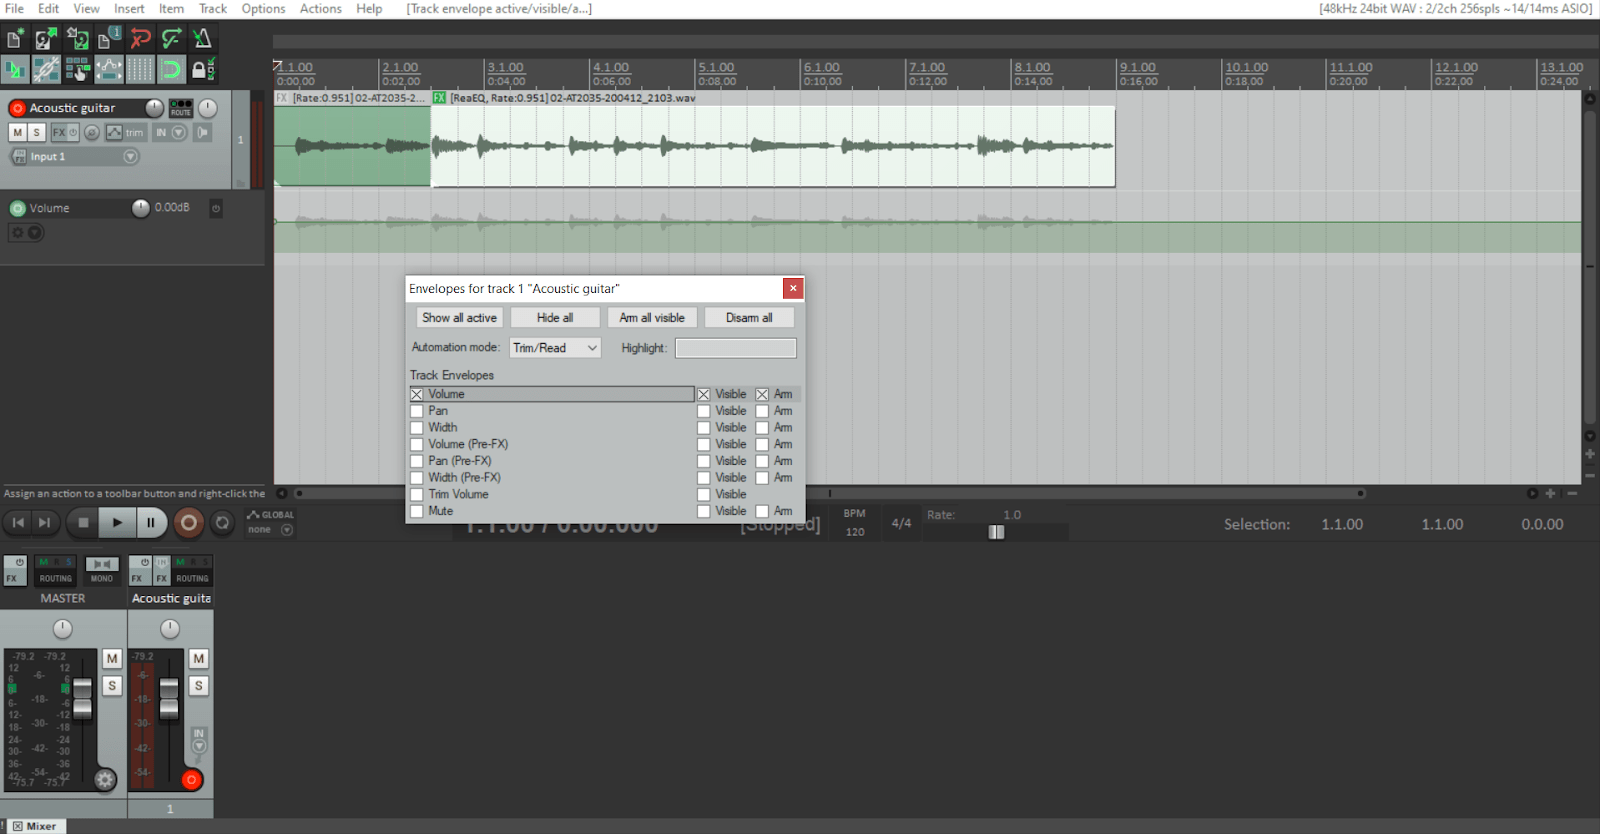
Another useful tool are envelopes. This is where you can adjust different settings on a track at different parts of the track.
This includes things like volume automation and panning. You can adjust them at different parts of the song.
And I’ll briefly mention routing (aka bussing).
There are a lot of cool methods you can use with routing. The one I use the most is to add reverb or delay to multiple tracks at once.
Here’s how to bus a track to an effects track:
- Create a new track
- Add your desired effect to it
- Send your other tracks (like acoustic guitar, vocals, piano, etc.) to this “bus” track
Doing this will add the effect to every track routed to it.
To route a track to your bus track, you have two options:
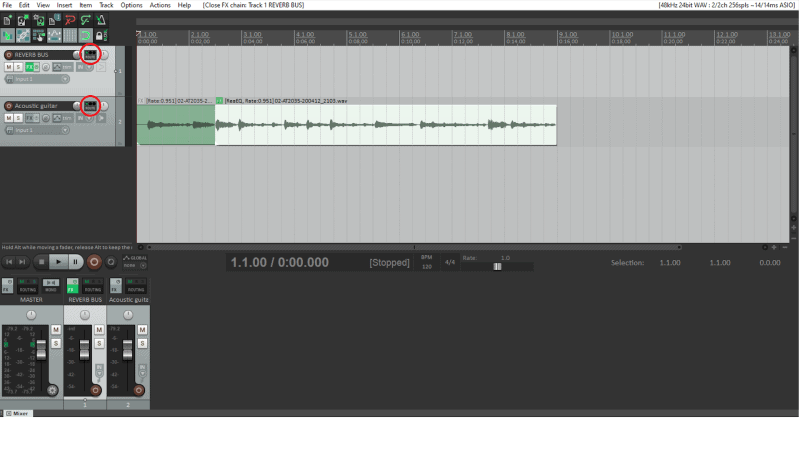
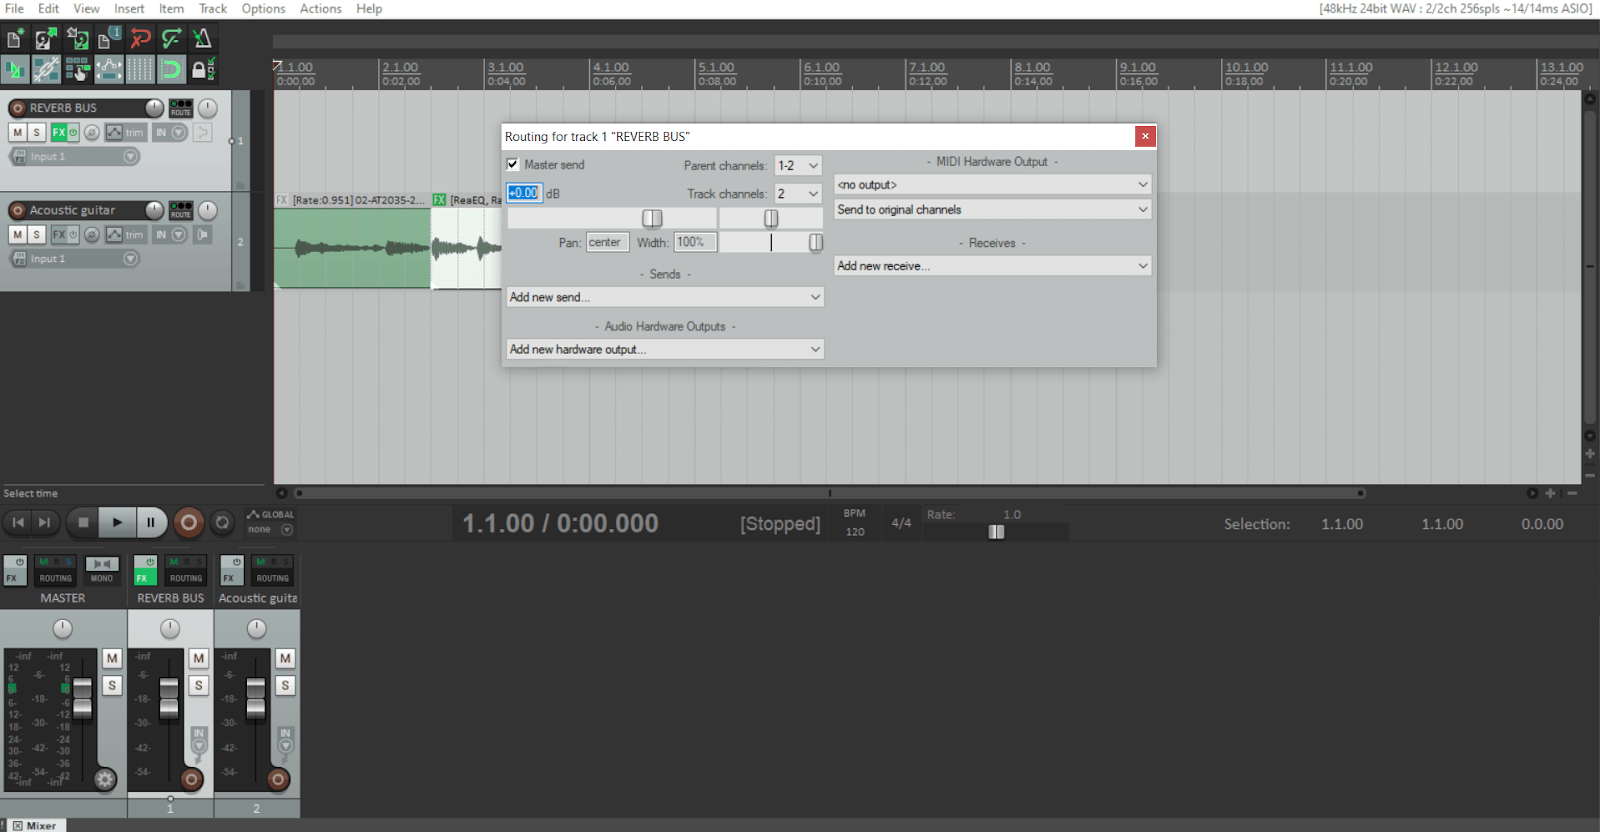
- Click the ROUTE button on the bus track (the one with the effect). Route the instrument track to it using the “Receives” drop-down box
- Click the ROUTE button on the instrument track (the one on which you want the effect). Route it to the bus track using the “Sends” drop-down box
More Reaper Resources
This tutorial is meant to get you started with Reaper. So at this point, you know everything you need to start recording with it.
But if you want to dive deeper into the world of Reaper, here are some extra resources to check out:
- Reaper’s user guide
- Reaper video tutorials
- Reaper forum: ask questions you can’t find the answers to elsewhere
(Unofficial) Reaper blog: covers just about every Reaper-related topic you can think of
Conclusion
And that’s everything you need to know to get started with Reaper!

