Want your MIDI drums to sound more like the real thing? There are a number of techniques you can use to become a drum programming expert.
These 12 tips will help you get realistic sounding drums from digital kits and samples!
I’m guessing you’re here because you want to make your mixes sound professional. We put together a brief training that covers a totally new approach to music production. Until now, everyone has been teaching production totally backward. Just click below to watch.Get industry-quality every time (steal this framework)
But if you just want to learn all about MIDI Drums specifically, keep reading.
How to Program Realistic Drums (TODAY!)
Tip #1: Think Like a Drummer
This one’s simple but super important!
Make sure any percussion part you write is something an actual drummer could play.

If you write a part that a real drummer couldn’t play, it’ll be really obvious that you’re using software.
A drummer probably couldn’t play straight 64th note hi-hats at 140 bpm. (If you are a drummer who can do this, please message me. We’re going to start the world’s first live trap band).
But they could definitely play a steady “four on the floor” rhythm.
An easy way to do this is to pay close attention to the grooves of songs you like. Listening to real drummers play will help you instinctively know what’s realistic.
You might even want to try air drumming along. Sure, you’ll look goofy, but it’ll help you get a feel for what it’s like to play drums.
Here are a few different drum patterns that you’ll hear in tons of music throughout history. These classic rhythm parts are a great way to get inspired while writing your own loops.
Tip #2: Use a MIDI Instrument
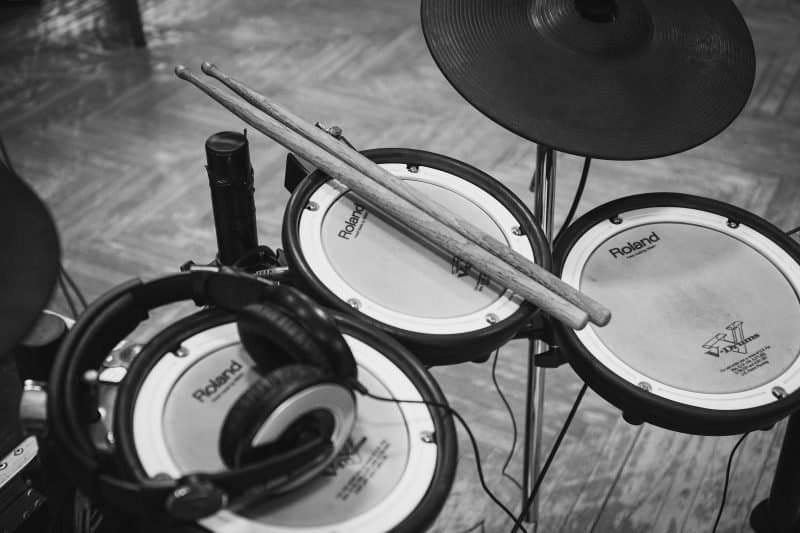
Using a MIDI instrument is a super easy way to make your software kit sound better. If you’re already a drummer but don’t want to go through the hassle of tracking a kit, get an electronic drum kit.
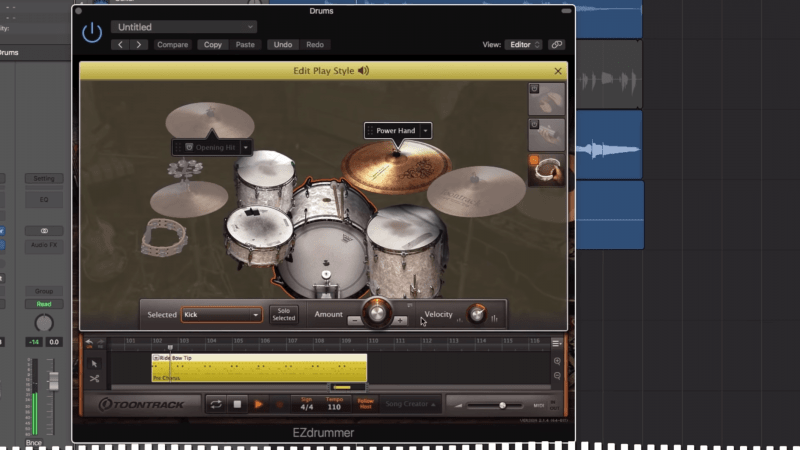
Playing an electronic kit into software like EZdrummer will help you get a human sounding performance really quickly.
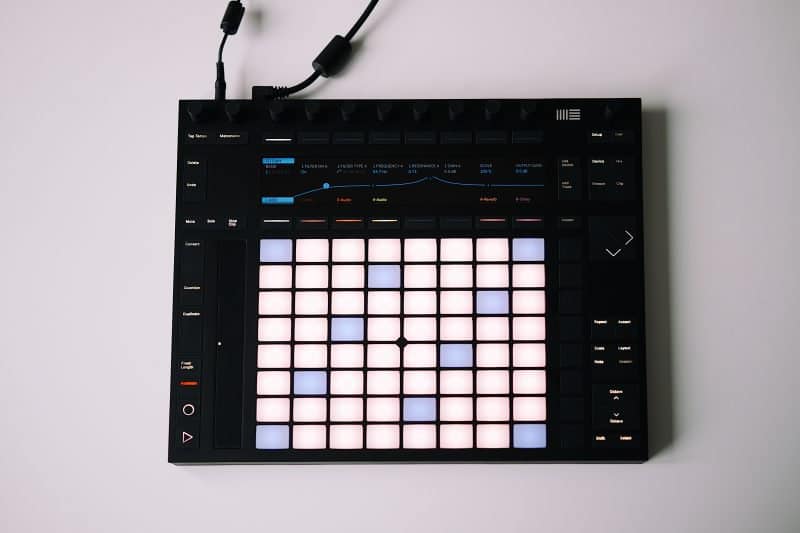
If you aren’t a drum virtuoso, you could also use a drum pad or MIDI keyboard.
If your drum programming is perfectly in time and always at the same volume, it’s a dead giveaway that you’re using MIDI.
Using a MIDI instrument will automatically vary the timing and the volume of the notes, making your track sound way more realistic.
You can still get the same results if you’re writing the pattern in by hand. It’ll just take a little more time and effort to get it right.
Tip #3: Adjust the Velocity
Every MIDI note has a velocity. Velocity describes how loudly the sample is triggered.
If a note has a low velocity, it’ll sound quiet. A high velocity will make the note louder and more brash.
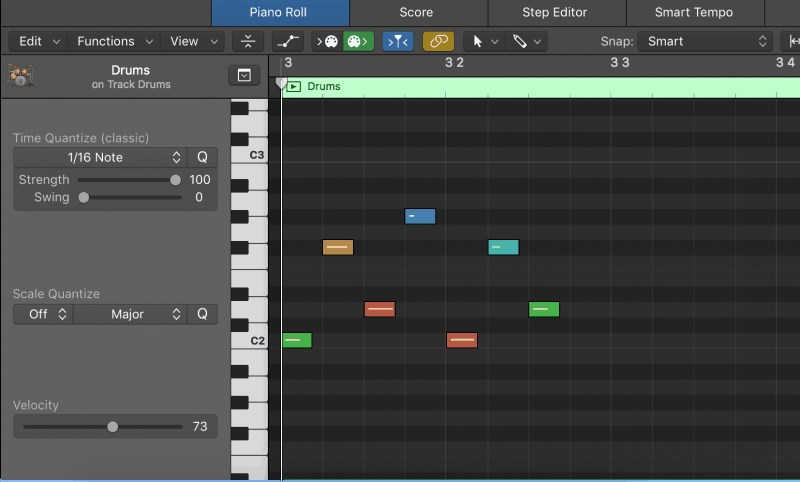
The red and yellow notes have higher velocities. And the blue and green notes have lower velocities.
You’ll want to change the velocities of your notes to accent certain beats.

Drummers highlight important beats by hitting a drum harder.
A straight-ahead punk anthem will probably accent the 2nd and 4th beat of each measure. On a funk track, they’ll probably put more “oomph” into the 1st and the 3rd beat.
Think like a drummer while assigning velocities. There are certain beats that you should accent in your song. That’s where you’ll want to turn the velocity up.
On the non-accented beats, you’ll want to ease off the velocity.
Tip #4: To Quantize or Not to Quantize
As the rhythmic foundation of a song, drummers also need to focus on their timing.
Quantization is all about to the timing of MIDI notes. If a note is out of time, you can use quantization to snap it into place.
Quantization is the process of snapping your notes to the rhythmic grid.

Quantization helps tighten up your track, but too much quantization sounds robotic. Real musicians can’t play perfectly in time, so you don’t want your MIDI to sound flawless.
Making sure some notes are a little off time can go a long way in making software instruments feel realistic. Instead of quantizing and calling it good, move some notes off the grid.
Pro drummers tend to either anticipate the beat or stay just behind it. Think about which one your imaginary drummer tends towards.

Bonus Tip: Quantization Strength
Moving individual notes takes a lot of time. If you’re adjusting a bunch of notes, save yourself a headache by using quantization strength.
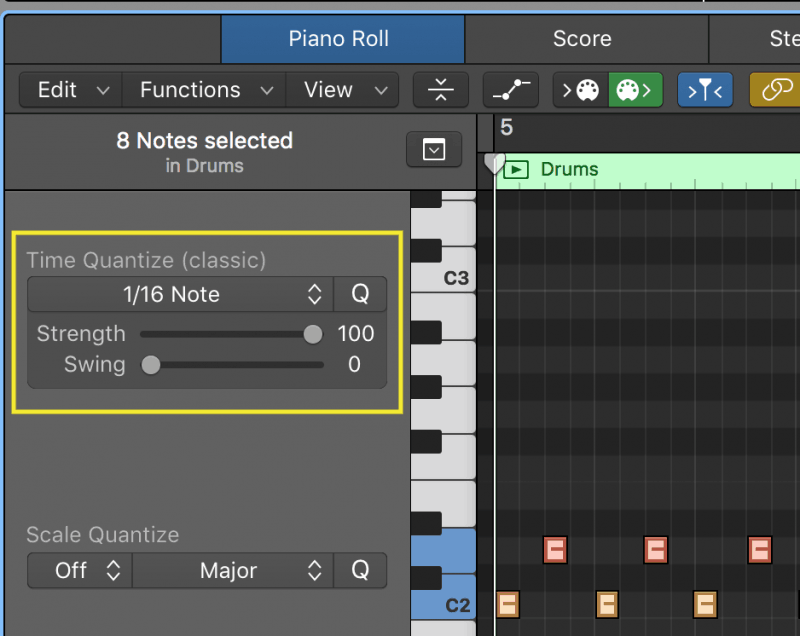
Quantization strength decides how “to the grid” your quantization is. In other words, a high quantization strength will make your MIDI sound perfectly in time. A lower strength will leave the notes slightly out of time.
By default, Logic’s quantization strength is set all the way to 100. Since the quantization is so strong, all the notes are perfectly on beat.
I usually set the quantization strength around 75. At 75, the quantization is still strong enough to tighten up the track, but not so robotic that it sounds fake.
Quantization strength is mostly helpful for those using a MIDI instrument. If you’re writing the beats in yourself, you’ll probably want to use humanization.
Tip #5: Humanize Your Tracks
Humanizing is the exact opposite of quantizing. Instead of putting your notes ON the grid, it moves them OFF.
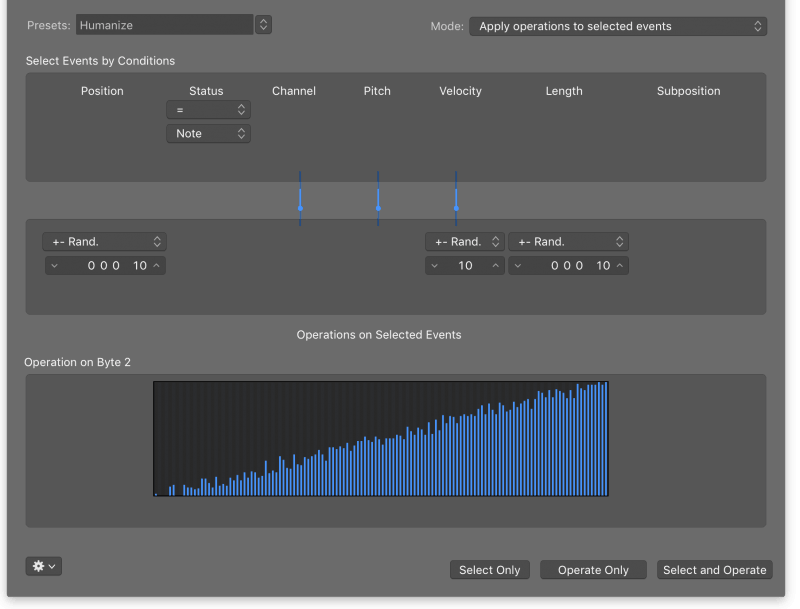
Humanizing slightly changes the velocity and timing of notes. It’s a quick way to make MIDI sound less robotic.

Be careful with humanizing velocity, though. Deciding which beats are accented and which ones aren’t is really important for your song’s rhythm.
You don’t want to assign velocities willy-nilly. It could make your drums sound even less realistic than a consistent velocity.
See if your DAW will let you humanize the timing without humanizing velocity. That way you can make the timing sound better without messing up your volume.
Here’s how it works in Logic.
You can open the humanization window by right clicking a MIDI track and navigating to “MIDI”, then “MIDI Transform”
Once you’ve opened up the humanization view, you’ll see that position, velocity, and length are being randomized.
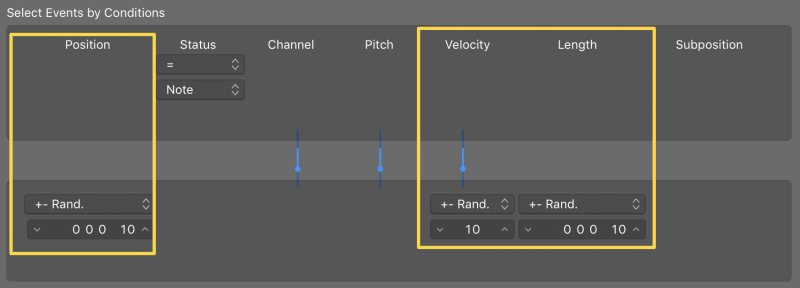
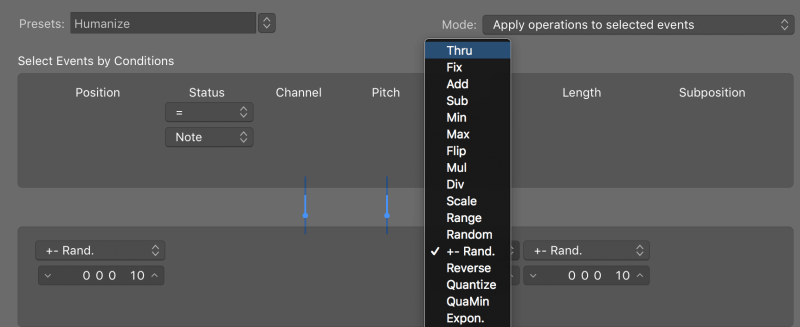
By clicking on the words “+-Rand.” below velocity and changing it to “Thru” you’ll humanize the timing of the pattern but not the volume.
Tip #6: Use Premade Loops
If you want to save time or if drums aren’t your forte, you might want to use premade loops.
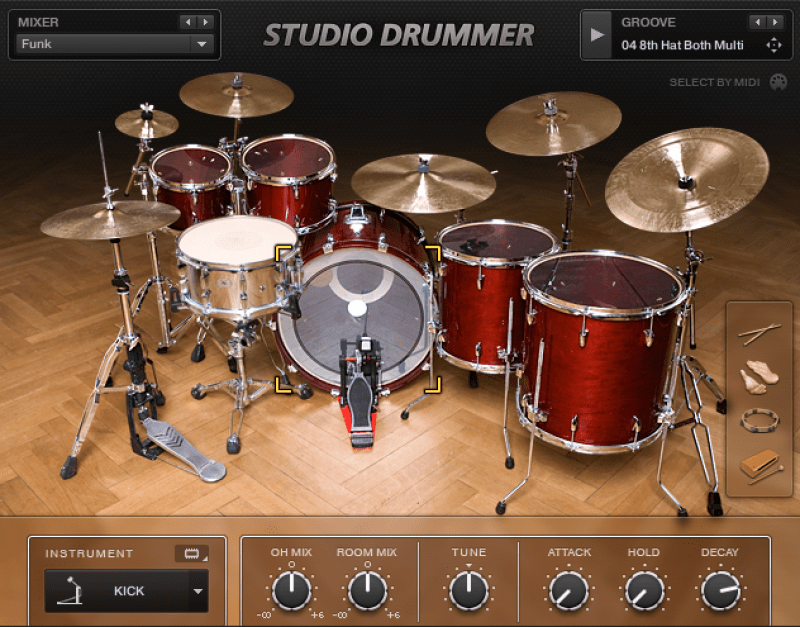
There’s nothing wrong with wanting to make your own drum patterns. But there’s also no shame in using tools that make writing easier!
Most virtual drum instruments come with premade MIDI patterns. These loops are specifically made to sound realistic, so they’re a great way to get a good sound.
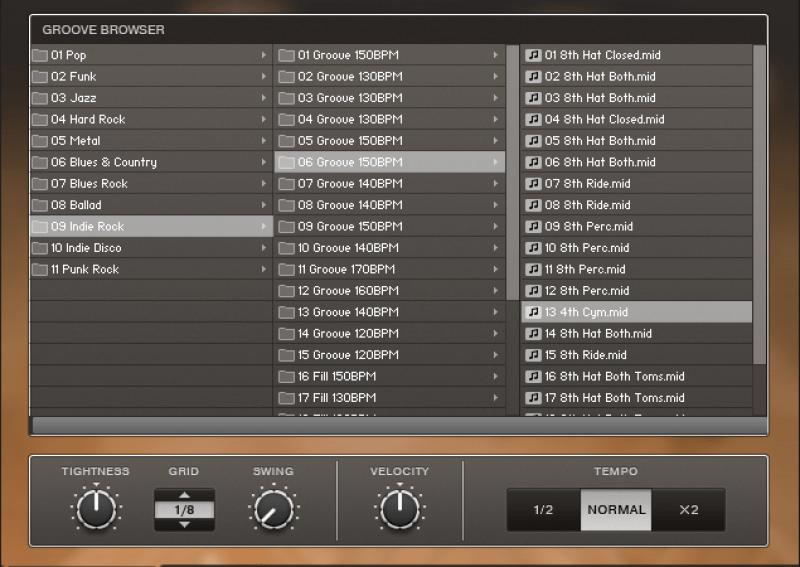
You can even edit the pattern from a loop if you’re worried about sounding unoriginal.
For example, you could take every other snare hit in the pattern and move it to be a rim click instead.
If you’re going to use loops, you’ll probably want to add them to your song sooner than later. Sometimes throwing a percussion loop into a song at the tail end of writing works perfectly. Other times… not so much.
Tip #7: Choose the Right Samples
The sounds you’re using play a huge role in how realistic your drums seem.
Virtual drum programs usually come with a bunch of different kit options. Experiment with the different kits available to you.
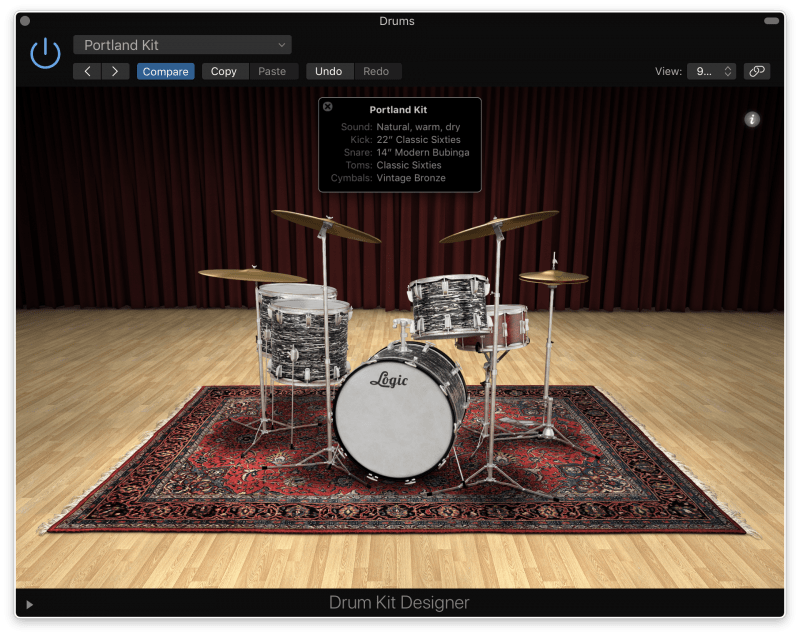
Loop a section of your song and cycle through the different samples to figure out which ones sound the most believable.
If you’re writing garage rock or lo-fi indie, you’ll probably want a kit that sounds pretty DIY. Look for a kit that sounds grungy and loose.
If you’re writing pop, you’ll want a tighter, more studio-sounding kit. Listen for something punchier that sounds like it was professionally recorded.
This can take a while, so I recommend saving custom kits with your favorite sounds. That way you can save time next time you need to pick out samples!
Bonus Tip: Find Samples Online
You can download different drum loops and libraries from the internet.
Some are free and some cost money. Depending on your budget, paid samples may or may not be worth it.
Either way, you can easily load these sounds into your drum software to create new drum kits.
Tip #8: Mix Your Samples Like a Real Kit
You want to mix your MIDI the same way you’d mix a real drum kit.
Just because you’re using software doesn’t mean you need a totally different approach.
By imitating the techniques you’d use to mix real drums, you’ll shape the tone of your tracks so they sound more realistic.
You’ll also want to figure out how you can get all of your kit’s elements onto different tracks in your DAW. Your kick, snare, toms, etc. should have their own channels.
That way you can mix them like you would the rest of your instruments instead of using the software kit’s internal mixer.
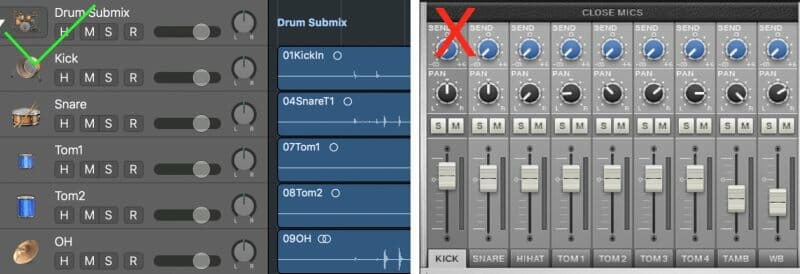
The process for turning each drum in your virtual kit into its own channel in your DAW depends on the software. Google how you can do this inside your preferred drumming software.
Tip #9: Use a Reference Track
Make sure you’re using a drum reference track while you mix. A drum reference track is a song that has the drum sound you’d like for your mix.
Listen to some of your favorite songs and pay attention to how the drums sound. Once you find something that sounds right for your track, choose it as your reference.
Try to recreate the kit sound from your reference for your own song.
Pay attention to how loud each of the drums are in comparison to one another.
What’s the tone of the kick drum and snare?
How much reverb did they use on their snare?
Does the entire drum kit sound close or far away?
You want to aim for the closest recreation of the reference’s sound you can get. By focusing on the sound of a real kit, the steps you need to take to make your drum programming sound better will become clear.
Side Note: Use a Reference Track for Your Full Mix
You’ll want to have a reference track for your entire mix as well.
The drum reference track will help you get the drum tone you want. But you’ll want another reference track for your full mix.
Mixing with a reference track will help you get a radio-ready mix every time.
Tip #10: Create Your Own Reverb
A lot of drum programs automatically add reverb.
Make sure you mute it!
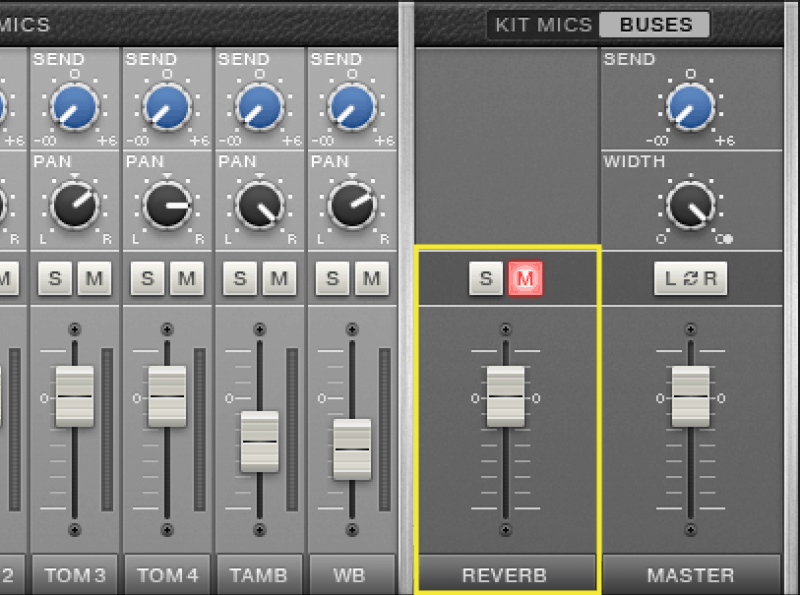
You should mute the drum kit’s stock reverb because you’re probably going to use a room reverb for your mix.
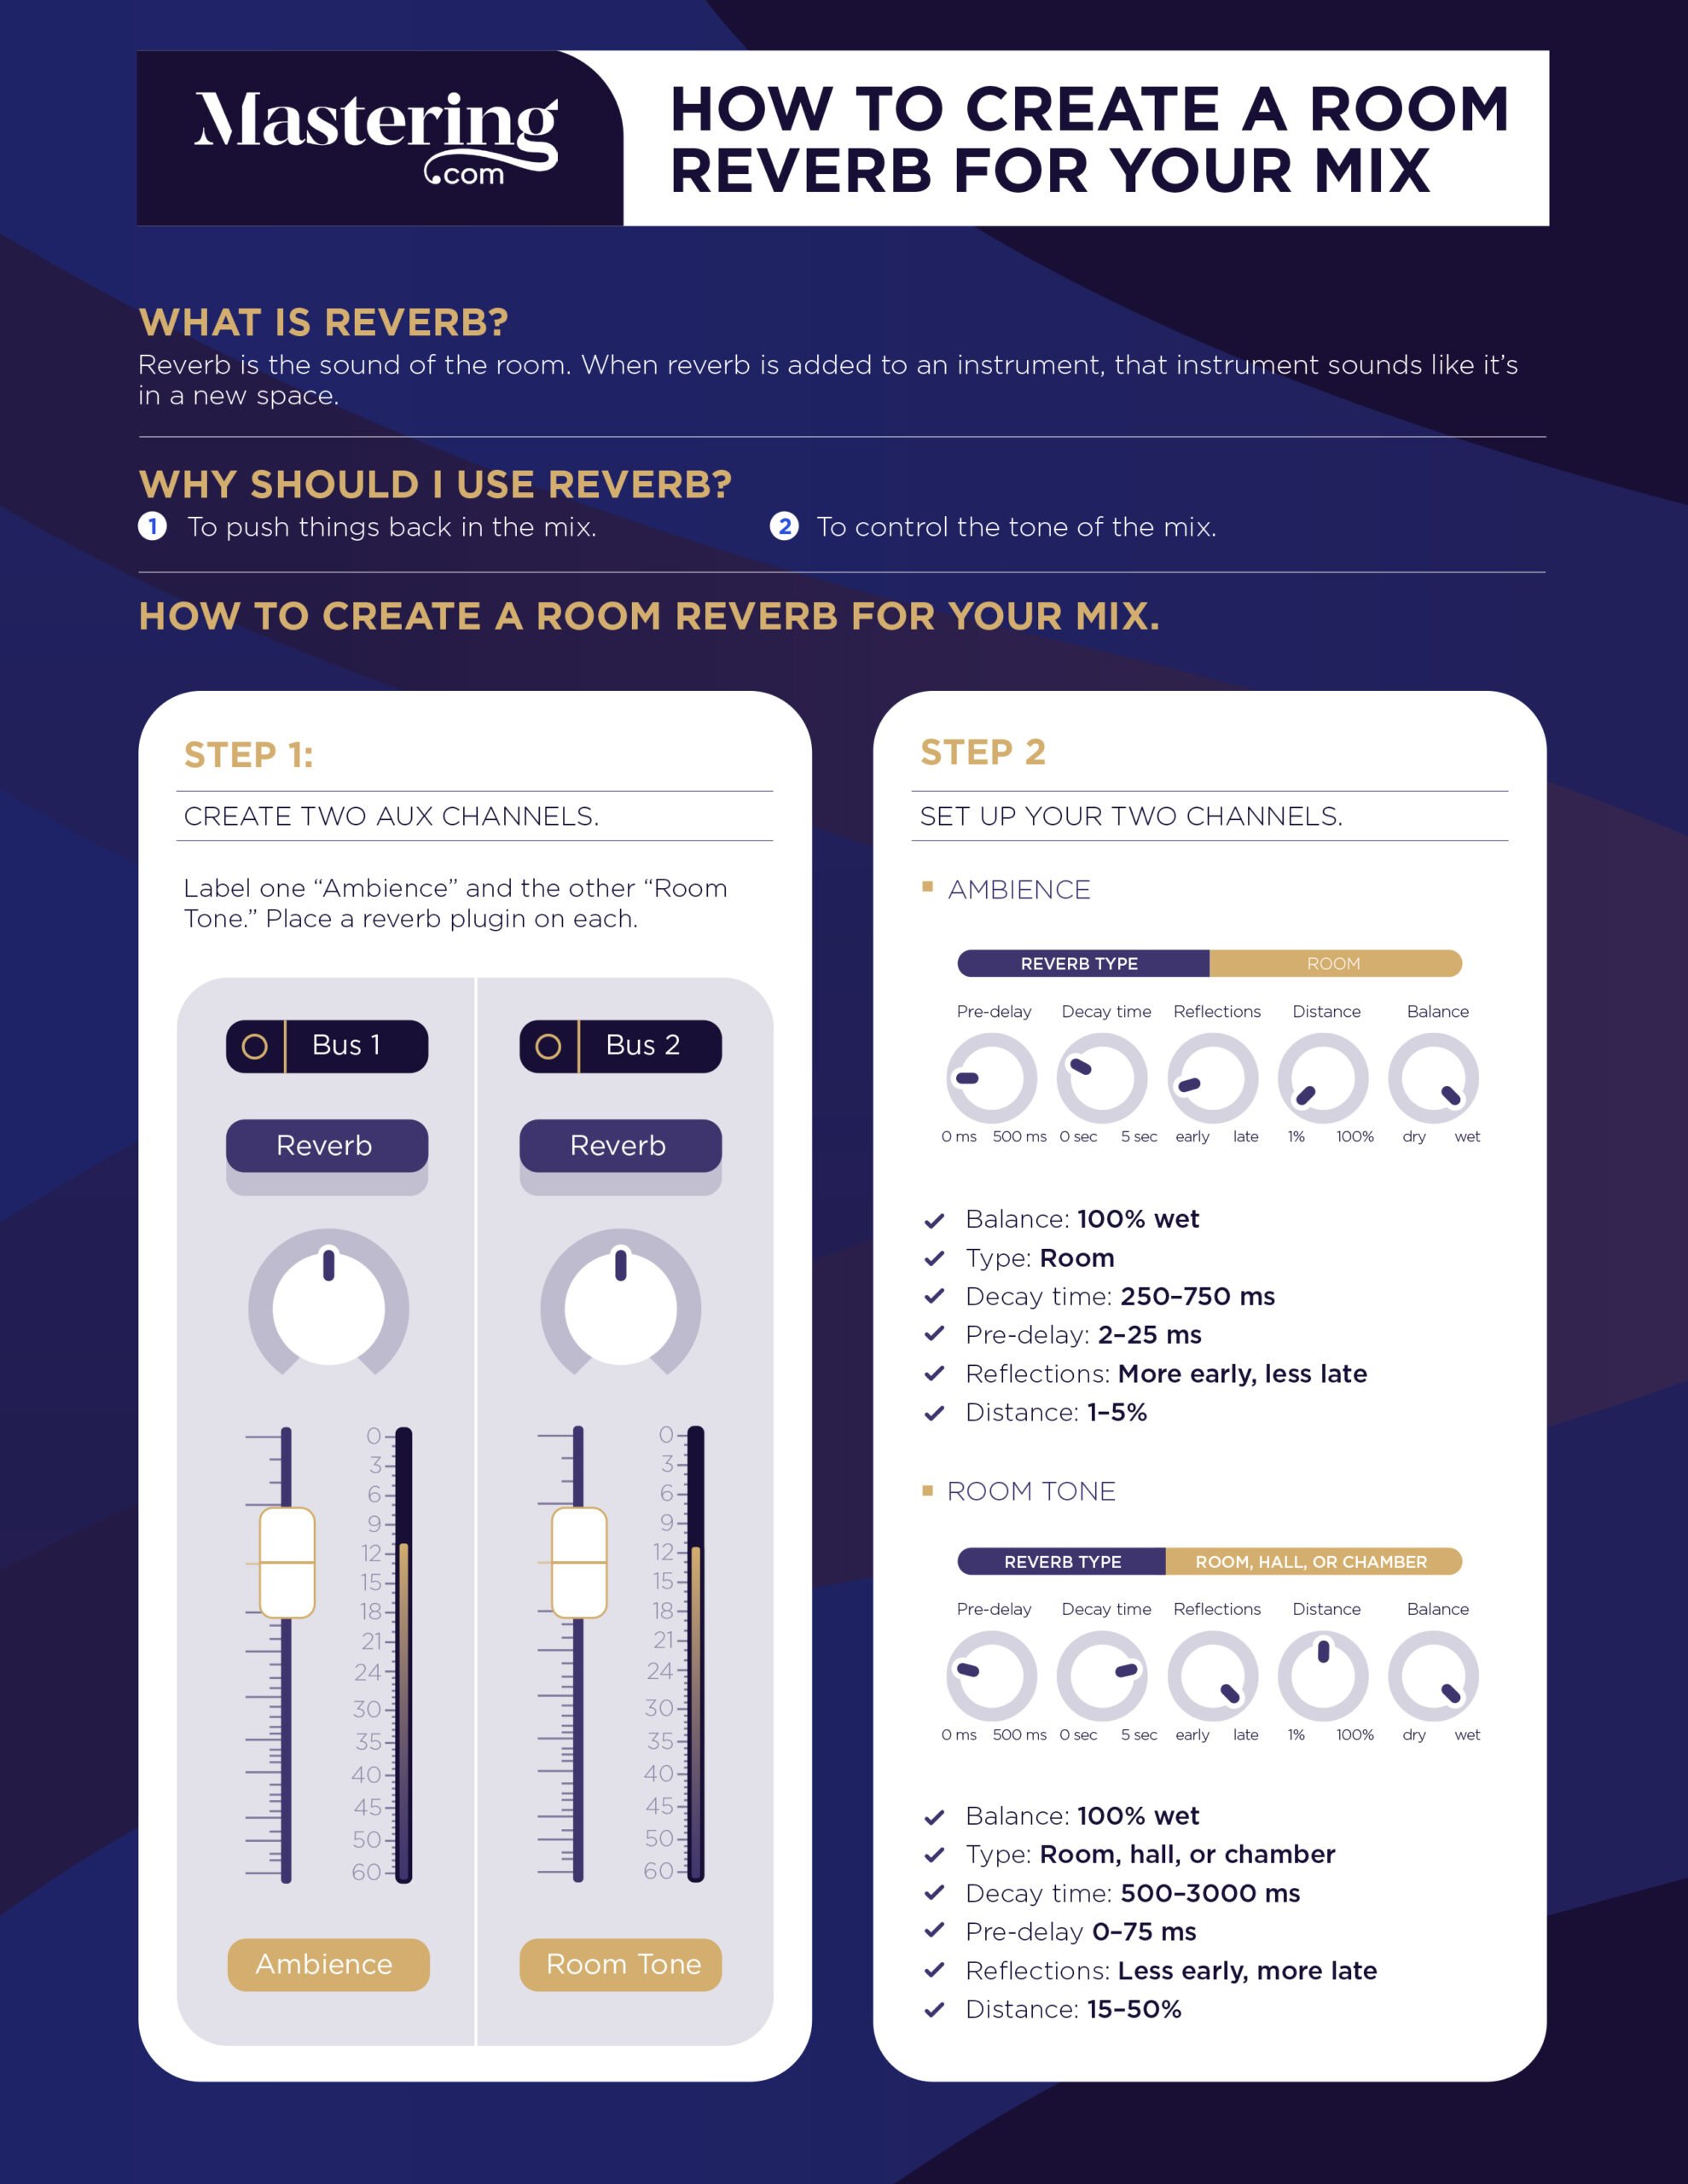
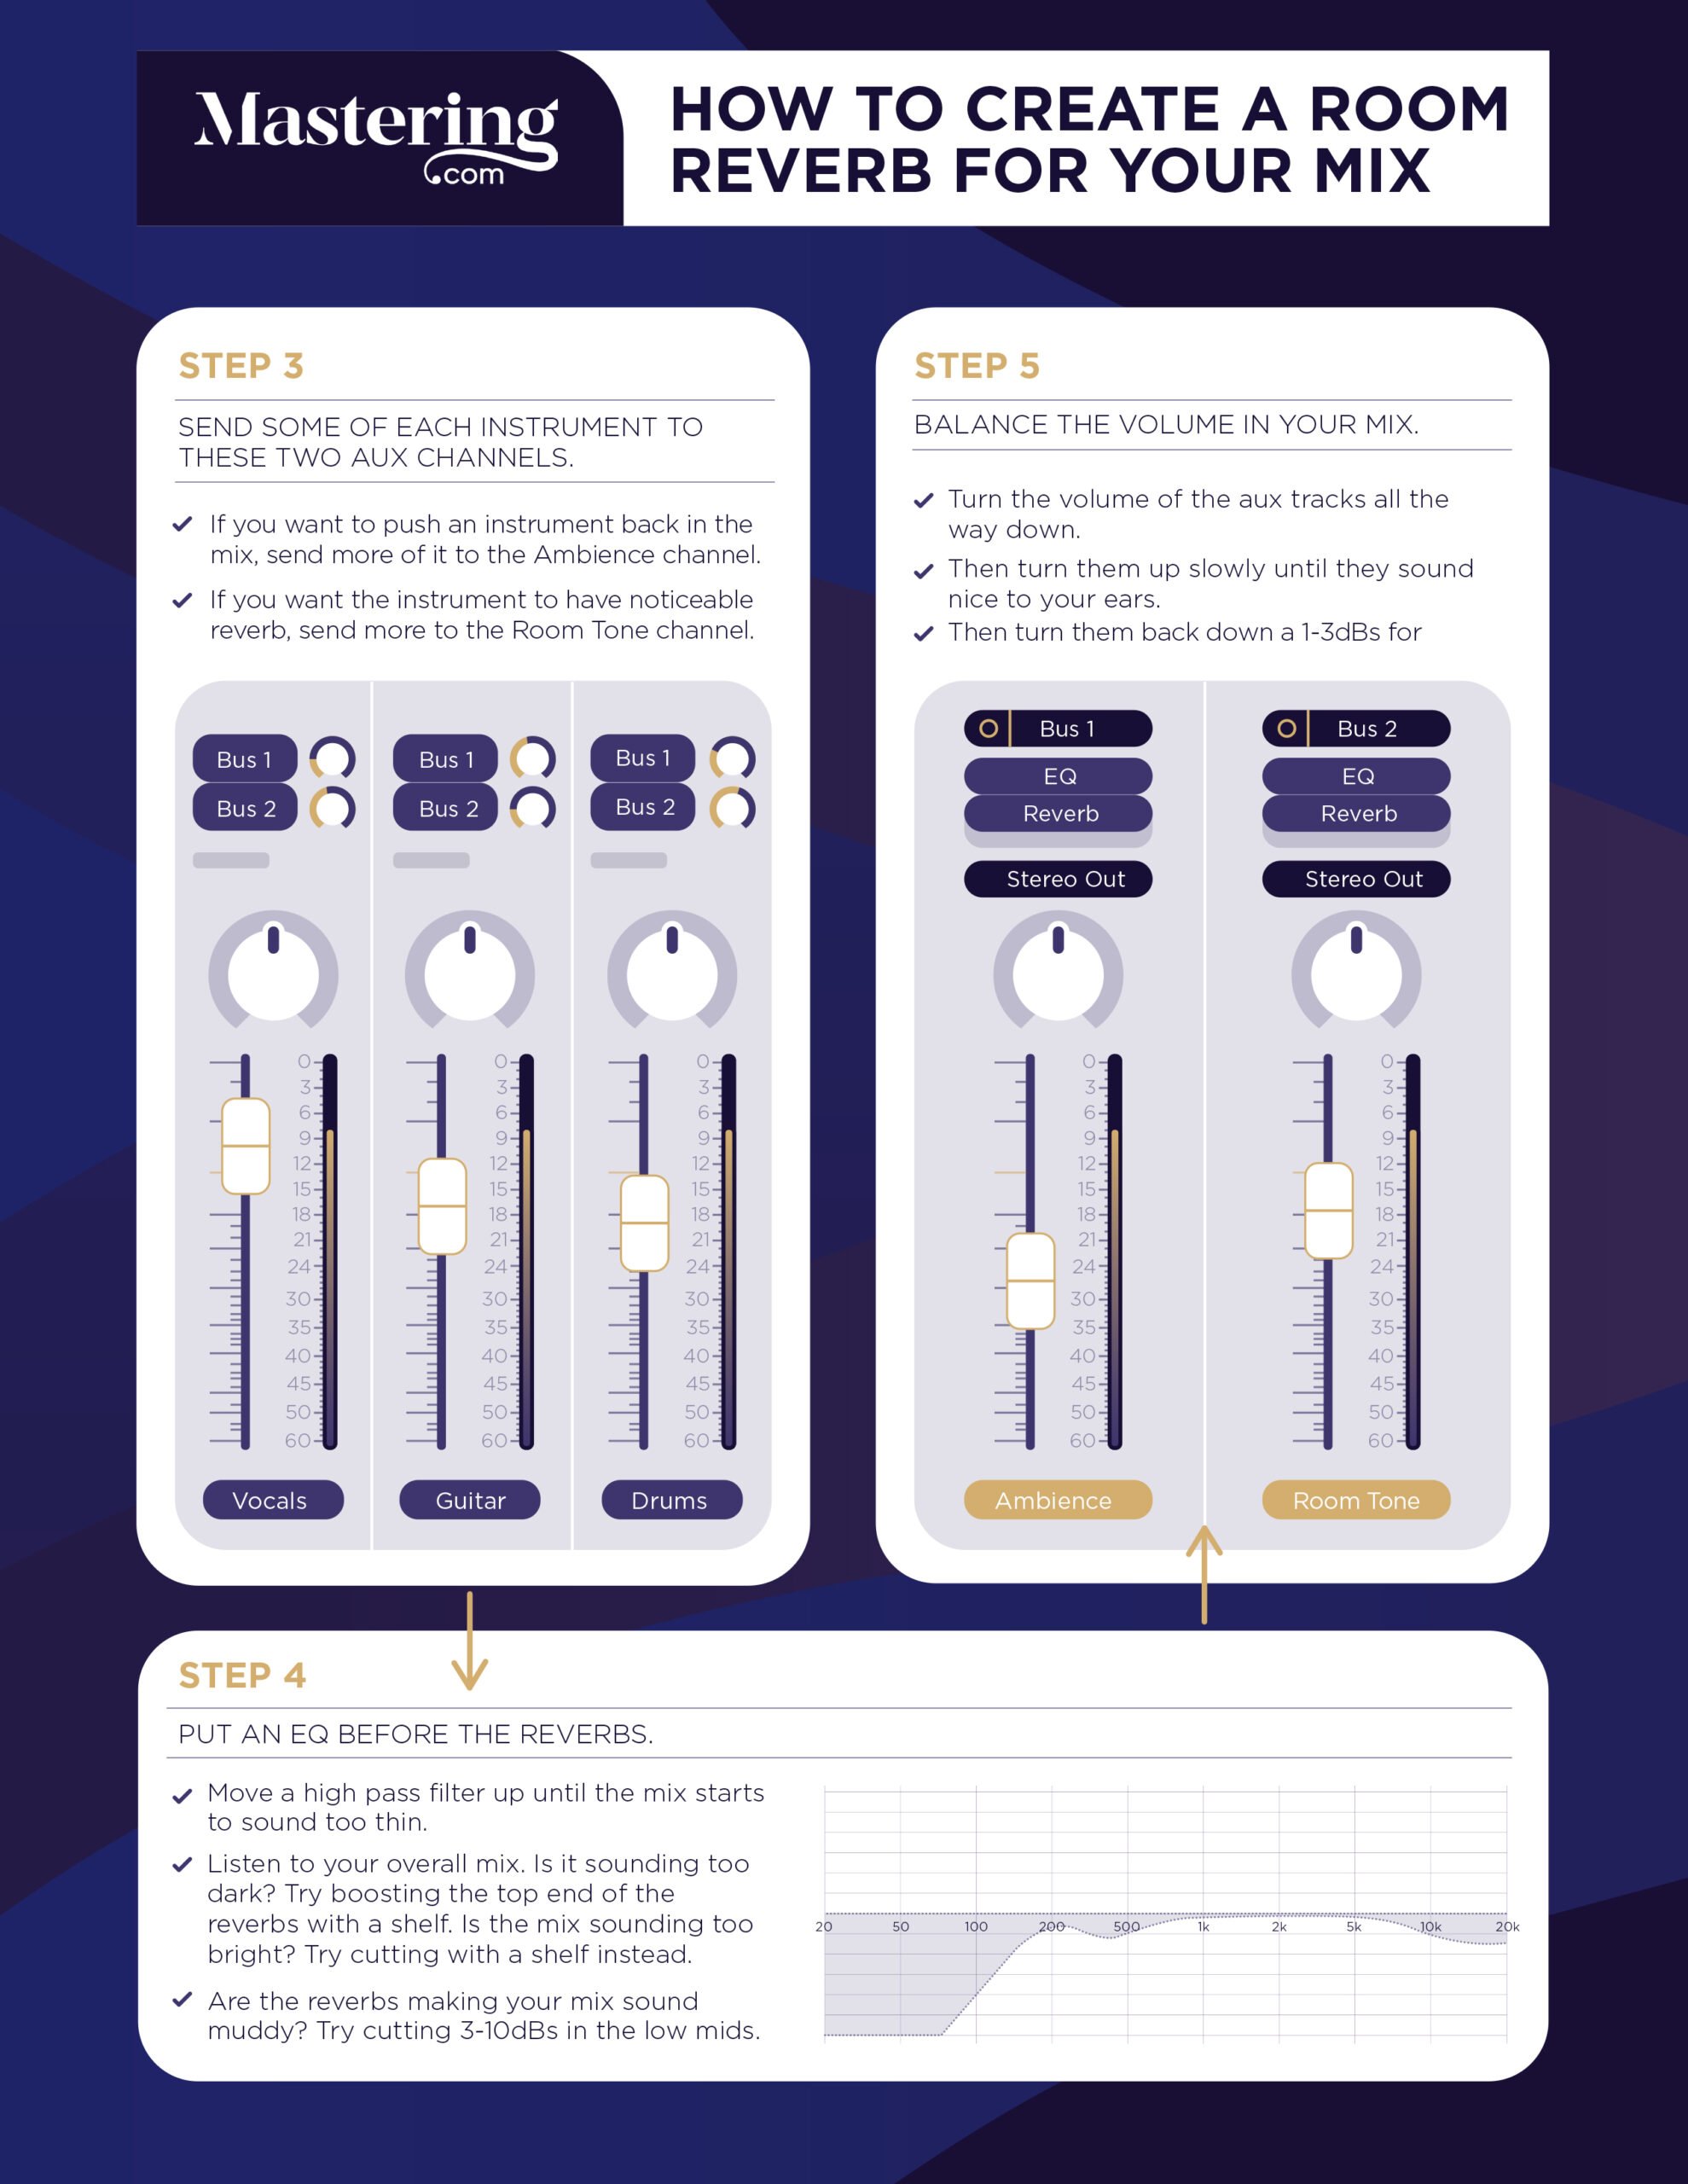
You want to put your kit through the same reverbs as the rest of your mix so they’ll sound like they’re in the same room as everything else.
Once you’ve dialed in the volume, tone, and reverb of your kit, there are a couple last mixing tools worth trying.
Tip #11: Add Saturation
Software instruments tend to sound a bit too pristine. Saturation adds natural artifacts to your sound that a recorded drum kit would have.
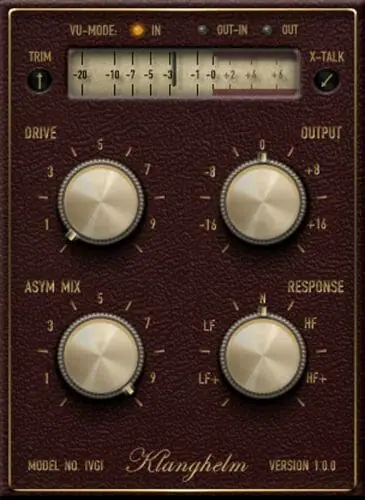
Try using parallel saturation on your kit. Send your drum bus to an aux track and put a saturation plugin on it.
Then use the gain knob to dirty it up as much as you’d like.
Listen to your drums and think to yourself: how can I improve the tone? If it needs some top end sheen, try turning the tone knob to the focus on the top end. If it’s sounding too thin, try turning the tone knob to focus on the lower-mids.
Once you’ve got the tone where you’d like it, turn the aux channel fader all the way down and slowly mix it back in. Keep turning it up until the kit sounds good to your ears.
Tip #12: Use Parallel Compression
Pro mixers use parallel compression all the time while mixing drums. So putting some on your software kit help it sound more realistic!
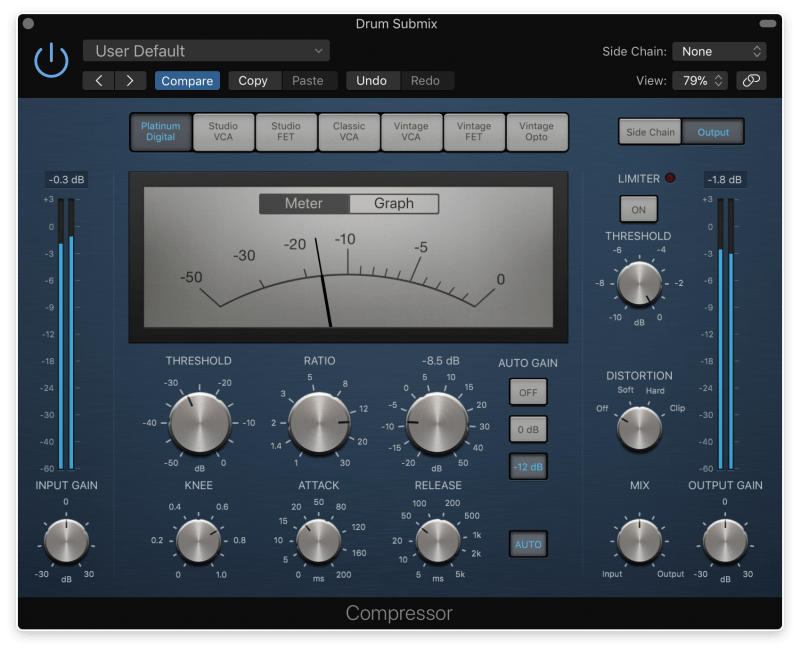
To use parallel compression, put a send on your drum bus that sends to an aux track. Then put a compressor on that aux track.
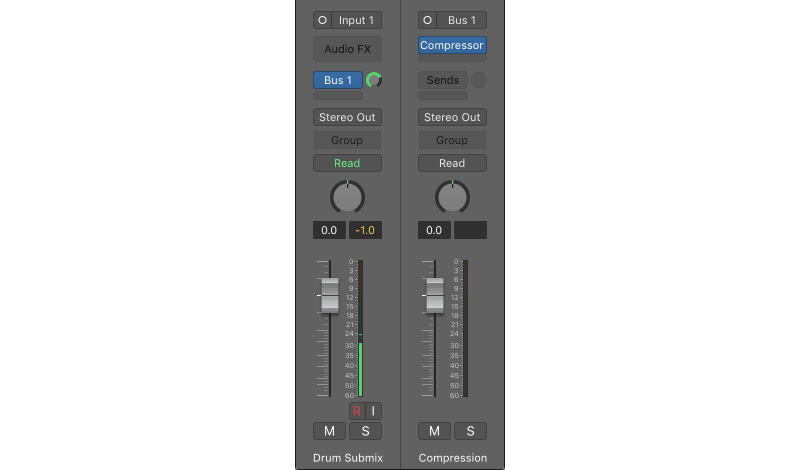
Set the compressor so it’s heavily compressing the drums. Shoot for around 10 dBs of gain reduction. It’ll sound terrible at first, but once we mix it in it’ll sound great.
Next, turn the aux track’s fader all the way down.
Play a looped section of your song.
Slowly turn the aux fader up until it’s barely audible. The parallel compression should give some life to your patterns and help them punch through the mix.
And there you have it!
Making your software kit sound realistic isn’t as tough as it sounds!
Follow these steps and your listeners will have trouble distinguishing your programmed beats from a real drummer with a kit.
Next Steps
If you want to dig deeper into music production and learn what it actually takes to make mixes that sound pro…
And you’re an intermediate or advanced producer…
Be sure to check out the free masterclass:
Enjoy!

