“Wow!”
That should be what your listeners say when they hear your songs.
But to get that effect, you’ll want to avoid the loudness penalty.
This guide will help you make final masters that sound as full and energetic as they should.
What Is the Loudness Penalty?
The loudness penalty happens when your song is too loud (or quiet) for streaming platforms. Your song’s volume will be turned down or up to compensate.
This can affect your song’s dynamic range and may even drain the life from it.
It’s a major concern for mastering engineers, but mixers should pay attention to it as well. That way you can ensure the final version sounds as good as it can.
For example, Spotify wants songs to sit around −14 LUFS. So if your master is −7 LUFS (common for pop and rock), it’ll be turned down quite a bit.
What Are LUFS?
Loudness units full scale (LUFS) measure how loud your songs sound.
Even though two songs peak at the same dB level, one might sound a lot louder than the other. LUFS fix this problem by tracking the perceived loudness of your music.
There are two ways to measure LUFS: short-term LUFS and integrated LUFS.
Integrated LUFS take an average of the entire song. So you’ll get a general idea of how loud the whole song is.
Integrated LUFS are great for getting a ballpark estimate for your entire song.
Short-term LUFS measure the loudness of the last several seconds.
They’re good for getting a more detailed view of your song. You can really understand how loud each section is.
It’s best to put a LUFS meter and a true peak meter at the end of your mastering chain.
How The Loudness Penalty Will Affect Your Songs
When your songs are turned down (or up) they may sound worse.
Changing the volume can make your song’s energy deflate.

Check it out. Here’s part of a song mastered at −10 integrated LUFS. It’s been turned down an additional 4 LUFS to match Spotify’s standards.
And here’s the same song mastered at −7 integrated LUFS. It’s been turned down 7 LUFS afterwards.
They sound different, right? Even though they’re the same loudness, they have a different feel.
The one that was mastered to be quieter feels more open, while the one that was −7 LUFS feels darker and more pumpy.
To me the first one sounds better.
The dynamics weren’t squashed for the sake of greater volume. So when played side by side at the same level, the quieter version stands out.
But this isn’t always the case. Sometimes a song still sounds great, even if the volume’s been changed quite a bit.
Fortunately, you can check how different streaming services will change your song!
Checking Your Loudness
MeterPlugs (with input from mastering engineers Ian Shepherd and Chris Graham) have launched a loudness penalty website where you can hear the difference.
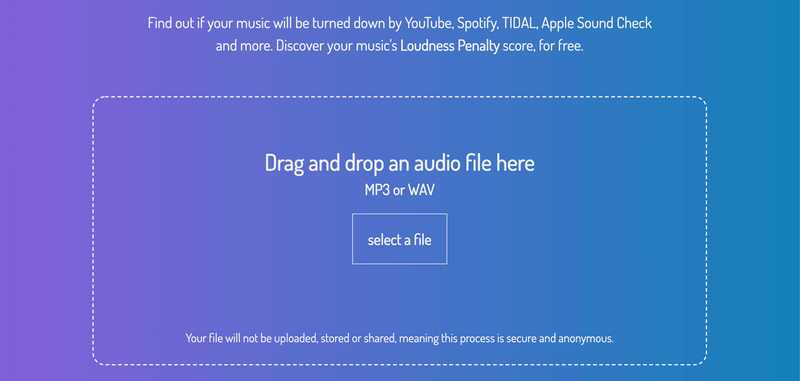
Just drop your song into the browser and select a streaming service.
Loudness Penalty will let you hear how your song will sound once its level’s been adjusted.
This way you can make sure you like what you hear before submitting the track.
There are various mastering plugins that will do the same thing.
For example, Nugen MasterCheck and the Loudness Penalty plugin.
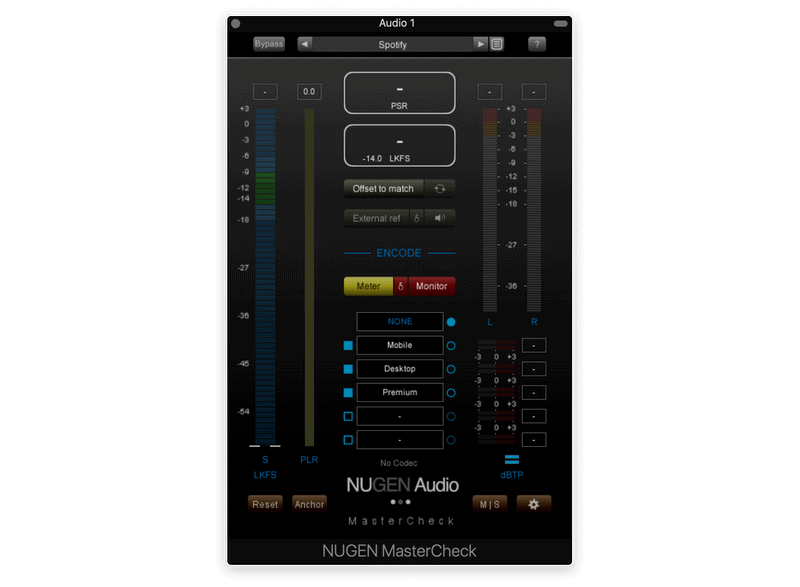
If you already have these, use them! Otherwise, the website will let you do it for free.
So What LUFS Level Should I Aim For?
It all depends on the song.
Ian Shepherd recommends using short-term LUFS. He finds that avoiding anything over −9 LUFS sounds best.
Tom Frampton, on the other hand, tries to go no higher than −8 short-term LUFS.
Beyond that, there’s no specific number. Some songs sound best peaking around −12 LUFS, while others sound great at −10.
At the end of the day, each song will have different needs.
It’s important to keep your LUFS level in mind. But as long as your track isn’t clipping, you should focus more on how the song feels than the numbers on your meter.
You can compare different versions of your master to see which one sounds better after normalization.
Comparing Multiple Masters
A good rule of thumb is to make multiple versions of your master.
Create two to three versions set at different volumes.
Check each one using the loudness penalty website. Then you can decide which one sounds best.
For example, I might bounce three masters set at −13 LUFS, −10 LUFS, and −8 LUFS respectively.
Then, I’d load them into Loudness Penalty and give them a listen, taking notes on each one.
Finally, I’ll decide which one best matches the vibe and energy I’m going for. And that’s the master I’ll use!
You can always use different masters for different platforms too. For example, I might upload a different file to Youtube than Spotify and iTunes, with a third made for sync.
You aren’t locked into having just one master.
Conclusion
It’s important to keep the loudness penalty in mind when working on your songs.
Why leave your track’s tone up to fate? You should be creating multiple masters at different levels and comparing them after. That way you can consciously decide which one’s best.
Even if you end up choosing the louder version, it should be because it genuinely sounds better.