Ever noticed a snare that cuts through a wall of distorted guitars or a kick drum that feels like a physical punch in the chest? What you are hearing is rarely just a single microphone on a shell. Instead, you are hearing the result of strategic layering.
Combining the organic texture of a live kit with the sonic accuracy of electronic samples is how professionals achieve that massive sound without losing the humanity in the performance.
The Philosophy of Reinforcement
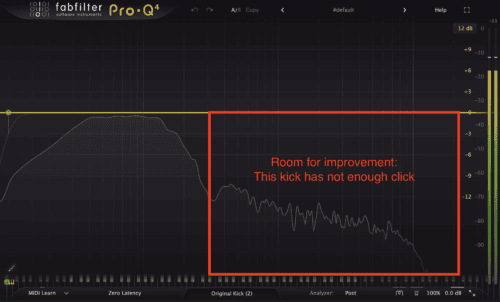
The goal of layering is not to replace the drummer, but rather to enhance the sound of the kit. A snare drum might have a great ring but lack low-end. A kick drum might have a nice sustain but lack the “click” needed to define the rhythm through dense arrangements.
When you pick a sample, ask yourself: What is my recording missing? A thick, punchy snare? A crisp high-end kick? Find the sample that fills that gap. This additive approach keeps the mix sounding natural while providing the artificial support needed for a modern professional mix.
Preserving the Human Element
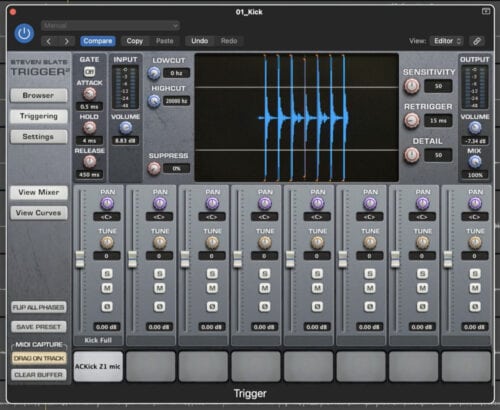
When layering drums, the last thing you want is for your drummer to sound like a machine. That’s why you need to match the sample’s dynamics to the original performance.
For this, you can use plugins that allows you not only to turn the drum recording into MIDI but also to capture the intensity of the original hit to alter the velocity of the sample. This maintains the emotional “push and pull” of the song.
Phase Alignment
Achieving a massive drum sound requires precision regarding the phase alignment of your waveforms. As sound travels in waves, the electronic sample and the acoustic recording must push and pull the speakers in perfect synchronization.
If the sample wave reaches its peak while the acoustic wave is at its trough, the two signals will neutralize each other. This may result in a drum sound that feels thin or hollow, losing the impact you are trying to build.
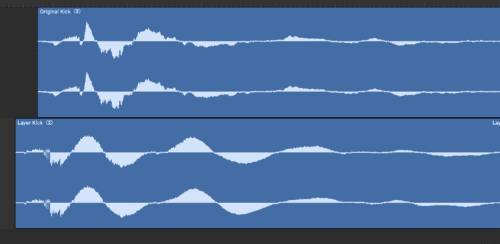
To make sure you end up with the strongest possible signal, zoom into your waveform at a microscopic level to check the alignment of your samples. The initial transient of your sample should align exactly with the transient of the live drum. Even a tiny offset of a few milliseconds can significantly alter the sound.
Frequency Carving
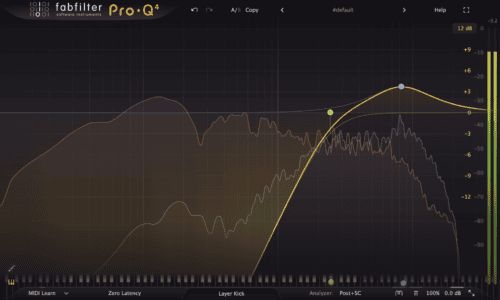
Now that we have a nice aligned layer, we want to use EQ to remove overlapping frequencies. For example, if you are using a sample for its low-end, use a high cut filter to remove the top-end so it doesn’t clash with the natural top-end of the live recording.
Or remember the click-less kick from our earlier example image, in the image below we’re using the new kick layer (in grey) only for it’s top-end by carving out the lows and boosting the frequency of the click. Meanwhile the original kick (in red) can will out the low-end on it’s own.
Glueing it all together
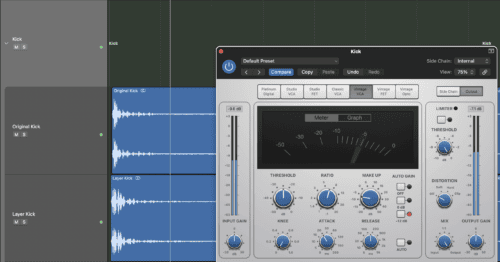
Now if you want to go even further, you can route the original drum recording and the sample to the same auxiliary bus. Then, apply a compressor with a slow attack and medium release to the bus. This will “glue” the two sounds together, making the speaker react to them as a single instrument.
Closing Takeaway
Layering is about enhancement, not replacement. By treating electronic samples as “texture” and “support” rather than the primary sound, you can create a hybrid kit that possesses both the grit of a garage recording and the polished power of a chart-topping hit.