We’ve all had those nightmare mixes. Where everything is almost perfect, but there are a few peaks that jump out of nowhere.
Are you mixing or mastering? Doesn’t matter.
Brickwall limiters could be perfect for when you need superior dynamic control.
Here’s everything you need to know to hit the ground running with these powerful tools.
What Is a Brickwall Limiter?
Regular limiters drastically reduce the dynamic range. But brickwall limiters take it a step further.
Brickwall limiters have a huge ratio, typically infinity to 1.

Anything louder than the threshold is completely squashed.
A regular limiter will mostly keep the volume at or below the threshold.
But some sound may still pass the threshold. Especially if you’re pushing the gain on the track.
When using a brickwall limiter, nothing will ever be louder than the threshold. Which can either be terrific or a disaster.
Problems with Brickwall Limiters
Brickwall limiters are often misused. This can wreck your song.
First off…
Don’t use brickwall limiters on your mixbus.

Brickwall limiters are great for mastering and certain parts of your mix. But you shouldn’t slap one on your entire mix before sending it off to get mastered.
At best, it won’t do anything. At worst, it’ll reduce the dynamic range your mastering engineer has to work with.
Speaking of mastering… Experienced mastering engineers know how to set a brickwall limiter while mastering.
If you’re new to mastering, you’ll want to be careful.
Abusing brickwalls was part of the issue with the loudness wars. So be sparing when using them to turn up the gain on a master.
You may just wreck the track’s dynamics!
How to Use a Brickwall Limiter
Any time you use a brickwall limiter, it should be for a reason. Here are the main reasons to use one:
- Make something louder without increasing its peak volume
- Shave the peaks off a dynamic track
- Add color and energy
Any time you use one, make sure you’re trying to accomplish one of these goals.
Increasing Loudness
Brickwall limiters are great for making something sound louder.

By turning up the volume but keeping the peaks the same, you can make the track sound louder without blowing your speakers.
This will reduce the dynamic range. But if you’re careful, that shouldn’t be a big deal.
First, check how loud your track is currently.
Take a note of this. You don’t want any unintended changes to your song’s volume.
Then set the threshold.
If you’re mastering, this should be a little below 0 dB. If you’re mixing, it should be about as loud as the track’s current peaks.
Finally, turn up the input gain on the limiter.
This technique can add distortion to the track. But it shouldn’t be a problem unless you’re chopping off too much volume.
Keep your ears open! Especially if you’re reducing over 3 dB at a time.
Turning Down Peaks
But what if your track is mostly the right volume except for a few moments when it jumps too high?
Just turn the threshold down and rein it in! Of course you could use a compressor for this.
But if you’re concerned with flattening out those peaks, a limiter is perfect.
Adding Color

Just like any plugin, brickwall limiters will naturally color your track.
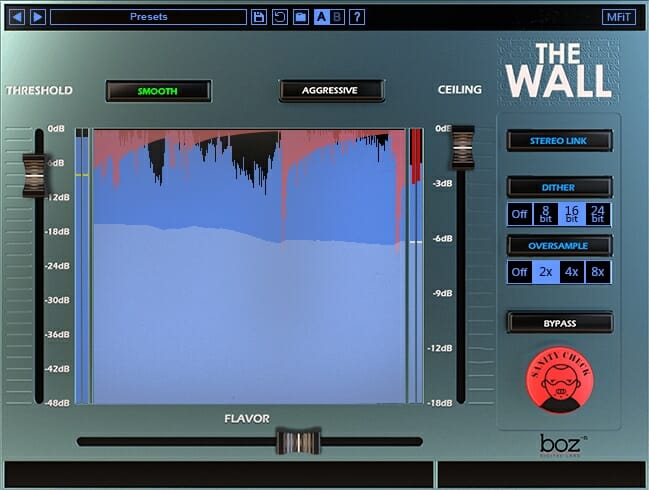
For example, Boz’s The Wall limiter is beloved for adding old school pumping. So you could intentionally choose a limiter that will change the tone.
Of course there are limiters that aim for transparency. But even no tone is a tone.
So make sure you choose a limiter whose vibe will match the song.
Common Uses
Let’s take a look at some of the main ways these limiters are used on songs.
Mastering
The most common use for brickwall limiters is in mastering.
Mastering often involves maximizing the loudness of a song. As you can imagine, brickwalls are often perfect for the job!
They allow you to crank up the energy without boosting the peak volume.
When using a brickwall limiter for mastering, you’ll want to make sure it can detect true peaks.
As your song is converted from digital data to sounds we can actually hear, certain peaks can be turned up. Parts that weren’t clipping in the software will suddenly be too loud.
That’s where true peak meters come in. They can detect which parts of your song will peak once it’s played back.
So make sure you have a true peak meter and a true peak limiter toward the end of your mastering chain.
Vocals

It’s pretty common to use limiters on pop vocals.
Pop tracks are typically heavily processed. Vocals, in particular, need tight dynamic control.
So limiters are perfect for reining in a very dynamic vocal.
You don’t necessarily need a brickwall limiter for this. A regular one will usually do just fine.
But if you want to make sure the vocal doesn’t jump out of the pocket, try a brickwall limiter! You may want to pair it with a gentler compressor to help smooth things out.
Bass

Basses are very dynamic, meaning they can easily dip too low in the mix or overpower everything else.
You’ll often want to use two, or even three, compressors on your bass track. Or you could use a limiter.
You won’t want to slap a brickwall limiter on every single bass. You don’t want to crush your low end.
But sometimes a brickwall limiter could work well.
Basses tend to have a few extra resonant notes. So there may be a few moments where even serial compression can’t tame it.
A brickwall limiter can bring down those wild peaks.
How to Set Your Limiter
The exact settings will always be different. You’ll need to dial them in to match the song.
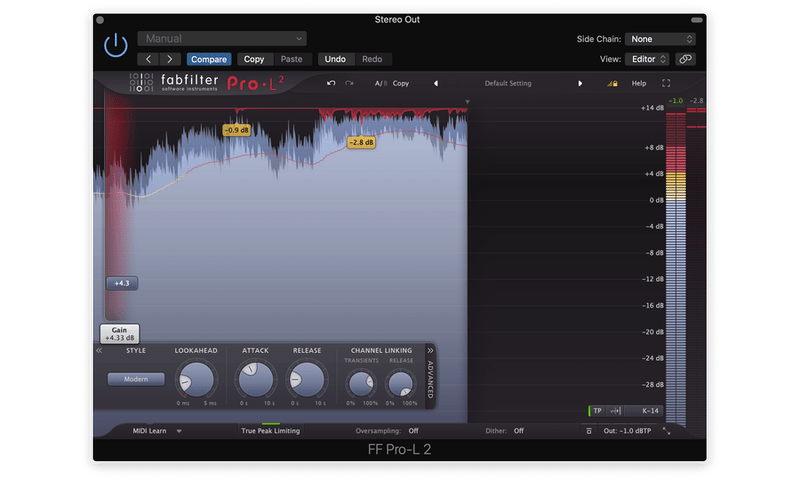
But there are a few solid rules of thumb.
When using a brickwall limiter for mastering, make sure it’s the last processor on the track. It can’t prevent clipping if there are active plugins after it!
You should also set your threshold below 0 dBFS to prevent clipping.
The threshold should definitely be at least −0.3 dB. But some streaming platforms like Spotify recommend setting your peaks below −2 dB.
It’s up to you, but generally speaking, a little more headroom is good.
You’ll also want to dial in the attack and release. Start with a slow attack and a fast release.
This should only shave off the loudest transients of the track.
Want greater gain reduction? Try lowering the attack or lengthening the release.
You may also want to add a few milliseconds of lookahead. As the name suggests, this tells the look ahead what’s coming up next in the track.
It’ll know exactly when to start limiting and when to stop. This’ll help you avoid pumping and distortion.
Bonus Tip: Using Multiple Limiters
Many mastering engineers will use multiple limiters in their mastering chain.
The first often has a somewhat lighter ratio. It’s used to maximize volume and shape the tone.
The second is your brickwall limiter. It’s there to make sure the track doesn’t peak too loudly.
You don’t want your song to clip, after all. So a brickwall limiter is perfect for ensuring quality.
Typically shaving off 1–5 dB with a brickwall limiter is plenty.
It depends on the song. But if you want more gain reduction, you’ll probably want to use multiple limiters.
Limiter Plugins
There are tons of different limiters to choose from. When you’re starting out, stick with your stock plugins. Expensive tools won’t help if you don’t know how to use them!
Once you’ve gotten some practice, you can look into premium options.
The Wall by Boz Digital Labs is a great option. It’s designed for quickly dialing in the perfect settings. Whether you want smooth or aggressive limiting, The Wall has you covered.
If you want an all around limiter, check out PSP’s Xenon. It’s basically two limiters in one. The first stage is more transparent, allowing transients to pass the threshold. The second stage is a brickwall.
The two stages let, you get greater gain reduction without unwanted pumping.
Conclusion
Brickwall limiters may have been the scourge of the industry for a few years. But they can serve crucial roles in your songs.
You could be looking for perfect pop vocals or a pro-quality master. Either way, you’ll need to get cozy with brickwall limiters.
And the tips from this guide will help you knock it out of the park every time!


