There is a distinct difference between a mix that sounds amateur and one that sounds professional, and it often comes down to the use of space. Beginners use reverb to hide mistakes; professionals use reverb to build worlds.
Creating that sense of depth doesn’t happen by accident, and it certainly doesn’t happen by routing every track to the same auxiliary bus. It requires a strategic approach to depth, distance, and texture.
When used thoughtfully, layering different reverb types (room, plate, hall, and spring) can transform a flat, two-dimensional mix into a rich, three-dimensional soundscape. The key is understanding how each reverb type contributes to the illusion of space and how to blend them so they work together.
The Role of Each Reverb Type
1. Room Reverb: The Foundation of Natural Reflections
A room reverb simulates a small, enclosed space. It features a short decay time, making it quick, tight, and ideal for adding a sense of proximity to instruments or vocals. Use it to:
- Glue close-miked elements (like drums or vocals) together into a cohesive space.
- Add subtle realism to the mix without overwhelming it.
- Create a sense of live performance on otherwise sterile, isolated vocal or instrument recordings.
- Anchor lead elements so they feel grounded rather than floating.

2. Plate Reverb: The Glue for Midrange Clarity
A plate reverb is smooth, dense, and excels at adding body to midrange-heavy elements like guitars, snares, or vocals. It’s less about realism and more about texture, often used in pop and rock music for its lush character. Use it to:
- Thicken vocals or instruments without pushing them too far back.
- Add a vintage, polished sheen to tracks.
- Create cohesion across multiple vocal layers or harmonies.
- Bridge the gap between intimate room reverb and distant hall reverb for mid-depth placement.
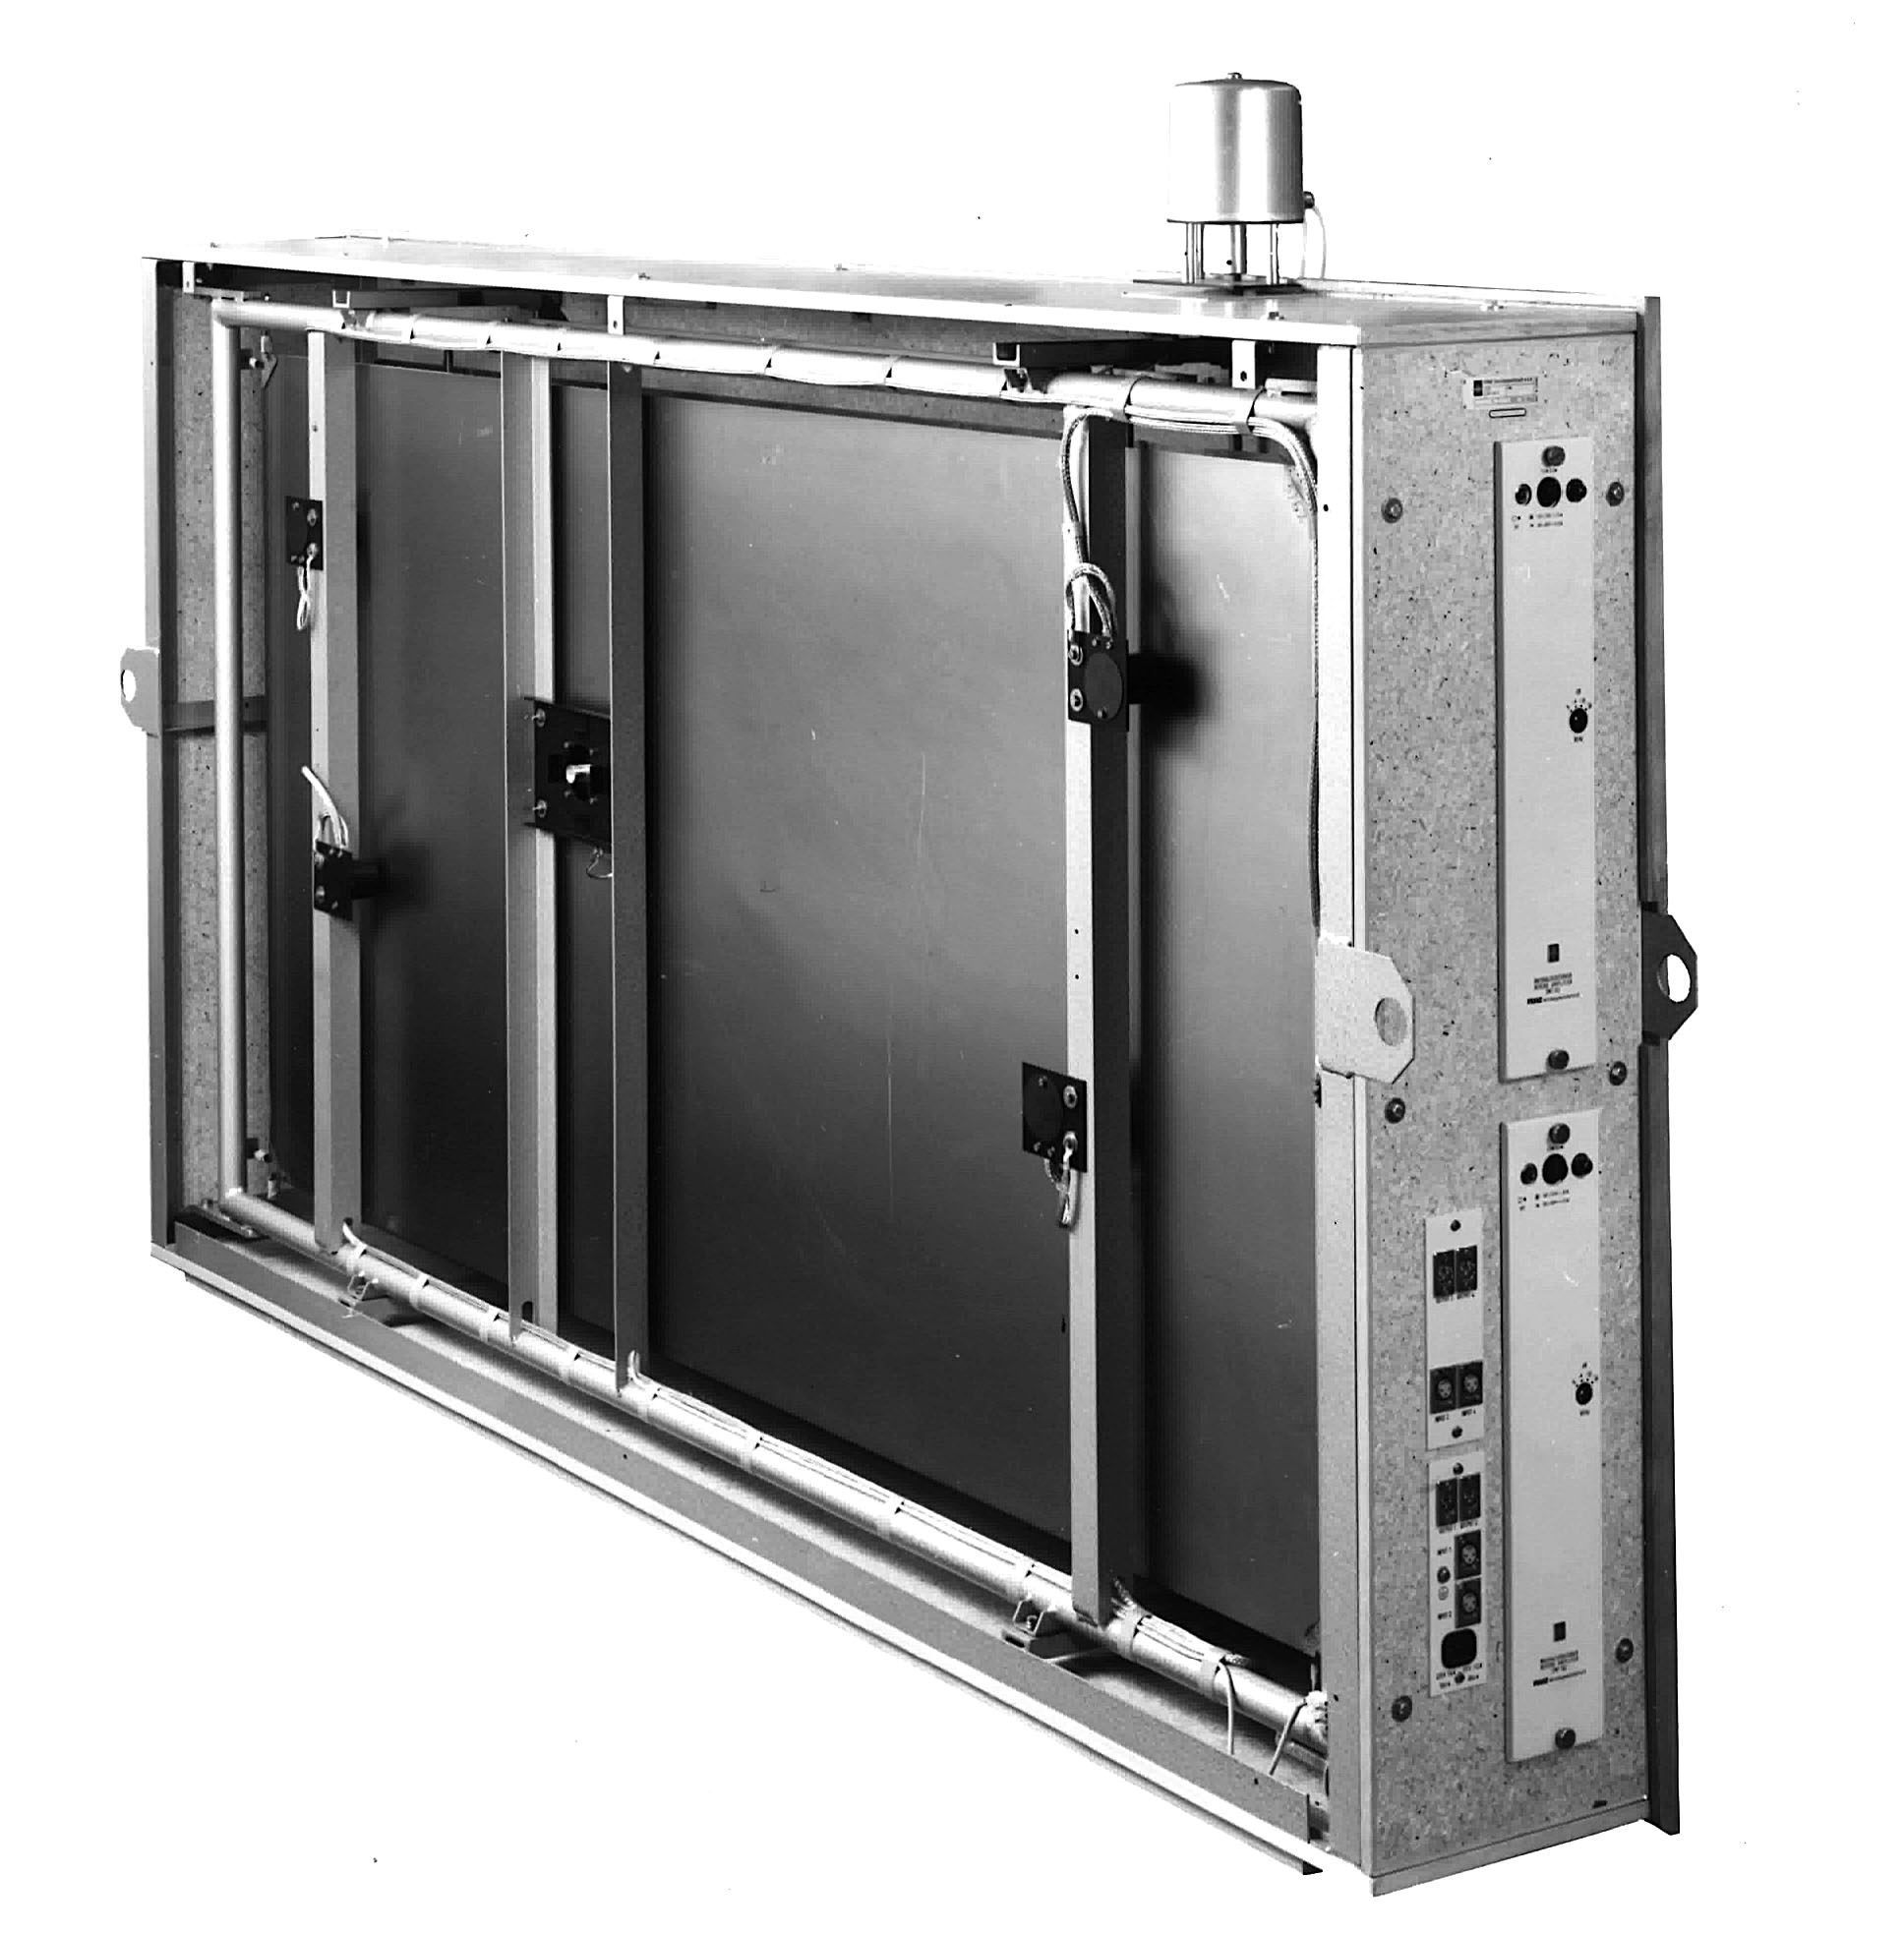
(EMT 140, photo by EMT-Archiv-Lahr)
3. Hall Reverb: The Illusion of Grandeur
A hall reverb emulates large, open spaces, featuring a longer decay time and more complex reflections. It’s perfect for creating depth and drama, but can easily overwhelm a mix if overused. Use it to:
- Establish a “venue” or acoustic environment that unifies the entire mix.
- Create a sense of awe or emotion during key moments (final chorus, bridge, outro).
- Place background elements (pads, strings, or ambient textures) far back.
- Push secondary vocal harmonies or backing vocals into the distance without losing them entirely.

4. Spring Reverb: The Vintage Edge
Spring reverb uses a physical spring to create reflections, resulting in a bright and often metallic character. It’s commonly found in guitar amps and vintage recording equipment. Use it to:
- Add a retro, surf-rock, or dub-inspired texture to guitars or synths.
- Create a sense of movement or “drip” in instrumental tracks.
- Emphasize high-end sparkle in clean guitar tones.

(photo by Ashley Pomeroy)
5. Digital Reverb: The Flexible Workhorse
Digital reverb generates reflections using mathematical models, offering a wide range of adjustable parameters. It’s highly customizable and CPU-friendly. Use it to:
- Craft unique, otherworldly spaces that don’t exist in reality.
- Fine-tune decay, diffusion, and early reflections for a tailored sound.
- Achieve consistency across different projects or sessions.
Understanding Reverb Layering as Spatial Sound Design
Layering reverbs is fundamentally about creating spatial hierarchy. Imagine your mix as a cube (more on that here):
- Room reverb places elements at the front.
- Plate reverb in the middle.
- Hall reverb at the back.
Each reverb type positions elements at different distances from the listener. Rather than applying one reverb to everything, you’re building a three-dimensional soundscape.
How to Layer Reverbs for a Cohesive 3D Space
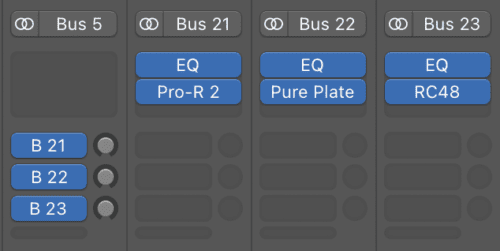
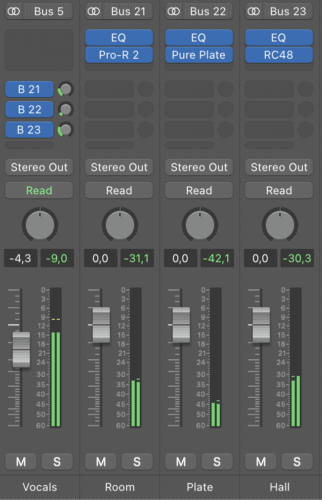
Step 1: Use Sends, Not Inserts
- Create busses or auxiliary sends (which are essentially the same in this context) and place one reverb type on each send. Using sends allows you to share the same reverb across multiple tracks, saving CPU and creating a more cohesive space.
- Route all instrument tracks to all reverb sends, but keep the send amount at 0% for now.
- For an even greater effect, you should add a long and a short reverb of each type to your project, but to avoid overcomplicating this article, we’ll use a single instance of each in the demonstration.
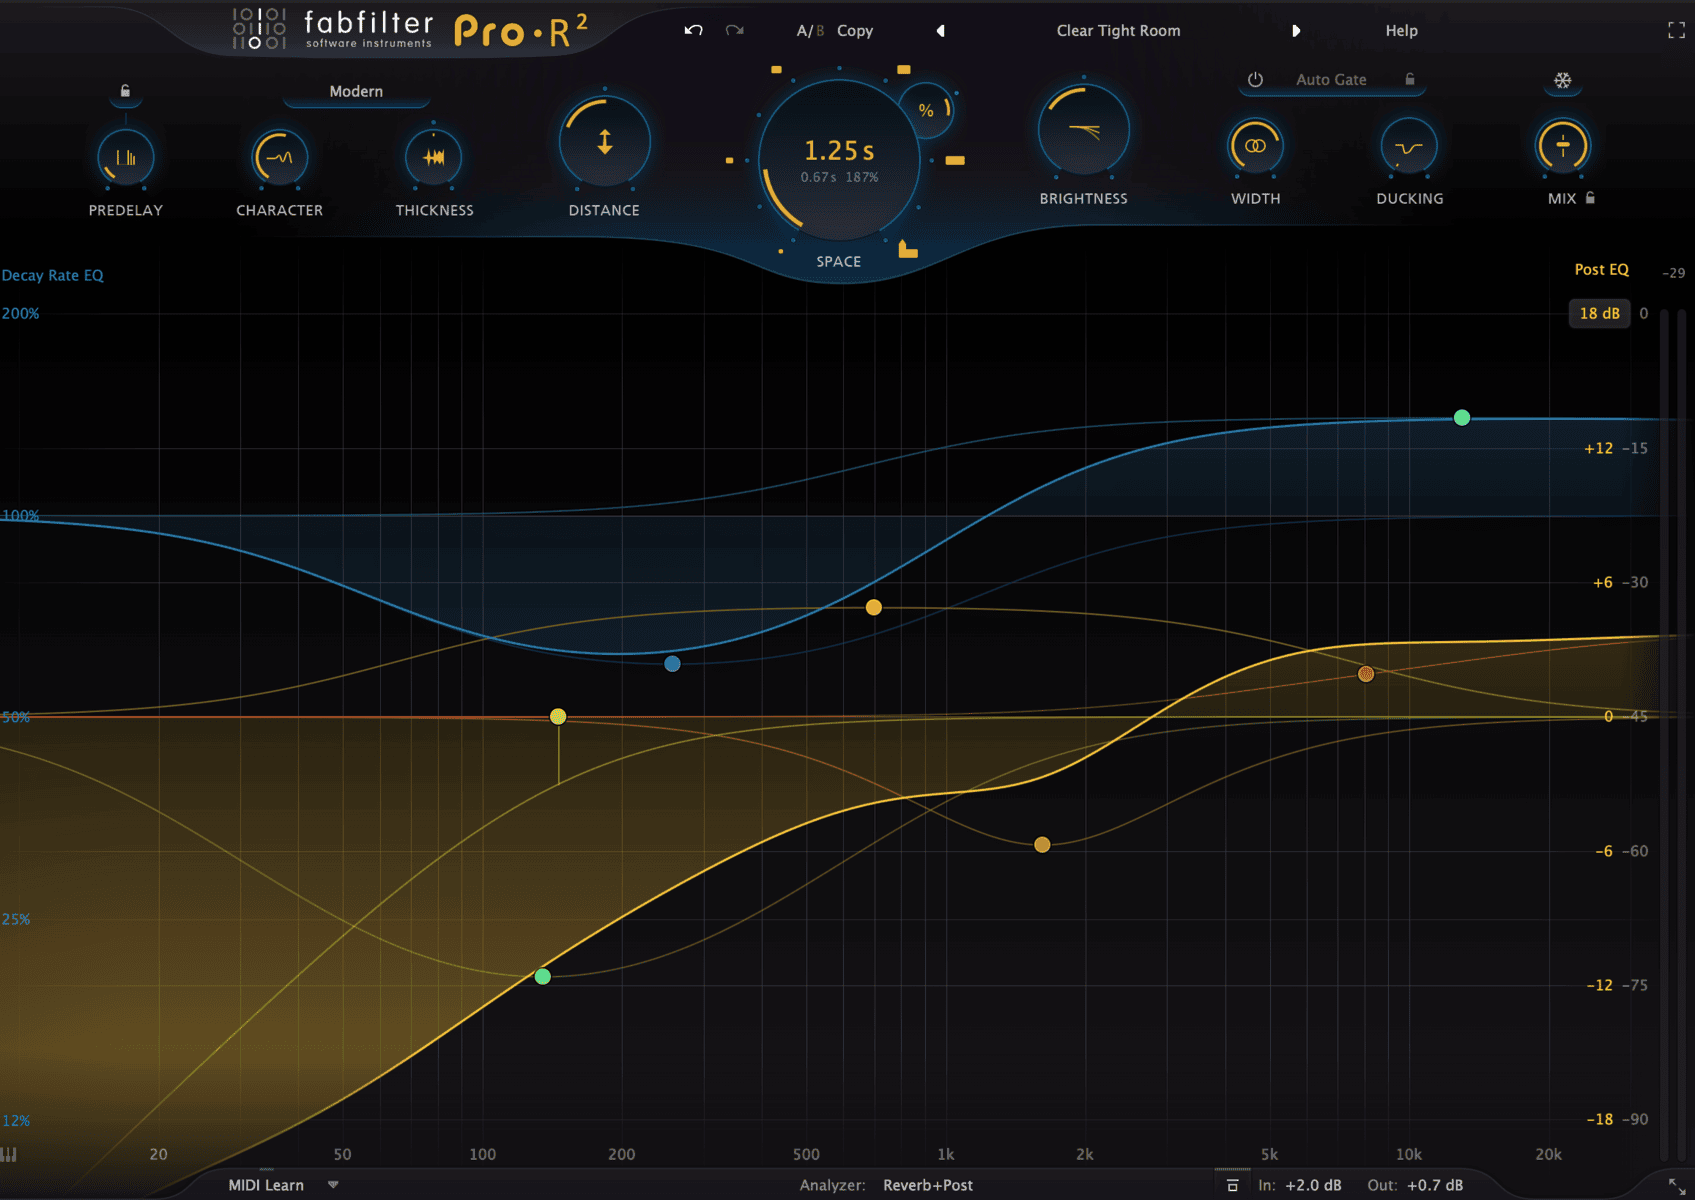
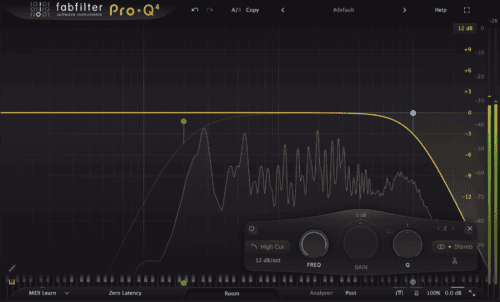
Step 2: EQ Each Reverb to Avoid Clashes
- Cut lows (below 200Hz) on plates and halls to prevent muddiness. The exact frequency depends on the mix and the reverb’s role.
- Tame harsh highs (usually above around 10kHz) on room reverbs to keep them natural.
- Further adjustments can be made later when you have audio running through them.
Step 3: Assign Primary Reverbs
- Start by assigning each instrument to its primary reverb type. For example:
- Room: Close elements (drums, vocals).
- Plate: Midrange texture (guitars, synths).
- Hall: Background depth (pads, effects).
- This is also where you’d further EQ each reverb send.
Step 4: Mix and Match
Once the primary reverbs are dialed in, experiment with layering additional reverb types for each instrument. For example, on a vocal:
- Close Room Reverb (main): Adds intimacy and places the vocal nicely in the mix.
- Plate Reverb (just a little): Thickens the midrange without muddying the low-end.
- Hall Reverb (automated amount): Places the vocal in a larger space during the chorus and bridge.

Step 5: Reference in Context
- Soloing reverbs can be misleading. Always check your mix in the full context of the track.
- Also compare your mix to commercially released tracks in your genre to ensure you’re not overdoing it.
Final Takeaway
This layering approach excels in genres requiring both intimacy and scale; pop vocals that feel present yet polished, rock mixes with defined drums but spacious guitars, orchestral arrangements where close soloists sit against distant pads.
Layering reverbs isn’t about piling on effects; it’s about creating a space where every element has its place. Remember, the goal isn’t to create a complex web of reverbs but to craft a space that feels natural and serves the emotional impact of the music. Start subtly, EQ carefully, and always serve the song.