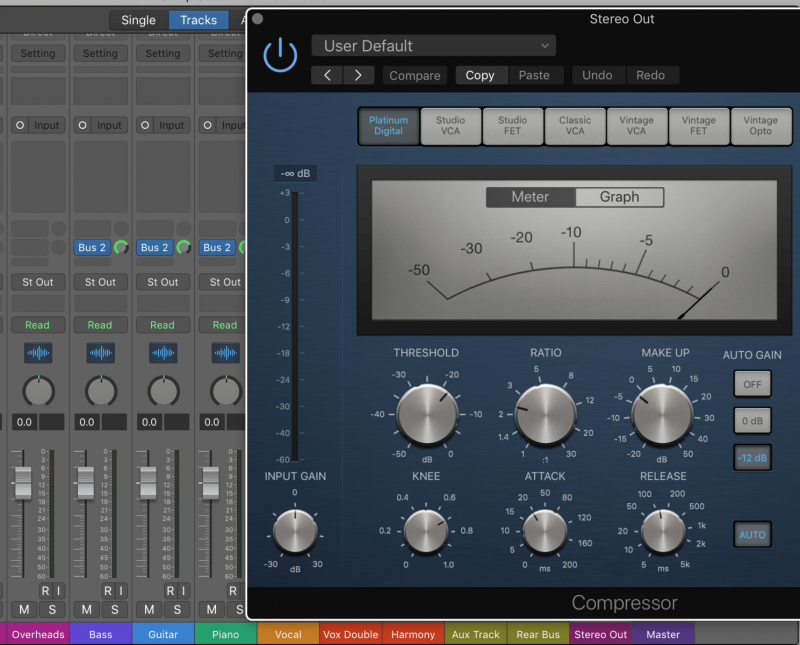
Want your mixes to sound full and more controlled? Compression is the foundation of a steady, professional sounding mix.
But it’s really easy to go overboard. If you aren’t careful, compression can make your instruments sound over-processed and flat.
In this complete guide, I’m going to teach 9 parallel compression hacks so you can get the most out of this incredible technique.
I’m guessing you’re here because you want to make your mixes sound professional. We put together a brief training that covers a totally new approach to music production. Until now, everyone has been teaching production totally backward. Just click below to watch.Get industry-quality every time (steal this framework)
But if you just want to learn about Parallel Compression specifically, keep reading.
What is Parallel Compression?
The key word here is parallel.
How do you usually compress an instrument? Slap a compressor on it, right?
Parallel compression works a little differently.
The old school way of compression is great, but sometimes you don’t want the whole thing to sound compressed.
With parallel compression, you duplicate a sound and only compress the duplicated version. So you end up with two different channels. Both of them are playing the same sound, but one’s compressed and the other isn’t.

But why is it so popular?
Tons of mixing engineers love parallel compression. And for good reason!
With parallel compression you can easily control the dynamics of an instrument without making it sound like it’s been compressed. In other words, it’s great at natural compression.
It’s also really helpful if you want to make an instrument punch through a mix. If you really crushing heavy parallel compression and mix it in lightly, then you can really highlight a track without making it too loud.
Whether you want natural sounding compression or obvious, energetic pumping, parallel compression is an incredible mixing tool.
How to Use Parallel Compression
First things first, you’ll need a track that you want to compress.

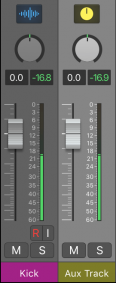
This kick drum sounds a little wimpy, so I’ll beef it up with some parallel compression.
Then, you’ll want to create an “aux channel” in your DAW.

Aux tracks are a lot like audio tracks, but you can’t record to them. Instead you send the audio from another channel to them.
In other words, aux tracks play an exact copy of other channels in your DAW.
Next, go to the audio track you’re trying to duplicate. Add a send.

Make sure your send’s output is set as your new aux track.
If you aren’t sure how aux tracks work, google your DAW’s name followed by “create aux track.” That should help you find what you need!
Turn up the send’s volume and you should have two different tracks playing the same sound!
Next, add a compressor. This is where you’ll actually set the compressor and make sure it sounds nice.
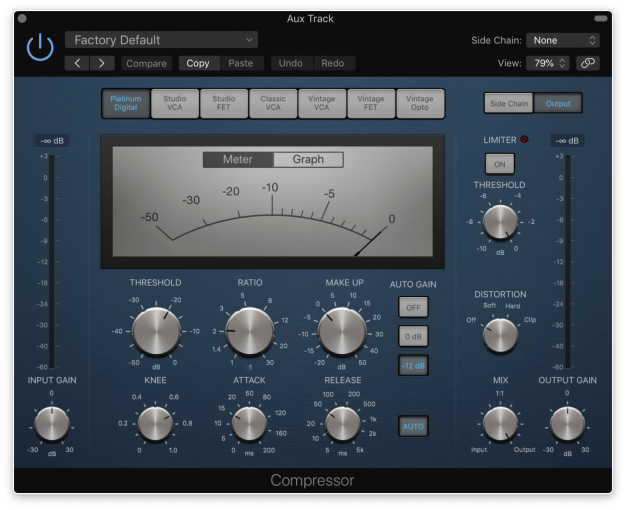
The 3 Ways to Use a Compressor
There are 3 different ways to use a compressor. So how you set a compressor depends on what you’re trying to do.
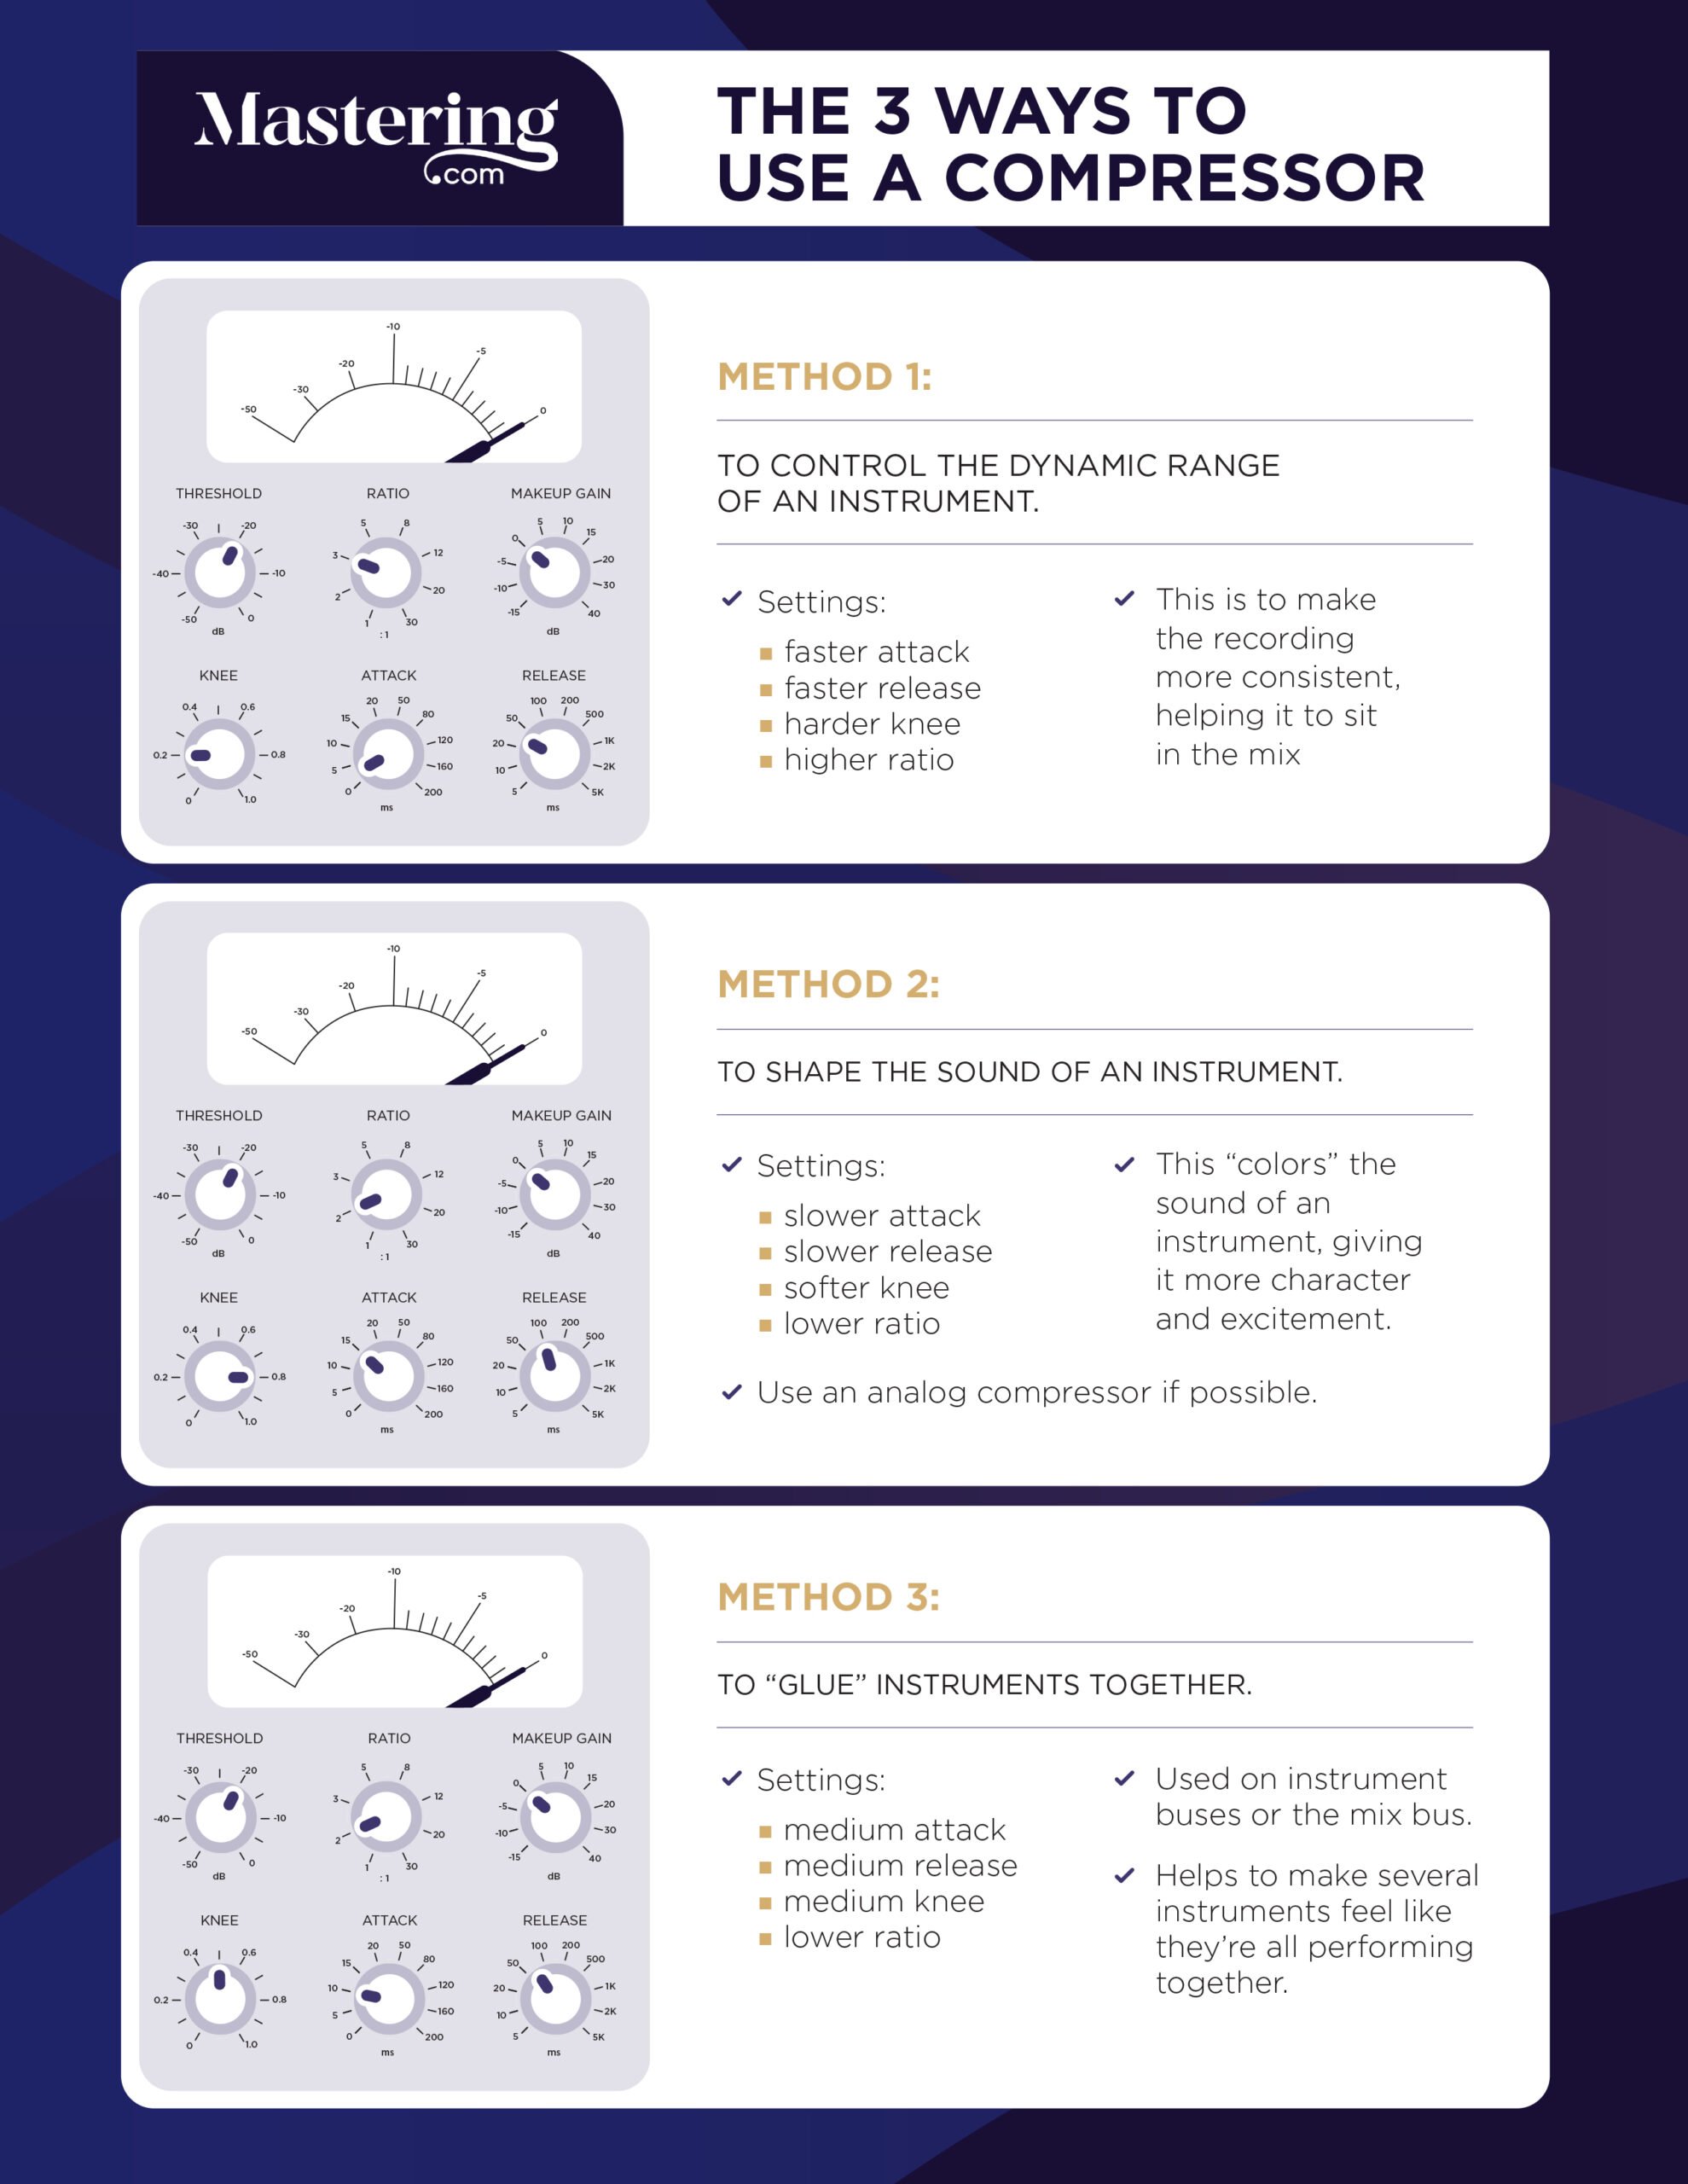
The settings you’d choose to glue tracks together are totally different than the ones you’d use for dynamic control.
Which brings us to our first hack:
Hack #1: Natural Sounding Dynamic Control
Parallel compression is perfect for controlling the dynamics of a sound without making it sound unnatural.
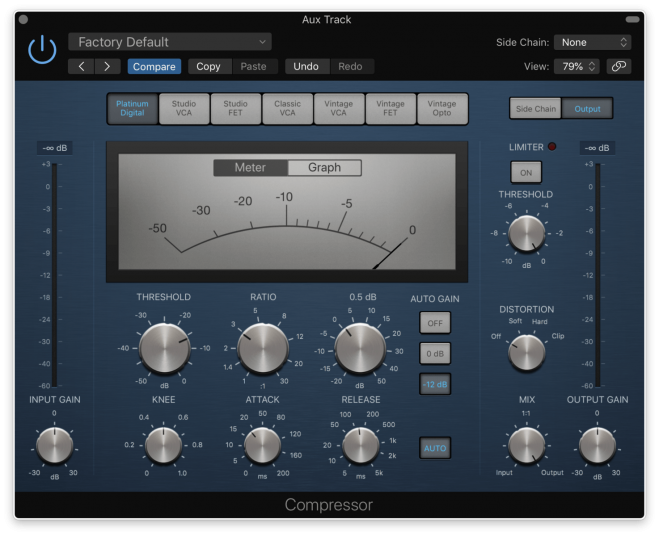
Here are some solid settings to start with.
- Ratio: 3:1
- Threshold: As low as possible in most cases, with the compressor releasing towards the end of sustained notes. Pay attention to your meter! For subtle compression you’ll want 3-5 dB’s of gain reduction.
- Attack Time: Fast for thickness (2ms or less), slow for punchiness (10ms or more) When in doubt, stick with something on the slow side.
- Release Time: Auto or slow (above 100ms). It also helps if the release is timed to the song’s tempo. This bpm to milliseconds calculator will help you hone in on a good release time
- Gain: You want it to be about as loud as it is with the compressor turned off. Bring the gain up until it’s about as loud as it was before.
Don’t feel like you need to stick with these exact settings, they’re just a starting point.
Hack #2: Beef Up Your Tone with Aggressive Compression
This technique is also great at getting some really intense compression. If your making something harsh and abrasive, this next hack is for you.
Set the compressor to be really intense. This’ll give your track some extra “umph.”
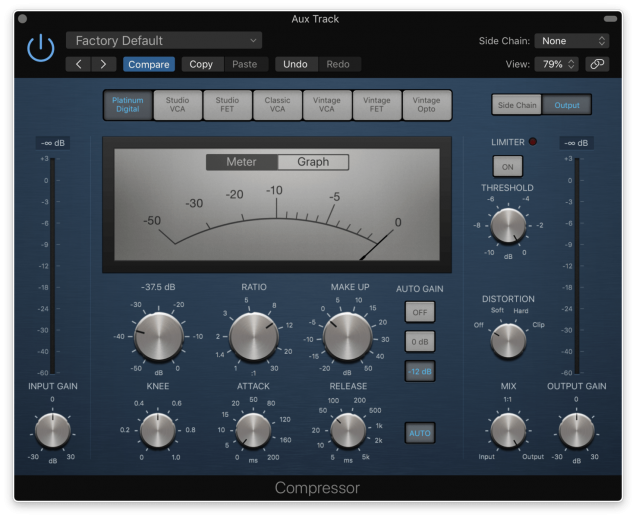
- Ratio: Can get pretty wild. Experiment with anything from 8:1 to 20:1. I know, that sounds ridiculous. But you’re mixing it in lightly, so it won’t sound terrible in the actual mix.
- Threshold: You’re aiming for 5-15 dB’s of gain reduction. As you dial in your threshold, watch your compressor’s meter for something in that range.
- Attack Time: When you’re going for aggressive parallel compression, you’ll usually want a fast attack. Something below 2 ms.
- Release Time: The release for aggressive parallel compression is often fairly short. Start with something around 60 ms and tweak it until it sounds good.
- Gain: You want it to be about as loud as it is with the compressor turned off. Bring the gain up until it’s about as loud as it was before.
Hack #3: Perfect Volume
Getting a good tone with your compressor is important. But without this next trick, your mix will implode.
You need to turn the aux track’s volume down so it’s balanced with the uncompressed track.

I recommend turning the aux track’s volume all the way down and then slowly turning it up. Once you notice an increase in volume, turn the volume back down a touch.
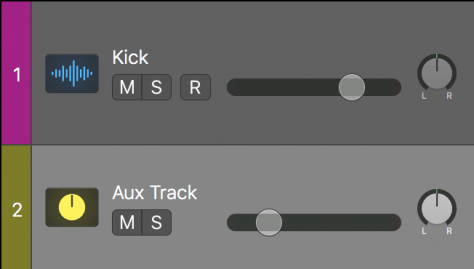
This should be the perfect level.
Now mute the aux channel. Listen to how the sound changes.
Bring the aux channel back in. Muting and unmuting like this should help you figure out if the changes you’ve made are an improvement.
Hack #4: Keep Your Mix Nice and Balanced
This one goes hand in hand with the last. But this time you’re making sure the instrument(s) you’ve compressed are balanced with the rest of your mix.
Let’s go back in time a little bit, before you’ve even created an aux track. For this next hack to work you’ll need to get your static mix down before using any compression.
Add a loudness meter to your master bus. This’ll let you see how loud your song actually is.
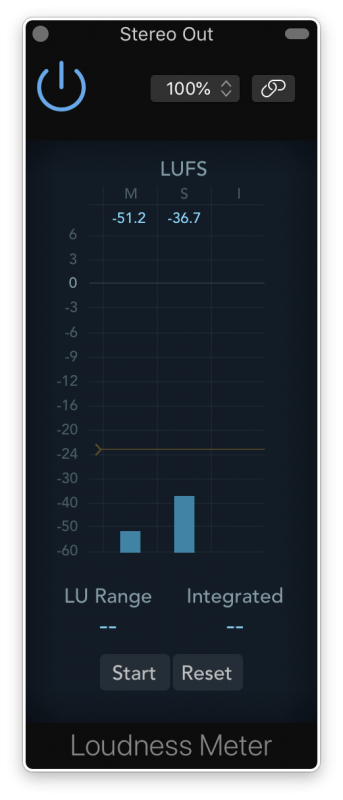
Then, solo the instrument you want to compress. Check your loudness meter and make a note of the instrument’s volume.
Once you’ve added your parallel compression and balanced the two tracks with each other, solo both of them.
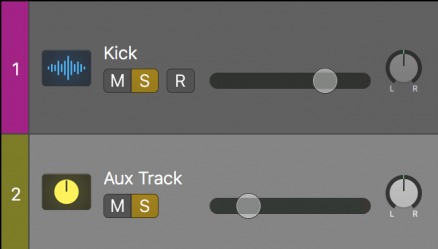
Look at your loudness meter and see how loud the instrument is now. If it’s louder than it used to be, turn it back down.
Be careful though! Just turning the fader down will also cause your compressor to compress less.
To make sure you don’t mess up your compression settings, put a gain plugin at the end of your plugin chain. If you need to turn the instrument up or down, use this.

You’ll also want to make sure your send is set to “pre-fader.” This means the aux channel’s volume isn’t affected by any changes you make to the original channel’s fader.
Parallel compression can throw your mix into chaos by making the compressed instrument louder. But this hack will keep your mix perfectly balanced!

Bonus Tip: Gain Automation
If you’re going to automate the sound you’re compressing, you need to be careful. Follow the steps in this video:
Hack #5: Getting a Killer Vocal Sound

First off, decide what kind of compression you want on the vocals:
- Natural, subtle control that brings the vocals further forward.
- Vocals that sound compressed, adding excitement and aggression.
If you’re answer is number one, try the compression settings from Hack #1. If number 2 is more your speed, check out Hack #2.
If you want to add excitement and aggression, experiment with adding EQ or saturation to the parallel channel. Try boosting the top end with a high shelf, boosting the upper mids or adding heavy saturation (the Softube Saturation Knob is a great free saturation plugin).

Hack #6: Drums That’ll Make You Swoon
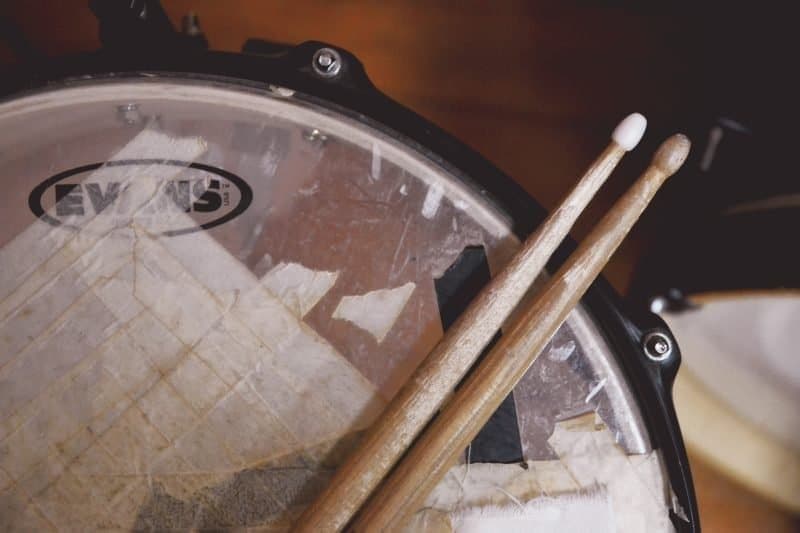
If you want your drums to sound punchier and more impactful, parallel compression may be the answer.
First add sends on all of your drum tracks and send them to your parallel compression track.
Generally, you want to send more of the kick, snare and toms than the overheads. Parallel kick compression can sound incredible.
Heavy parallel compression on the overheads can sound weird. You might notice the compressor pumping as the cymbals ring out. Still, try sending a small amount of overhead.
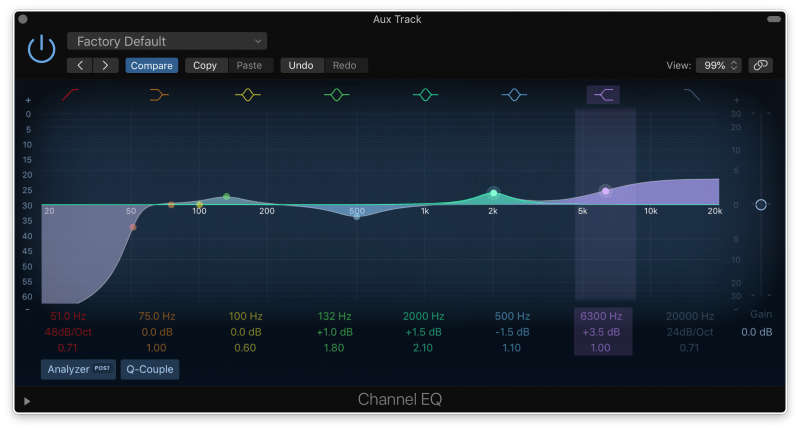
Again, experiment with EQ on the parallel channel. Try adding heavy top end and low end boosts – or cuts to the mids. Just make sure you add a high-pass filter around 50Hz to stop the low end from getting out of control.
UPDATE: We released a great video showing some parallel drum compression tricks:
Hack #7: Liven Up the Mix Bus
You can even use parallel compression on your entire mix.
When done well, this can add thickness and character to a mix. But it has to be subtle!
Create a send from your mix bus to a new stereo aux. Start with the settings from hack #1 and the volume technique from hack #3.
Remember, you might just be making the track louder. So spend plenty of time muting and un-muting the parallel channel to make sure you’ve actually improved the mix.
If your DAW won’t let you create sends from the mix bus, put a compressor with a “mix” knob at the end of the mix bus plugin chain.
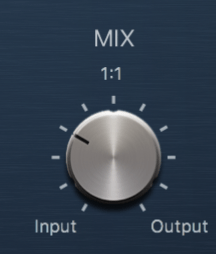
This knob lets you mix in as much of the compressed signal as you want. Basically, it’s a different way to do parallel compression
The higher the number, the of the compressed version is being mixed in. Just turn the knob up a little bit until it’s sounding the way you want.
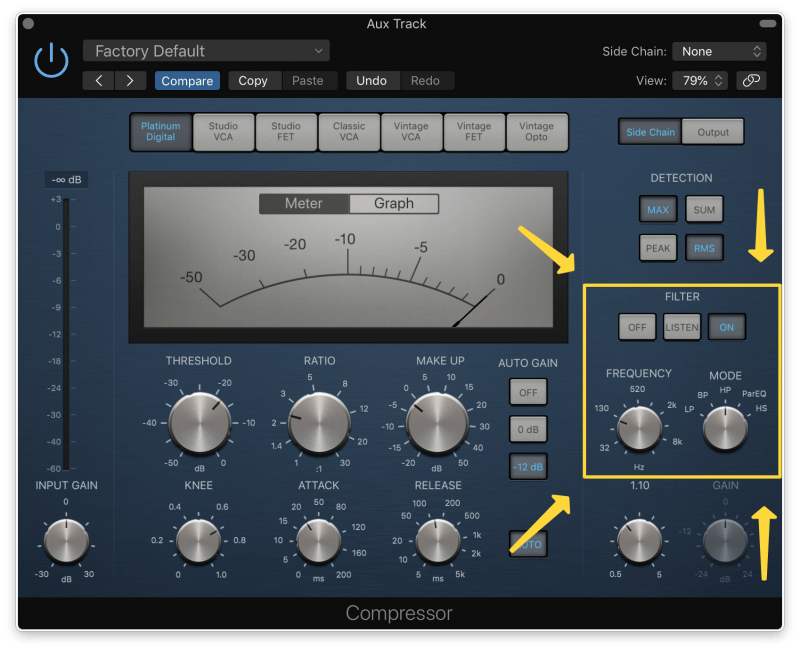
If your compressor has a high pass filter (HPF) turn it on and set it around 100 Hz. This’ll make sure the low frequencies aren’t being compressed, which’ll keep your mix from pumping.
Hack #8: The Secret “Rear Bus” Technique
This is a slight variation of mix bus compression.
Instead of compressing the entire mix, create a new aux track and send everything BUT the drum kit there.
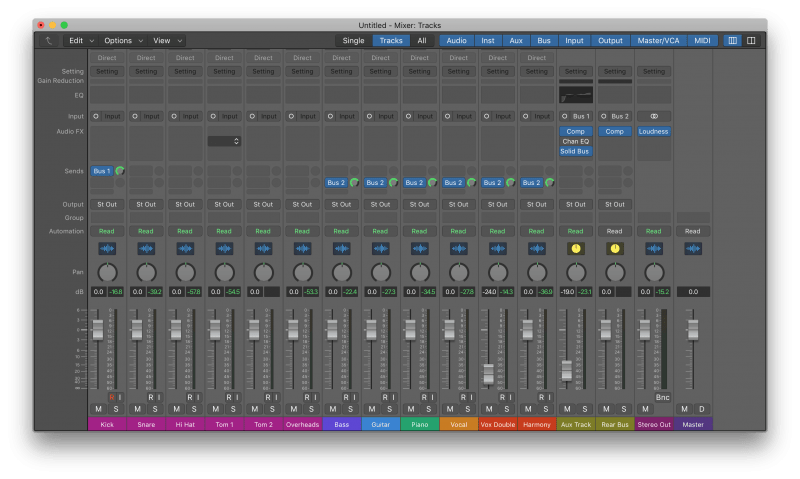
Set all of the sends to 0dB. Now you’ll be getting an exact replica of your mix minus the drum kit.
These guidelines for setting mix bus compression should come in handy:
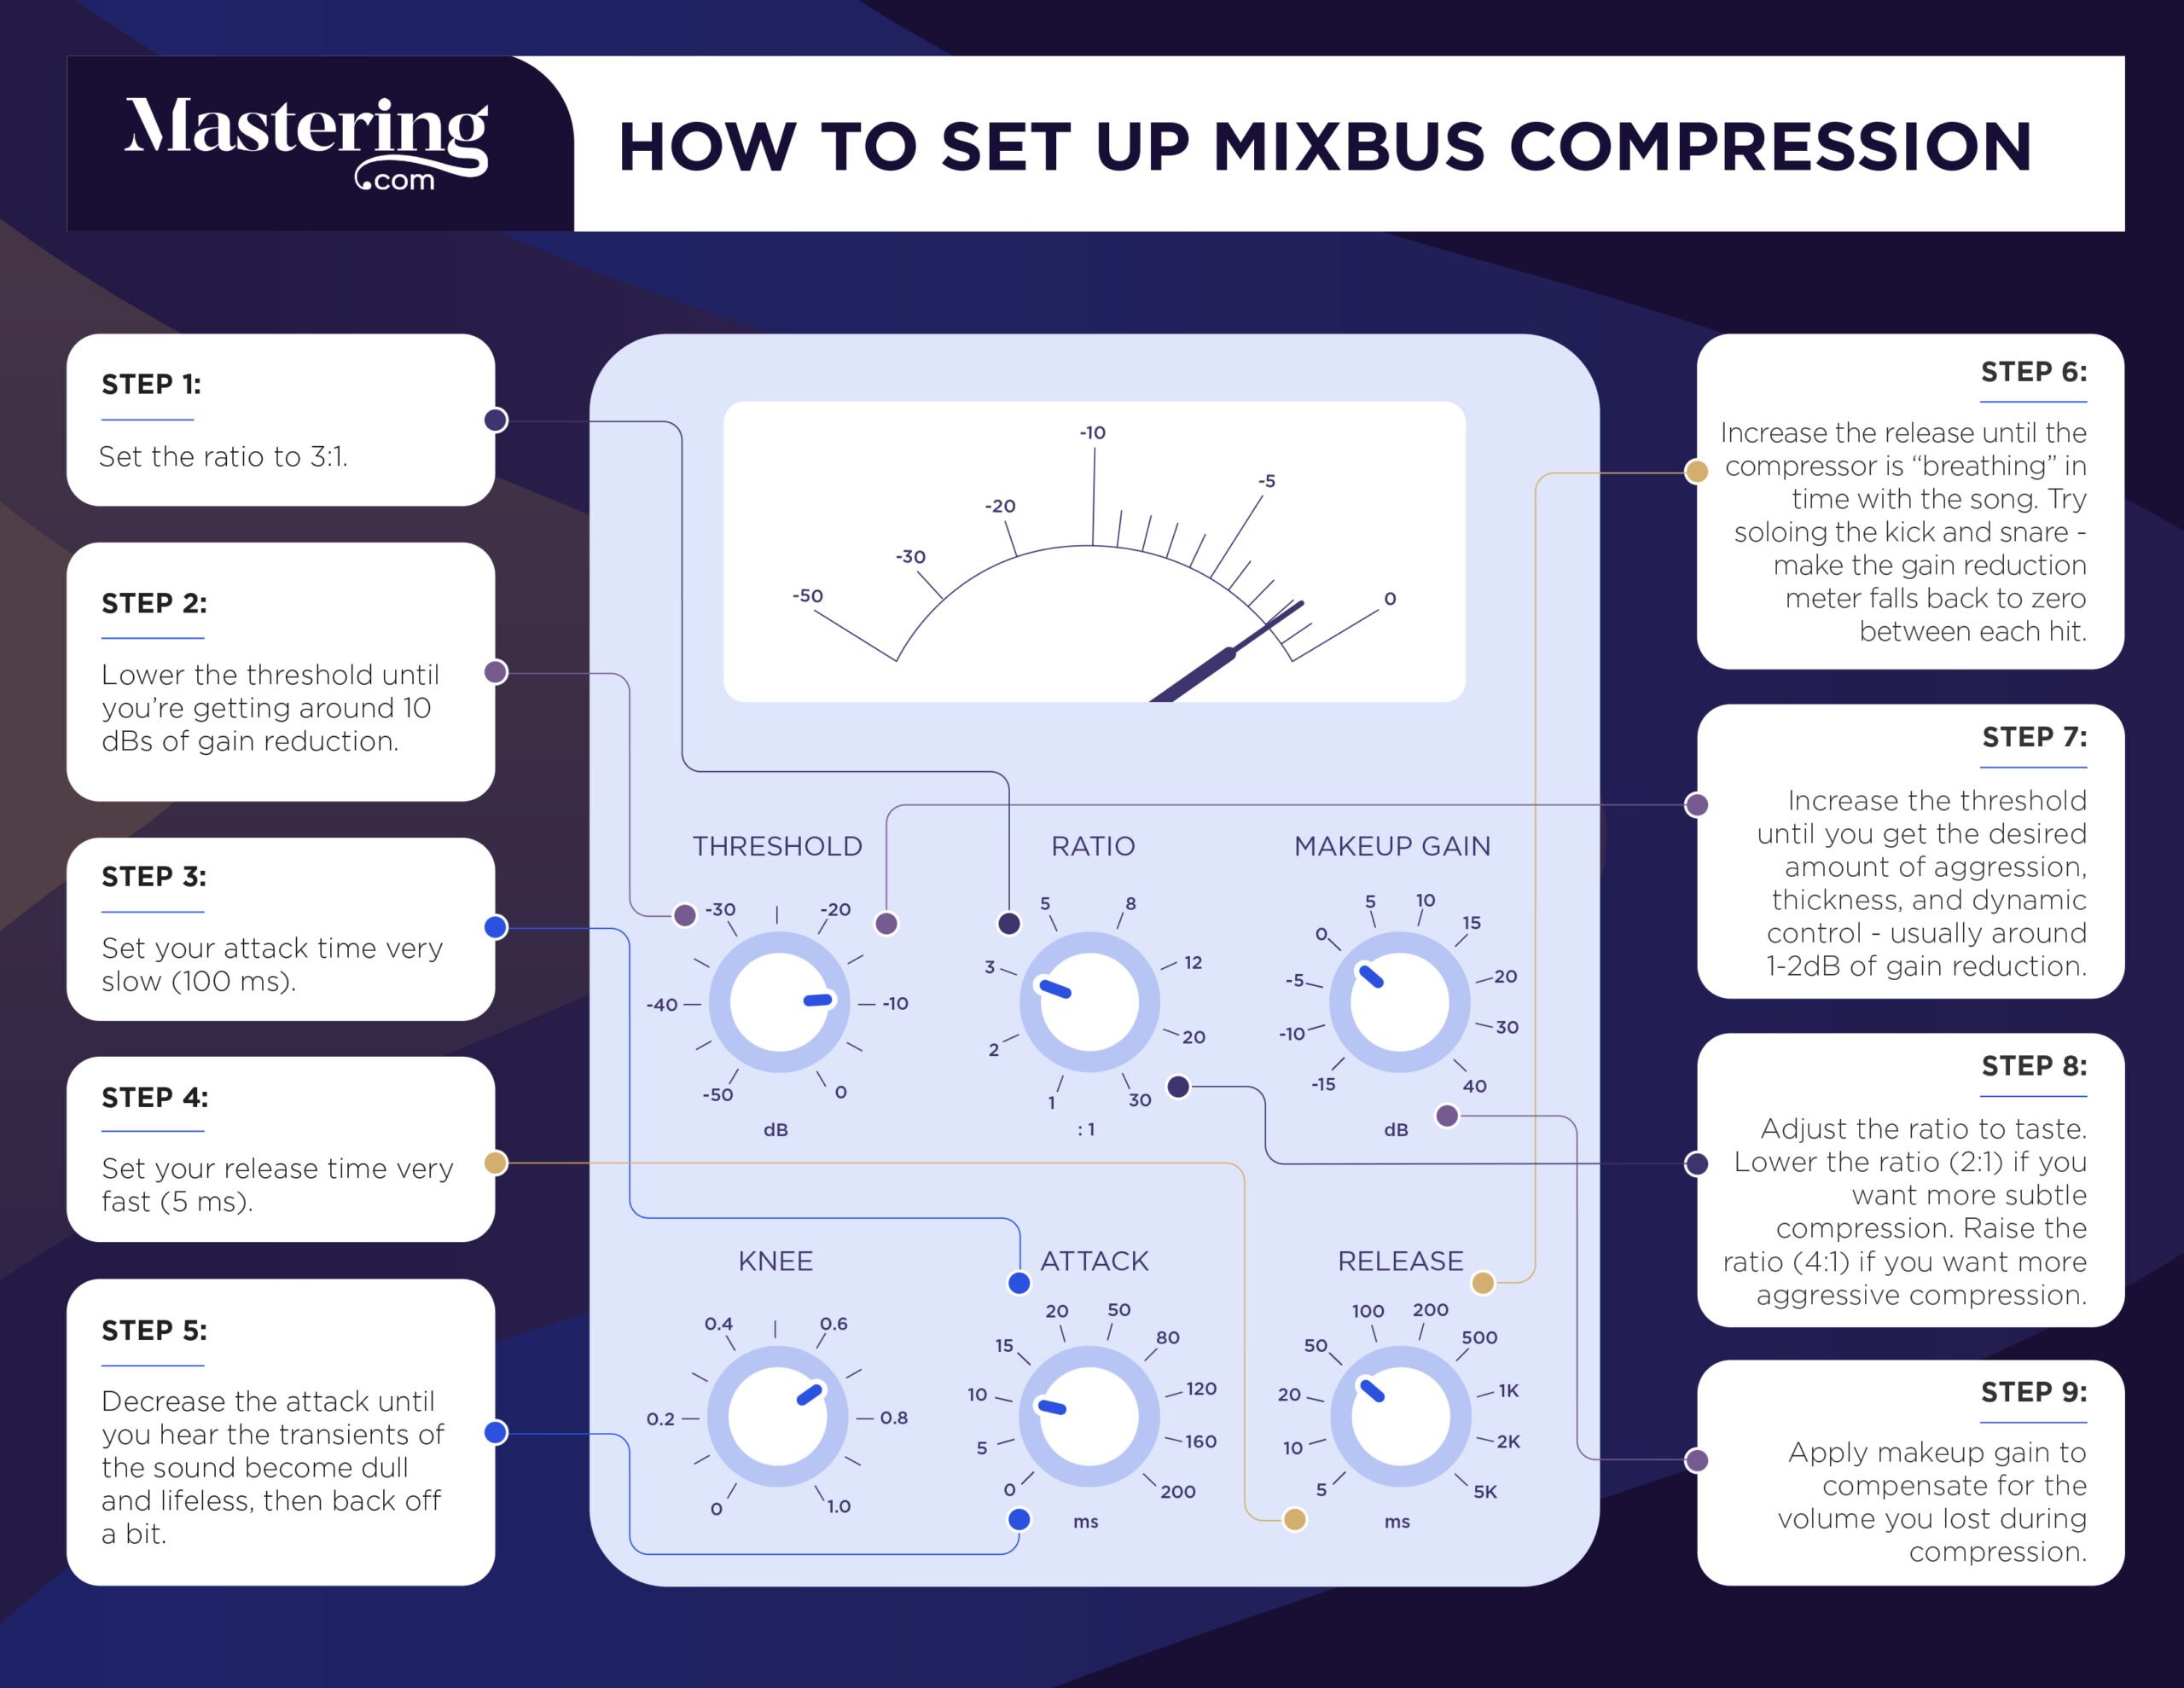
This time, a higher threshold might sound more musical. It’s up to you. You might want a slower attack time as well.
Drums tend to catch compressors more than the rest of the mix. So compressing everything but the drums will help the rest of the mix cut through.
For example, when the vocals come in, everything (except the drums) will get compressed as the vocals trigger the compressor. But then when the vocal drops out, the compressor stops clamping down as much – because the vocal is generally the loudest part of a mix.
One Last Tip: Make Any Instrument Sound Great in the Mix

Subtle parallel compression doesn’t only work well on vocals or drums.
Sometimes, you might want to control an instrument’s volume without making it too obvious. Parallel compression’s a great way to keep a sound natural while putting it “in the pocket.”
Plus, it just sounds different. Sometimes it works better than direct compression.
Just don’t forget to mix it in quietly. This technique works because it’s subtle, it’s not supposed to be in your face.
Get creative with it. Try it on guitars, backing vocals, voice overs, keys… anything!
UPDATE: We just released a great video about how parallel compression could be hurting your mixes instead of helping them:
What Will You Try First?
This is an incredibly versatile technique that many mix engineers heavily rely on. Some people perform the majority of their processing in parallel.
Apply what you have learned in this guide, but also don’t be afraid to try out new things.
That’s how you develop your own style!
Just try to keep it subtle until you are confident in your decisions.
If you want to dig deeper into music production and learn what it actually takes to make mixes that sound pro… And you’re an intermediate or advanced producer… Be sure to check out the free masterclass: Enjoy!Next Steps

