Picture this: You’ve nailed your mix. But when you play it back-to-back with some of your favourite songs, . That’s where mastering comes in.
Mastering is all about ready for release. This is not the time to fix major issues, as those should be handled before you start mastering.
But how do you make sure you stay focused on enhancing clarity, balance, and loudness rather than rabbit-holing into fixing issues that should have been fixed in the mix or maybe even all the way back at the recording stage?
At mastering.com, we believe in frameworks and checklists. From our top-of-the-line “The Reverse Engineer” program to our cheat sheet binders, we help students achieve
Today, I want to briefly run through our mastering framework together so you can finish quality records with consistency.
Step 1 – Initial Observation: Is Your Track Ready?
Before you start with any processing, ask yourself:
1a) Is the track ready?
Ensure your mix is balanced, with no glaring issues in
1b) Are there major problems?
This can be anything from polarity or mono compatibility issues to a pop sound caused by automation lanes or cutted audio clips. If there are any issues, revisit the mix and fix the issue there.
1c) How does your track compare against your reference?
Here, we import a professionally mastered track in a similar style to your track into your DAW and compare. All you need is a professionally mixed and mastered track in a similar vibe and style to what you’re mastering. The closer the reference matches your track in tone and instrumentation, the more useful it will be.
. Focus on where the kick hits in the frequency spectrum, how the vocals sit in the mix, and how wide the mix feels. Alongside your ears, you can also use the frequency spectrum with SC input on the Pro-Q by FabFilter or Tonal Balance by iZotope.
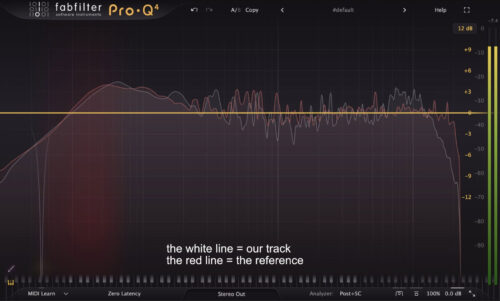
Learn more about using reference tracks.
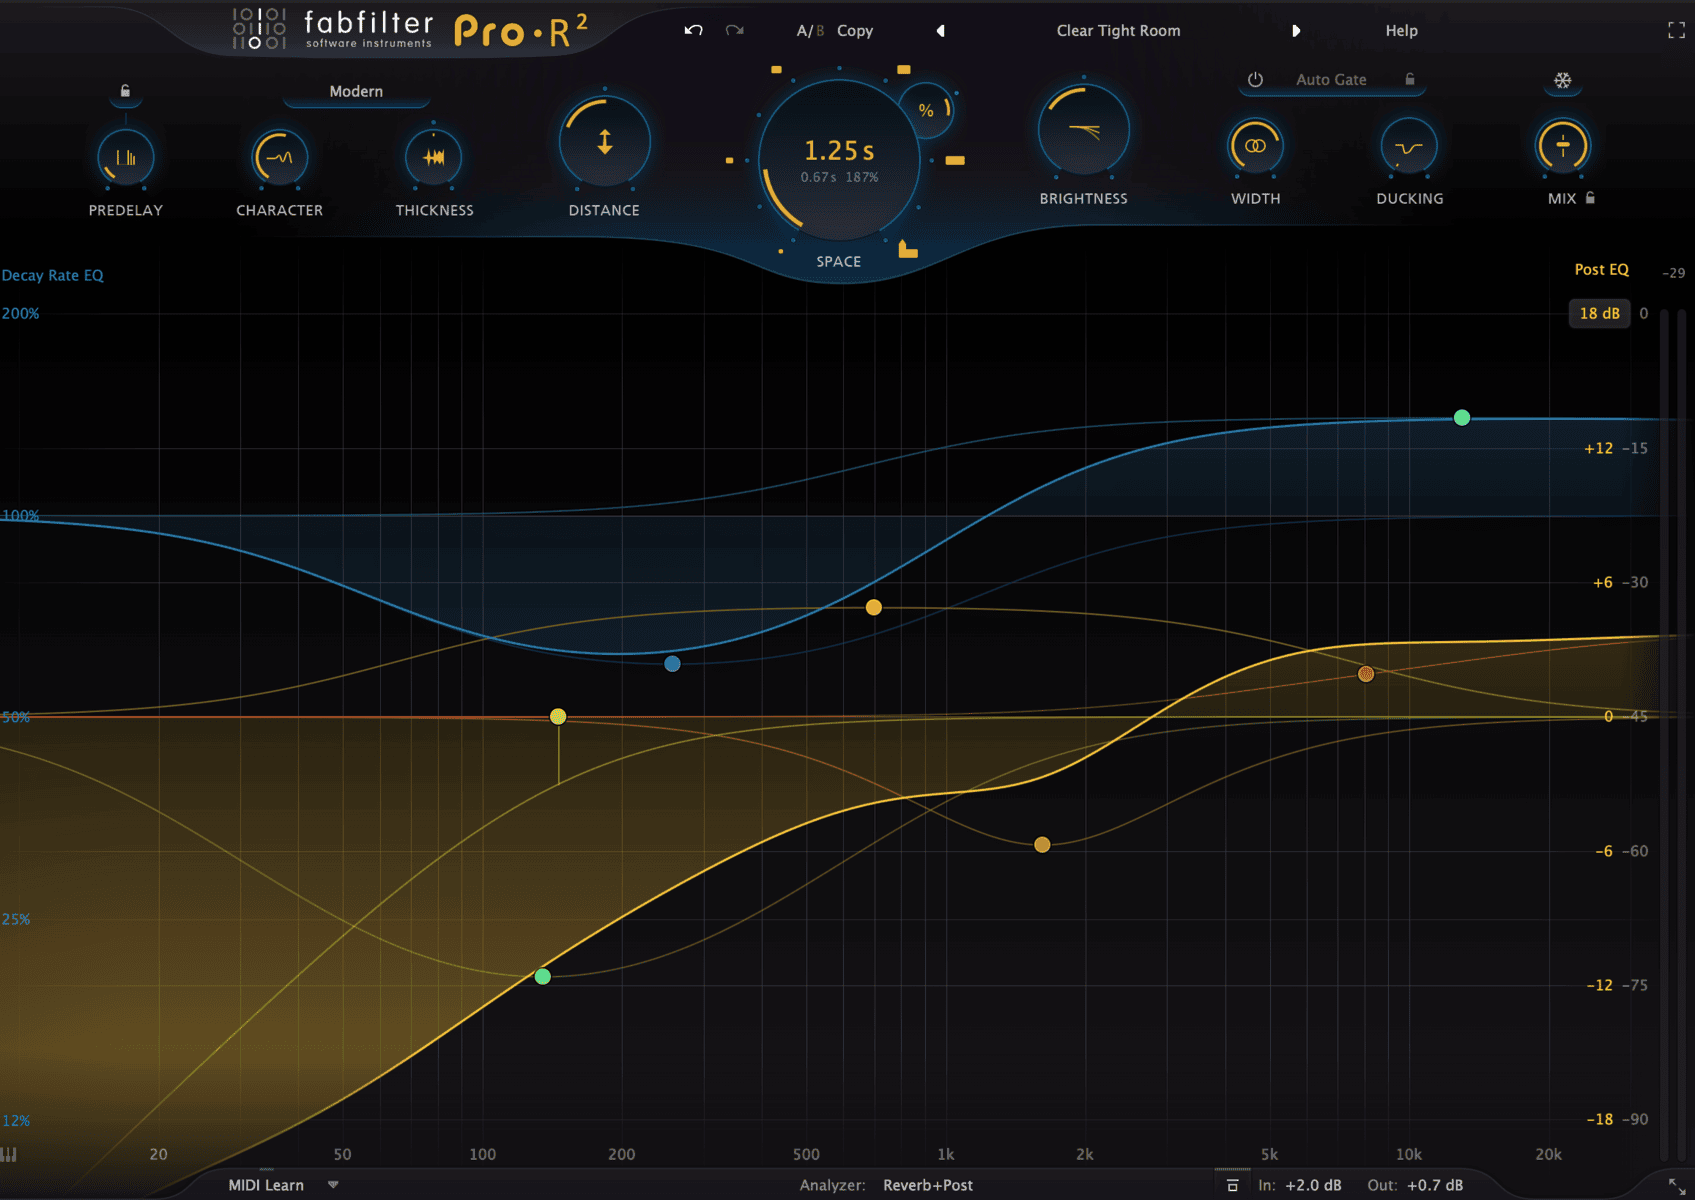
Step 2 – Frequency: Surgical and Tonal Adjustments
When you’ve passed the initial observation, it’s time to dive into the real work, starting with EQ. Think of EQ like using a magnifying glass. You’re zooming in to gently smooth harshness, tame muddiness, or add a touch of air and clarity. A dB here, half a dB there. Those moves might feel tiny, but they make all the difference in bringing a track from good to great without losing balance.
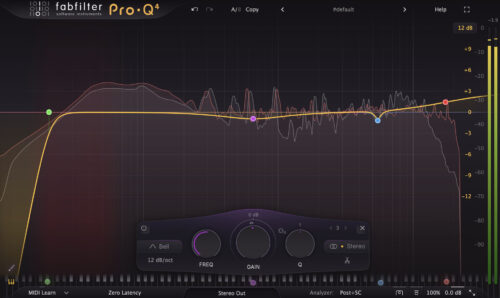
2a) Graphical EQ (e.g. Pro-Q)
First, we use a Graphical EQ for surgical fixes, such as cutting harsh frequencies or resonances.
2b) Tonal EQ (e.g. Pultec)
Then we use a Tonal EQ to enhance the overall tone, but only if needed. Here you can b.

Learn more about using EQ in mastering.
Step 3 – Dynamics: Taming, Gluing and Achieving Loudness
In step 3, we move on to the dynamic processors. In this step, the main objective is to achieve loudness by reducing peaks. Additionally, we can use compression to “glue” the track together or to make it sound more aggressive by employing various compression techniques.
3a) Tame transient peaks
Use the clipper to reduce the compressor and limiter’s workload. Using a clipper can also add some nice .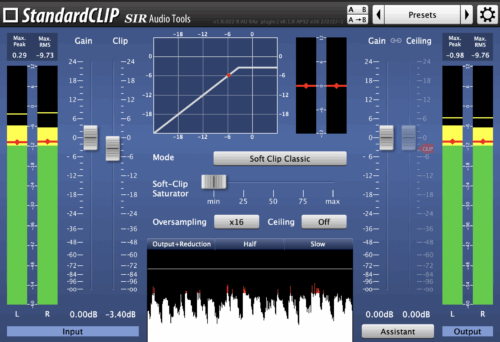
3b) Sculpt the sound with compression
Apply gentle compression to glue the track together or add some extra punch, depending on what the track needs.
- Is the reference less punchy than the final mix? Use the following settings to add more glue to your track:
- Fast Attack & Slow Release
- Low ratio of 1.5:1
- High gain reduction of 3dB. The Needle should bounce with the track between 3 and 1dB.
- Is the reference punchier than the final mix? Use these settings to make your track punchier:
- Slow Attack & Fast Release
- High ratio of 3:1
- Low gain reduction of 1dB. The needle should hit 0 in between beats.
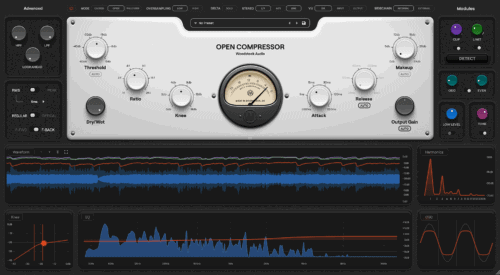
3c) Responsibly pump up the volume
Use a Maximizer/Limiter to achieve industry-standard loudness by reducing the dynamic range and boosting the gain, a. How loud you should push a track is very genre-dependent, but we found that this range is around where you should be. You should also set the ceiling to -0.5 dB to avoid clipping on streaming services.
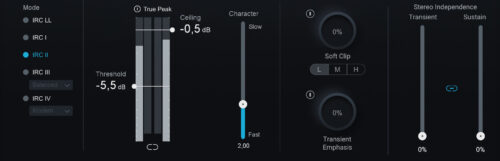
Learn more about compression techniques as well as clippers and limiters.
Step 4 – Final Observation: Are You in the Ballpark?
After your first round of going through these steps, compare your mastered track to your references again and check:
- Does my track sonically match the tonal balance and clarity of the references?
- Does my track dynamically feel as punchy and open as the references?
Feel free to go back and tweak your master based on your references or client feedback, but keep each session under 15 minutes. Spending too much time on a single track can cloud your judgment and reduce objectivity.
To summarize
Mastering is the art of adding the finishing touches to your mix: Enhancing clarity, balance, and loudness, following these 4 steps:
Step 1: Assess the mix for technical readiness and compare its tonal balance, dynamics, and width against a professionally mastered reference track to identify necessary enhancements.
Step 2: Use surgical EQ to remove harsh resonances and tonal EQ to subtly enhance warmth or clarity without disrupting the overall balance.
Step 3: Control transient peaks with a clipper, apply gentle compression for “glue” or punch, and use a limiter to reach industry-standard loudness levels.
Step 4: Perform a final comparison against your reference track to ensure sonic consistency and make quick, objective adjustments to avoid over-processing.
By following these four steps, you will be able to consistently deliver high-quality masters with ease.