Gain staging is one of the most important steps to getting a pro sounding mix.
But it’s easy to get wrong!
That’s why I’ve put together this list of 9 gain staging secrets. These’ll help you get the most out of each mix.
I’m guessing you’re here because you want to make your mixes sound professional. We put together a brief training that covers a totally new approach to music production. Until now, everyone has been teaching production totally backward. Just click below to watch.Get industry-quality every time (steal this framework)
But if you just want to learn about gain staging specifically, keep reading.
What Gain Staging Mistakes Are You Making?
Why is it So Important?
The name “gain staging” sounds fancy, but it’s actually very simple.
It just making sure the volume of your tracks is set well. You’re looking at all of your instruments and making sure there loud enough to be heard clearly, but not so loud that they’re distorting.

Whether you’re recording or mixing, gain staging is a crucial step to making your song sound professional.
Turn up an instrument that was recorded too quietly and you’ll get a lot of extra noise with it. If an instrument is too loud, it’ll start distorting.
Your song will sound muddier and quieter than those on the radio.

It’s super important for getting a professional sounding sound.
By following the techniques in this article, you’ll be one step to getting top notch mixes every time!
How Gain Staging Works
But how does it work?
First we’ll look at how it can help while recording and then we’ll talk about using it before you mix.
For Recording…

You’ll want to make sure everything you record is the right volume. If your recordings are too soft or loud, you’ll run into unwanted surprises in the mix.
So make sure you set the preamp properly before you start recording. You want the volume to hover around -18 dBFS.
The channel’s meter in your DAW will have numbers next to it. That’s how loud the channel is in dBFS.

For Mixing…
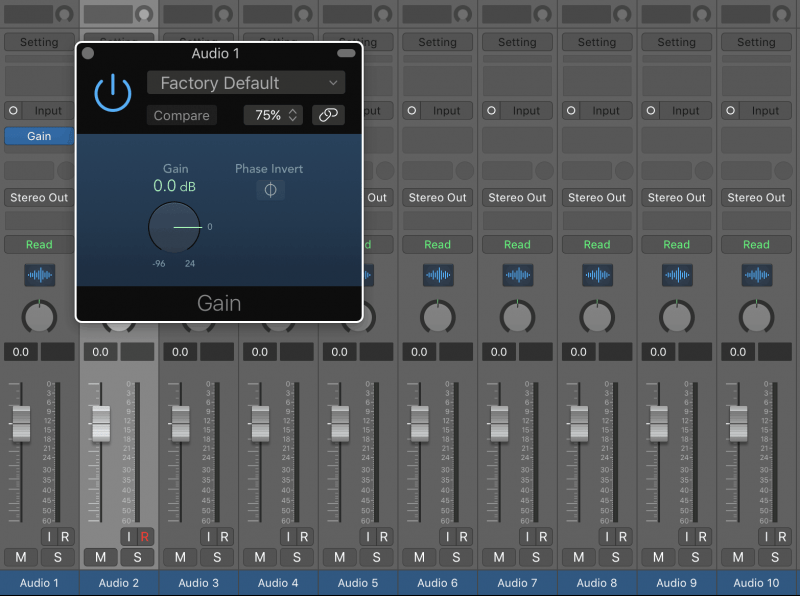
Go in and add gain or trim plugins at the top of your plugin chain.

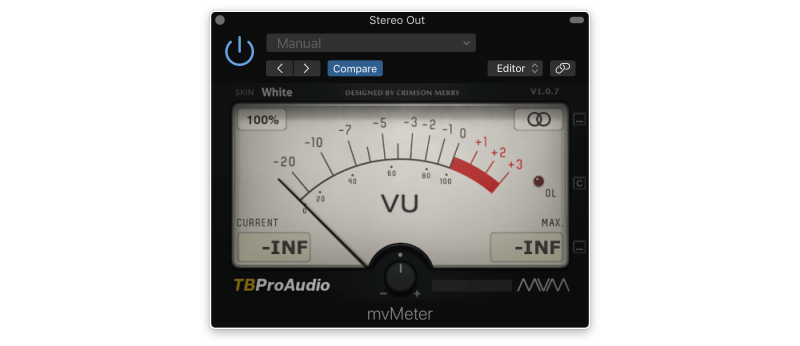
Then pop a VU Meter on your mix bus.
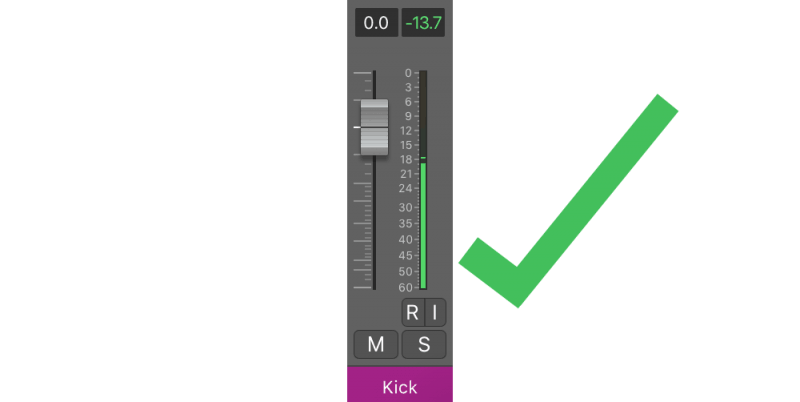
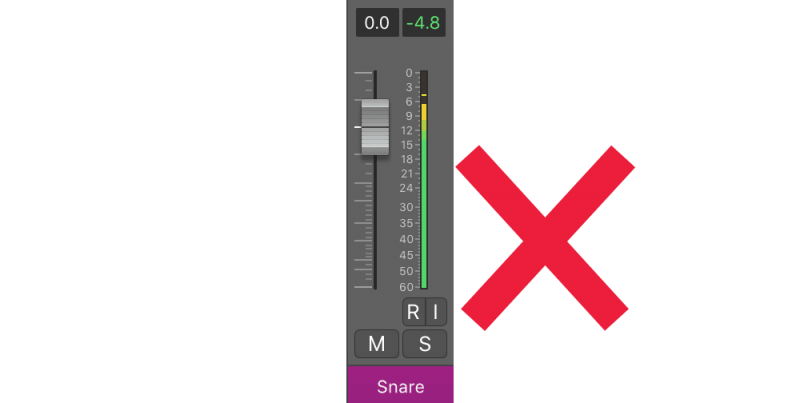
Go track by track, listening to each instrument while it’s soloed. You’ll also want to pick out the section where each instrument is at its loudest.
Check for anything that’s usually above or below 0 dB on the VU meter. Turn it up or down until its sitting around 0dB.
To help you keep this in mind for every mix, I’ve whipped up this step by step diagram.
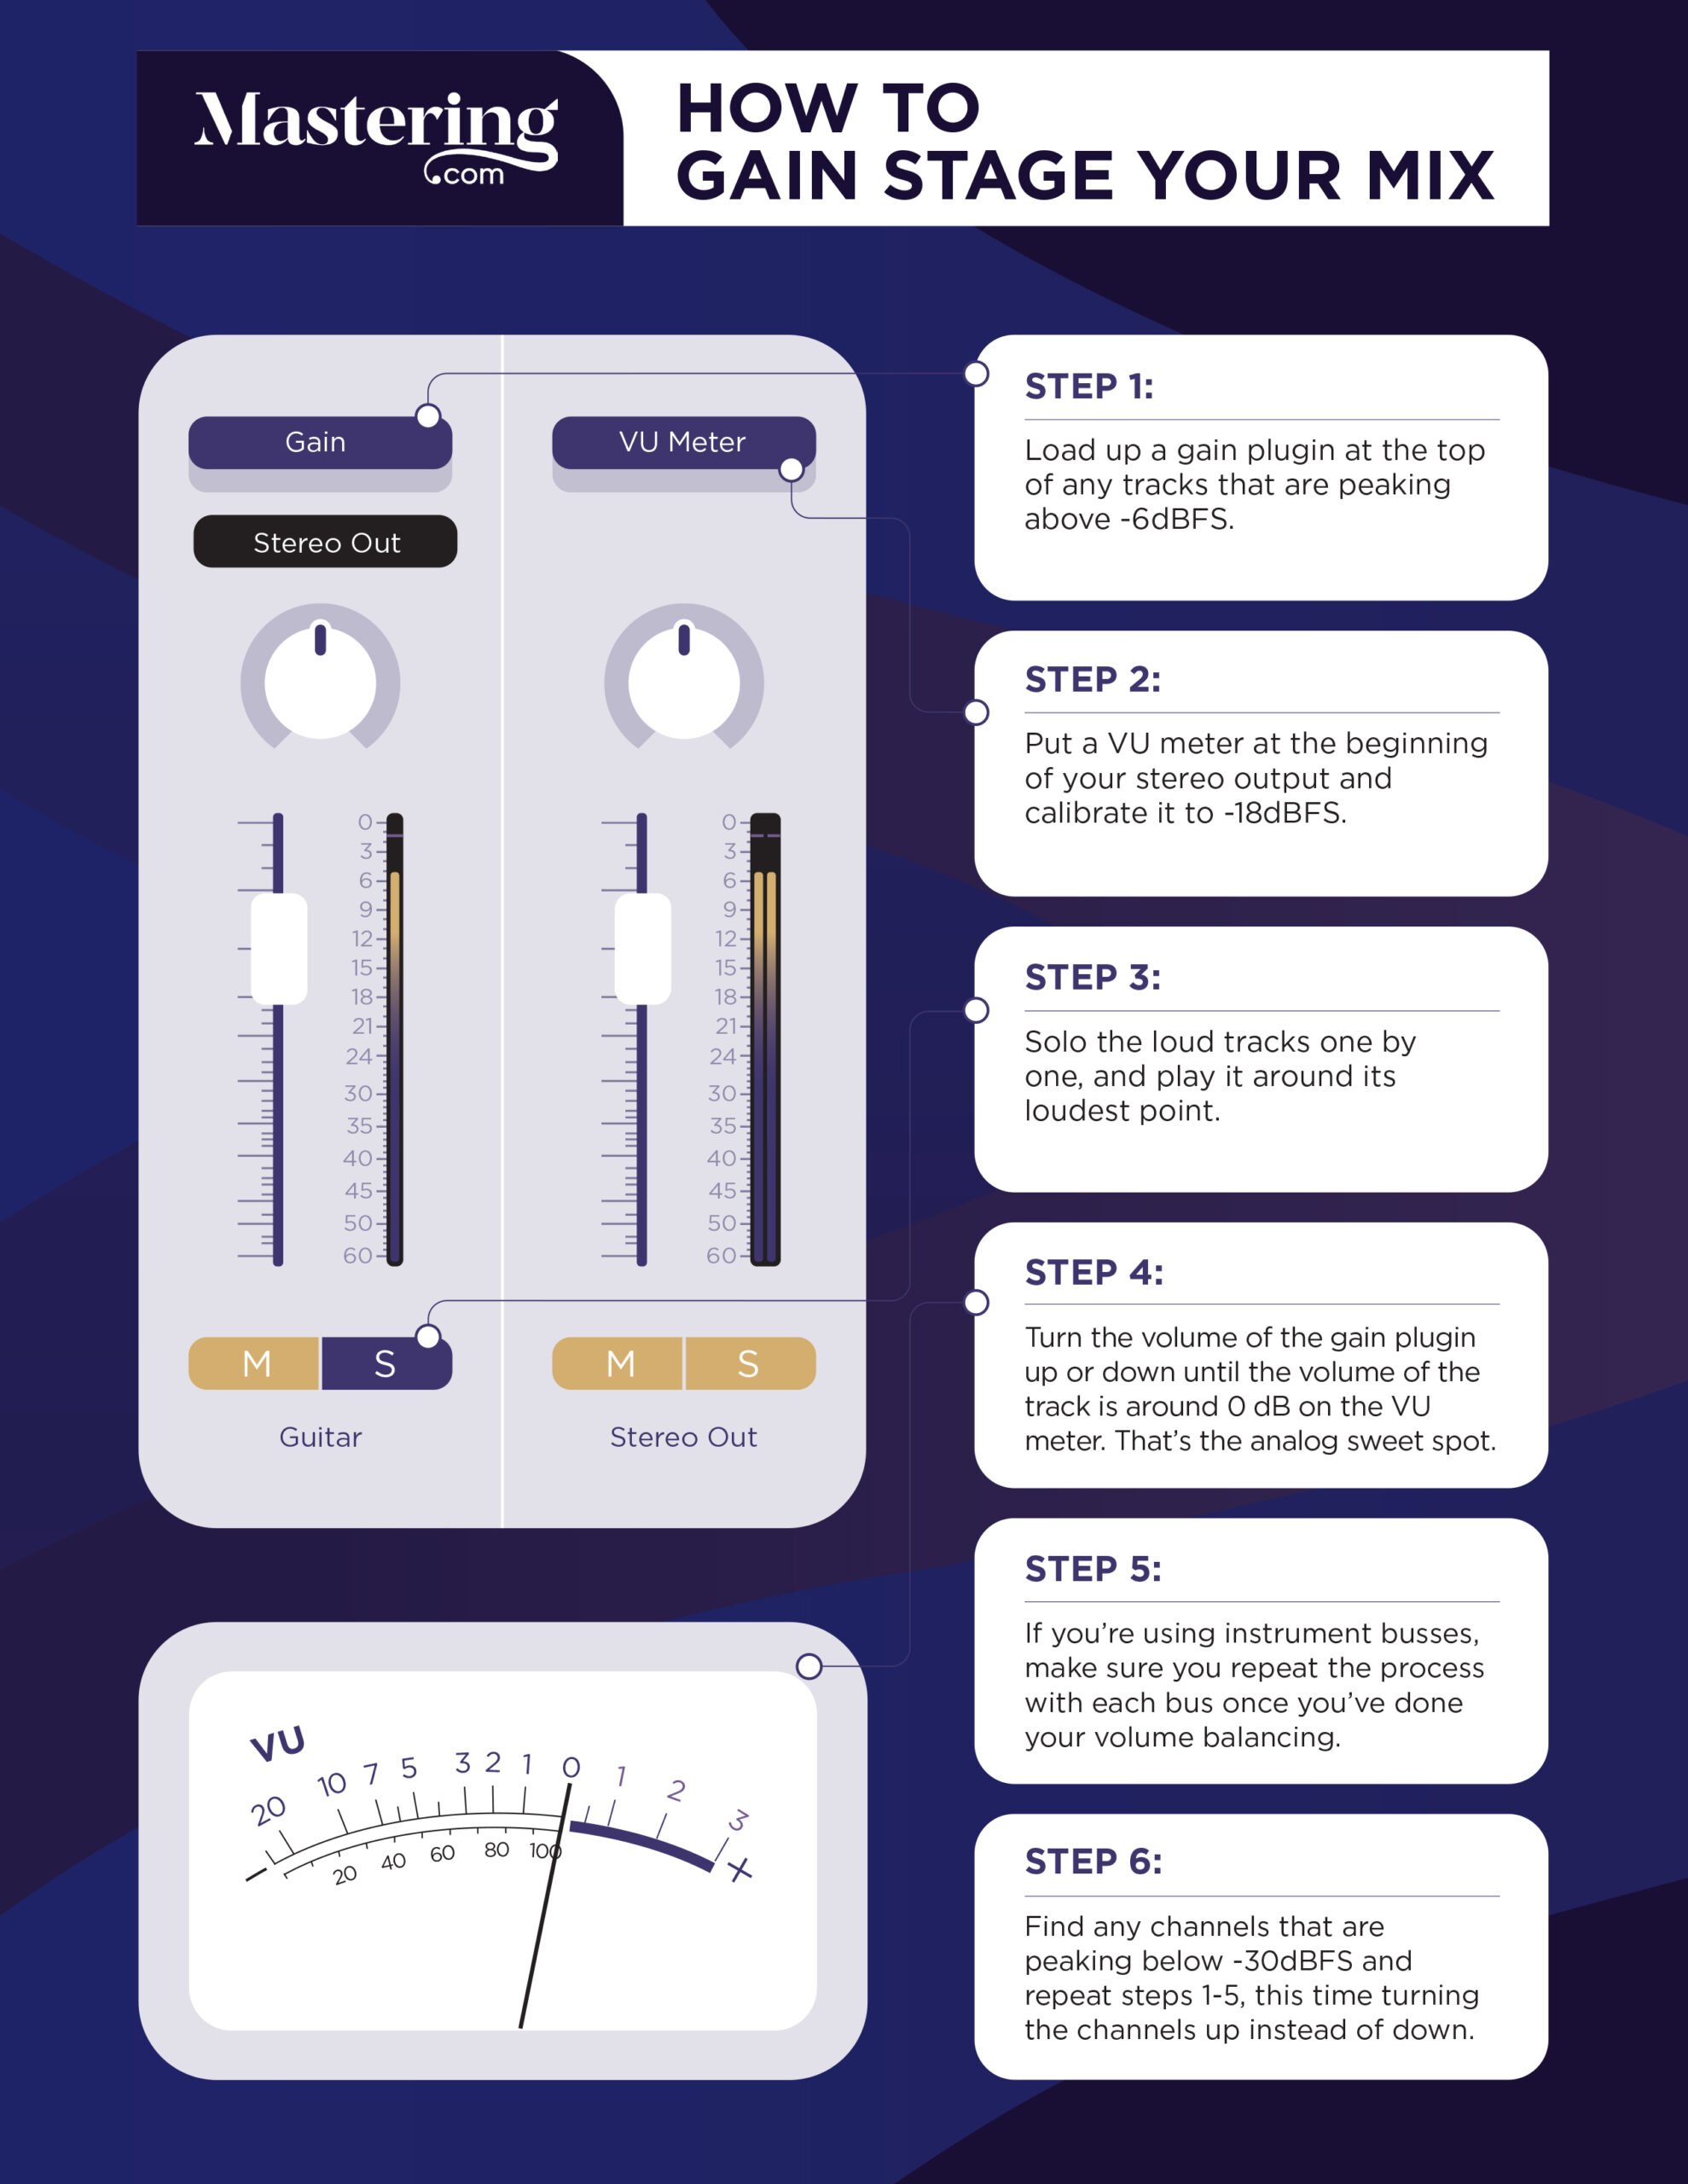
It goes through all the fundamental steps your mix needs. Keep it on your desktop for easy access!
But there’s more to great gain staging.
Here are 9 secrets the pros use to make sure their songs sound great.
Secret #1: Top Notch Recordings

This is one of the most important steps.
Most people record their instruments too loudly.

It may sound counterintuitive, but your recordings are too loud, your song will sound quieter.
Why is that? When your song’s too loud you have less headroom while mixing and mastering.
You won’t be able to turn the volume up to match pro standards.
You’ll also get some nasty distortion. So recording at the proper levels is really important!
When recording any instrument, watch the meters of your track(s).
The meters in your DAW measure in dBFS. You want to aim for an average of -18 dBFS with peaks hitting around -10 dBFS.
You never want a channel to go above -6 dBFS while recording.
Set yourself up for success by keeping each track’s volume in this range!
Bonus Tip:
Musicians tend to play louder while recording than while sound checking. This is due to the hubris of man.
So you might want to give yourself an extra dB or 2 of headroom while setting the preamps level!
Secret #2: Adjust for Plugins That Add or Subtract Volume
This one’s easy to miss!
Over the course of your mix, the volume of your tracks will fluctuate. That’s because plugins will naturally add or subtract volume.
Take this EQ for example.
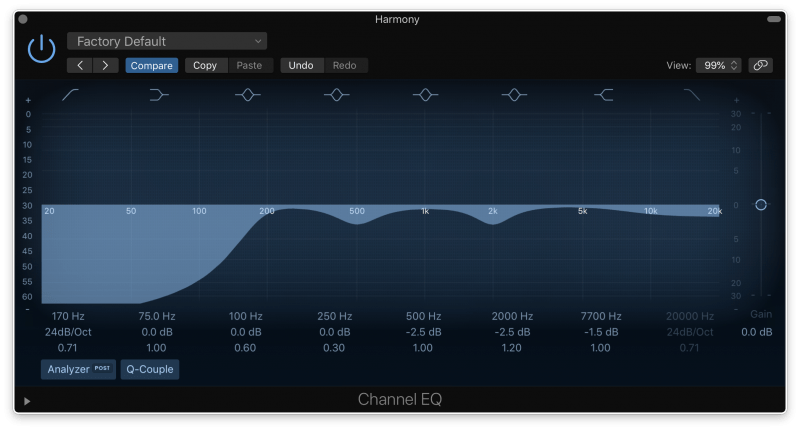
As you can see, it’s cutting out a lot of frequencies.
But cutting these out, the track as a whole will be quieter.
So to make sure your mix is still balanced, you’ll need to turn it back up! Here’s how you can figure out how much to turn it down.
First, put an LUFS on your master bus. Then, solo the track with the EQ on it.
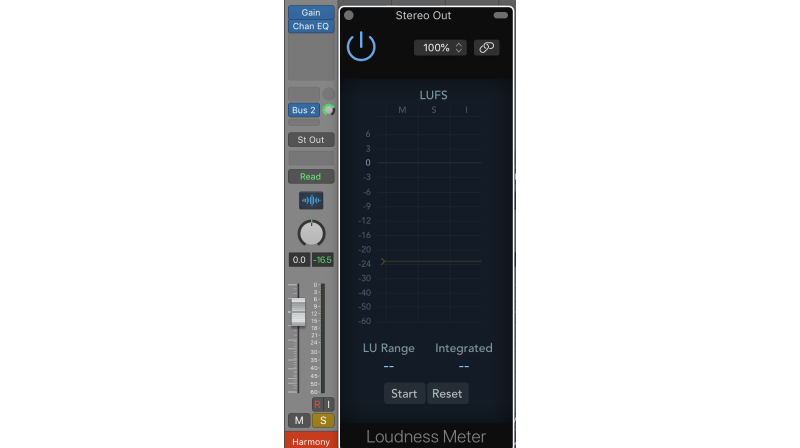
Bypass the plugin and see how loud the meter is.
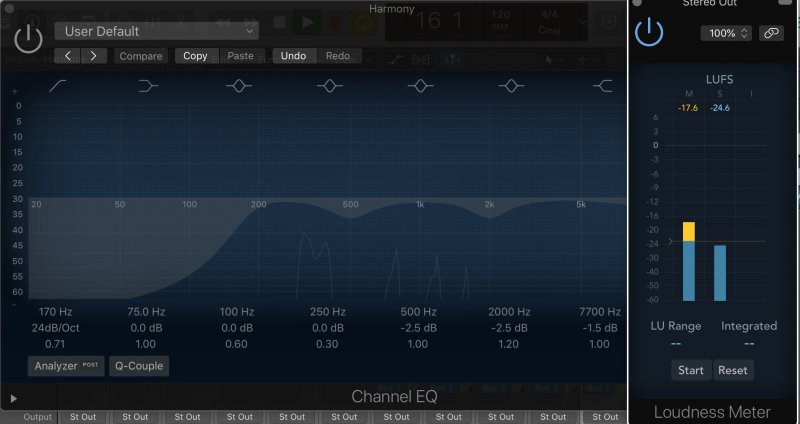
Then, turn the plugin back on and play the same part of the song.
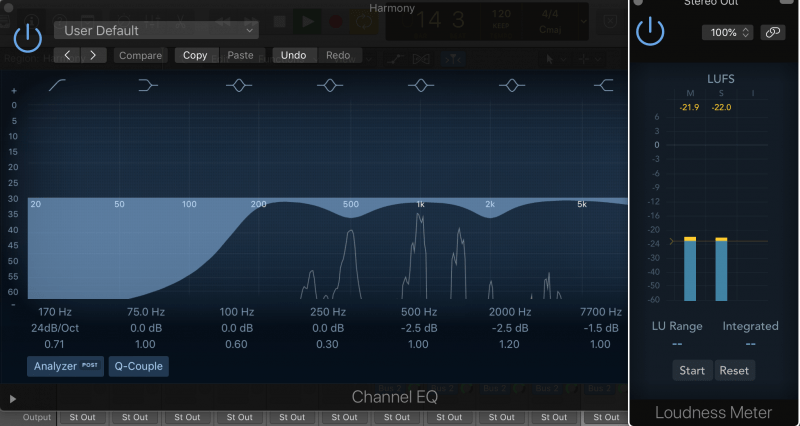
As you can see, the track is a few dB quieter when the EQ is on. Now we know how much we need to turn it back up!
It’s really easy for plugins to change the volume of a track, so you’ll want to use this technique frequently. Just check whether the volume changes with the plugins turned off and, if so, adjust for it!
Secret #3: Protect Your Compression Settings
This one goes hand in hand with the last one. If you have an EQ that’s adding volume to a track, you might think you should turn the fader down.
But this would be a big mistake!
Doing this could throw your mix out of balance if you have something like a compressor on the channel. By turning down the volume going into the compressor, it’ll actually compress less.
So what do you do if you need to change the volume of a track that has plugins on it?
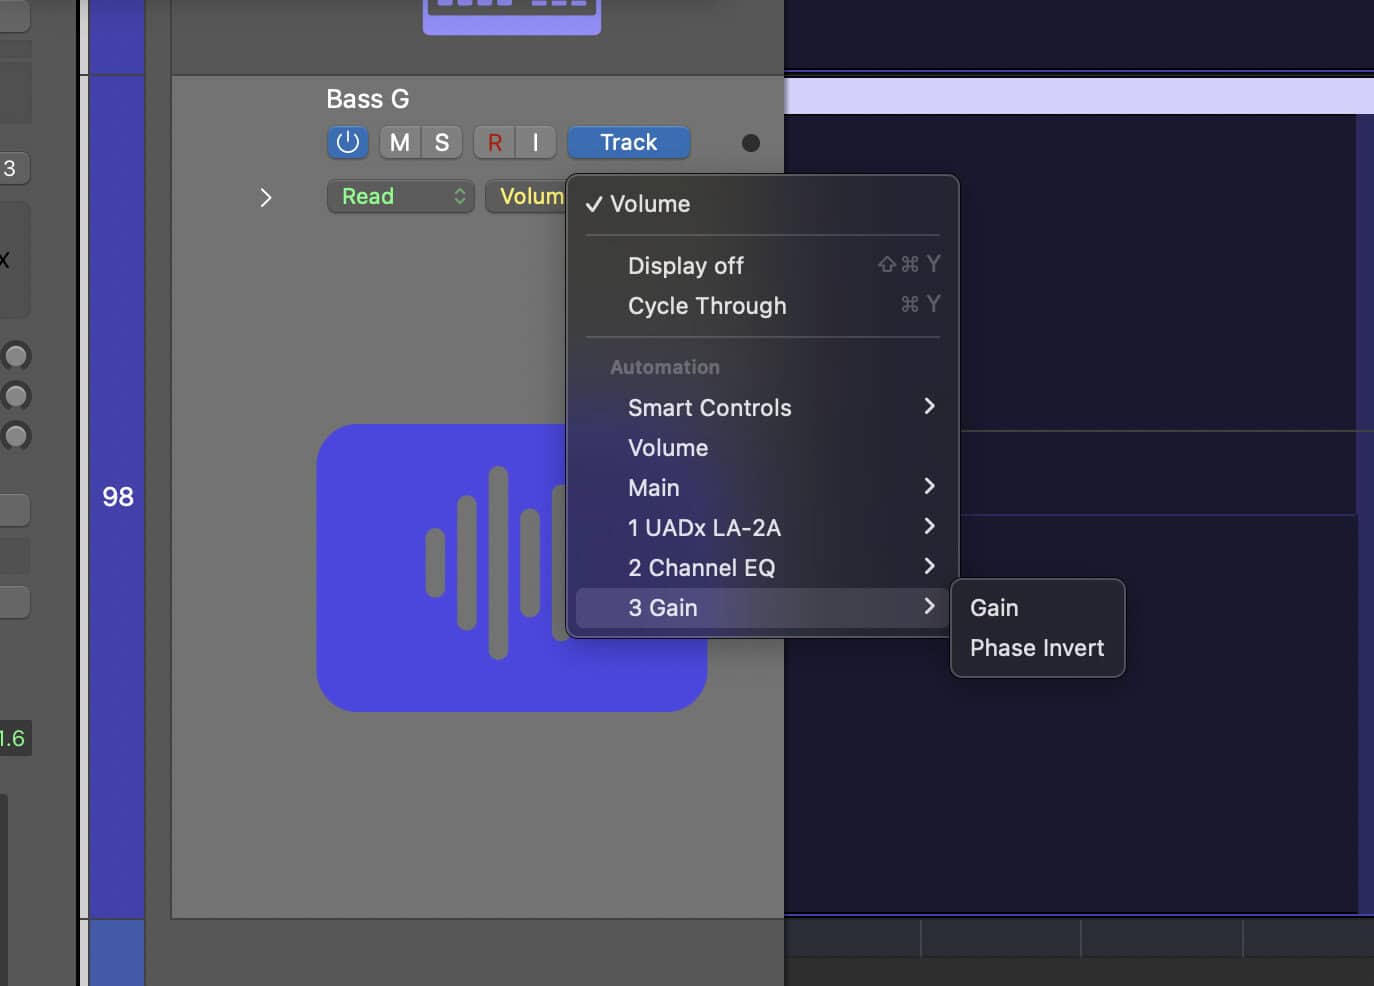
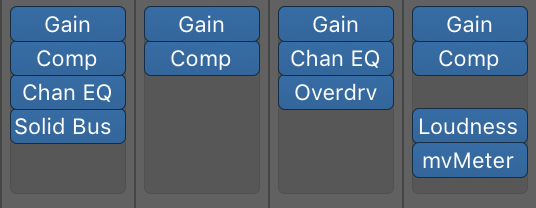
Instead of turning the volume down at the beginning of the plugin chain, we’ll turn it down at the end. Go to the end of your plugin chain and throw on another gain plugin.

Now you can change its volume without messing up the rest of your effects!
Secret #4: Use a VU Meter
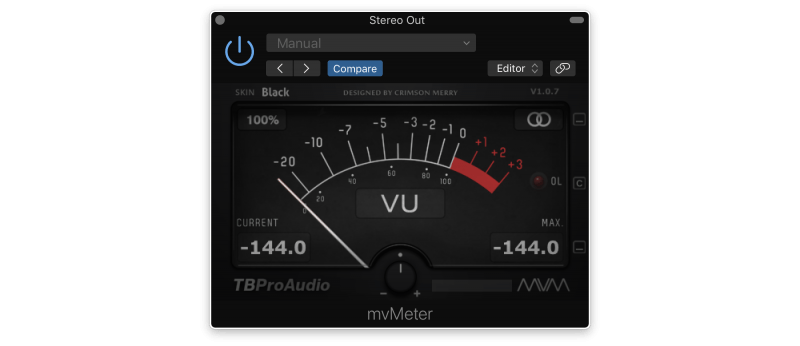
I know I talked about this earlier, but this one’s important!
While setting your preamps and plugins, you’ll want to pop a VU meter on your master bus.
Why a VU Meter?
VU meters will help you save time!
VU meters show you an approximation of how loud something is. And since you’re focusing on average volume of a track, VU meters are especially helpful.
Double check that your VU meter is set to -18 dBFS. This just means that 0 dB on the VU Meter is the same thing as -18 dBFS.
Later on in your mix you’ll want to use an LUFS meter. VU meters aren’t great for surgical stuff like adjusting for volume changes made by plugins.
But when it comes to setting your initial levels, VU meters are really handy.
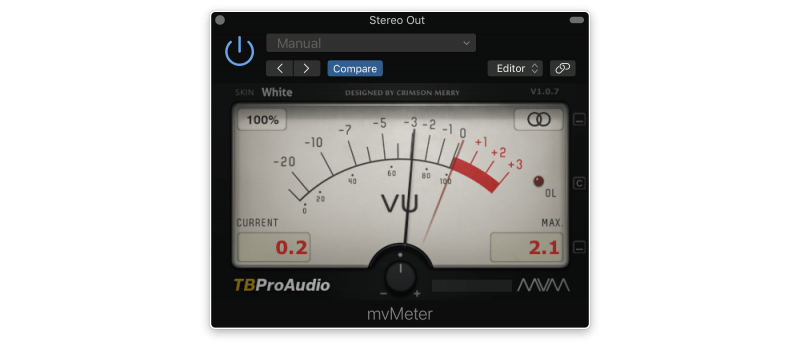
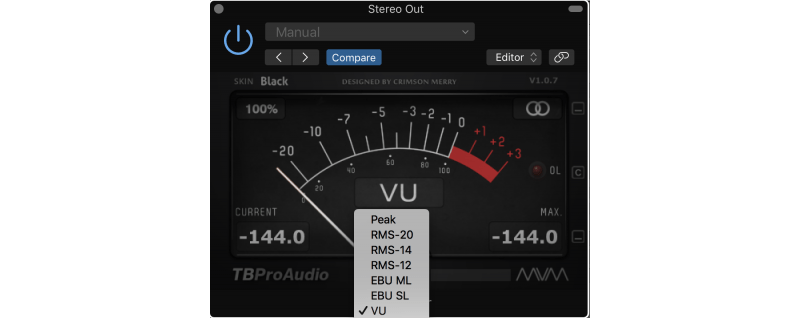
Most DAWs don’t come with a VUMeter. But TBProAudio has a free one that’s really good!
By default it’s set as a peak meter. So make sure you click on the word “Peak” and change it to “VU.”
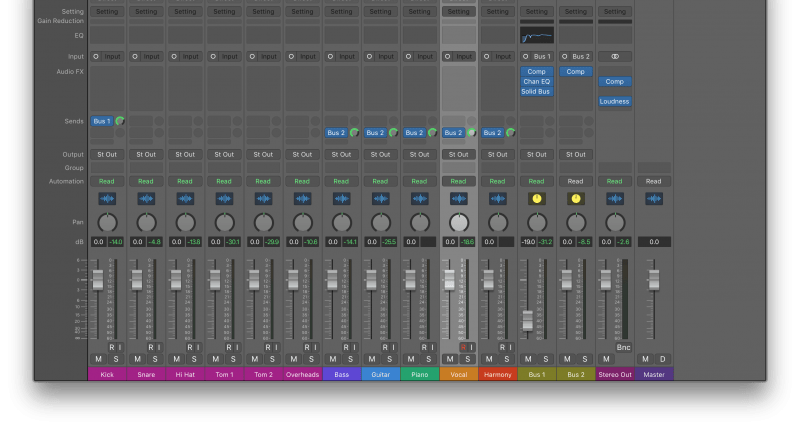
Secret #5: Pay Attention to Your Buses!
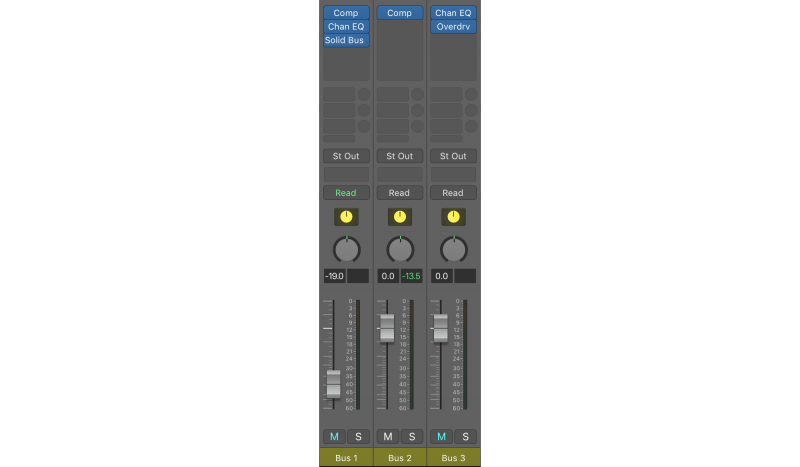
It’s really easy to forget about buses.
If it has plugins on it, it needs to be gain staged.
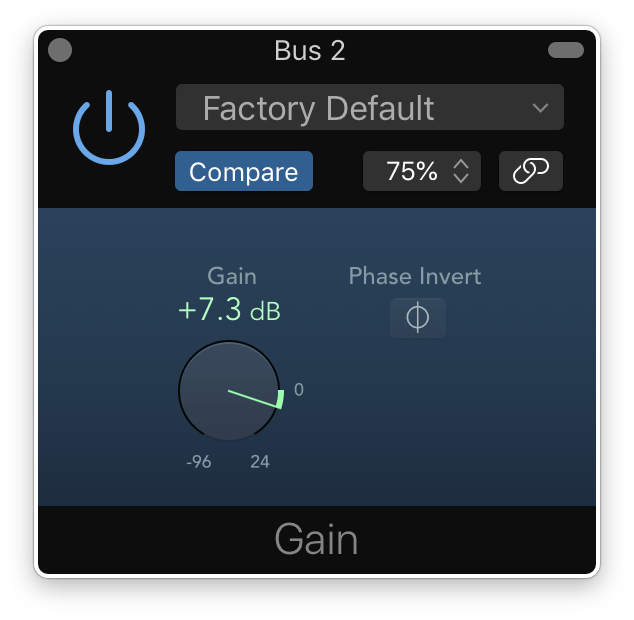
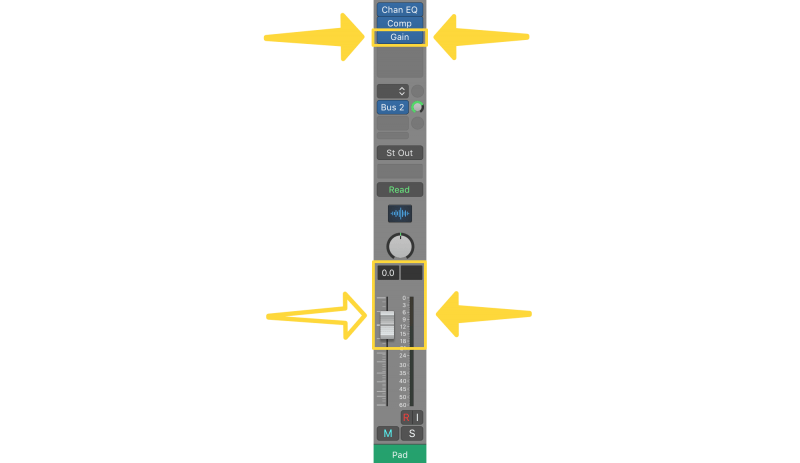
The busses are just as simple, though. If the signal’s coming in too hot, just add a gain plugin at the beginning of the plugin chain and turn it down. That’s all you need to do.
Make sure to do this for the stereo output as well.
NOTE: Create space and separation in your mixes using submixes:
Secret #6: You Don’t Need Premium Plugins
You don’t need expensive tools to gain stage effectively!
There are plenty of fancy plugins out there that
You’re better off sticking with your DAW’s stock plugins instead of dropping a ton of money on premium ones that do the same thing.
Save yourself some money by sticking the plugins that come with your DAW. If you have to get something, look for a free version first.
Secret #7: Don’t Leave Any Faders Down Low!
After balancing your mix, you may realize that some faders are really low.

Maybe something that’s only supposed to be barely audible, like a shaker or a pad.
The problem is that the closer you get to the bottom of the fader, the less resolution you have. One tiny movement could change the volume by 10dB!
You should aim for your faders to be around 0dB to keep that resolution high for the mix.
If you’re coming across this as a problem, check the volume of the track when it’s soloed before turning the fader back up to 0.
Then, add a gain plugin to the end of your chain, and cut the volume there. That way you still have access to the full resolution of your faders.
Secret #8: Automation – Gain Staging on Steroids
This one’s huge. Pros use this all the time to make sure their songs sound consistent.
Automating a channel’s gain over time.
Ever had a track that’s too quiet in one section, but way too loud in the next? It’s really frustrating!
How are you going to get a good mix balance if the volume is all over the place?
That’s where gain automation comes in! By changing the gain throughout the song you can make sure a track is the right volume at all times.
By simply turning the gain up when it’s to quiet, we get it into the ideal range of -18 dBFS. Then we’ll just turn it down when it’s too loud.

Voilà! This should sound a lot better!
Bonus Tip: Automate Individual Phrases
This technique isn’t just for full sections. You can automate the gain of individual phrases, words, or even syllables.
This takes a lot of stress off your compressors and limiters. It also helps your plugins to perform better because the vocal will always be around that -18dBFS sweet spot.
But don’t try to do this for everything. Automating the gain of every channel would take way too long. Save it for the stuff that needs to be at the very front of your mix, like lead guitars and vocals.
Different DAWs have different ways of doing automation. If you aren’t sure how it works, google the name of your DAW followed by “gain automation.”
Secret #9: Don’t Be a Perfectionist! Set it and Forget it.
Nothing kills creativity like agonizing over the details.

Here’s the thing: gain staging is important. Without it, your mixes will never sound professional.
But it’s not a magic wand!
Making sure your tracks have the right amount of headroom is more like leveling the playing field. It’s making sure you have every opportunity to make your mix sound incredible.
But by itself it’s not going to make your mix sound incredible.
This process doesn’t need to take more than 2 or 3 minutes if you’re eyeballing it, or 5 or 10 if you’re getting a really specific.
Not every track needs to be perfectly set to an average of -18dBFS. Just making sure it’s around that area (and not peaking higher than -6dB) is all you need. Set it and forget it so you can move on to more important things.
And there you have it!
The 9 secrets you need to knock it out of the park.
By using each of these techniques, you’ll be one step closer to making professional sounding mixes every time.
UPDATE: Check out our complete guide to gain-staging:
If you want to dig deeper into music production and learn what it actually takes to make mixes that sound pro… And you’re an intermediate or advanced producer… Be sure to check out the free masterclass: Enjoy!Next Steps