Dither sort of sounds like an insult. Like “Don’t be such a dither brain!”
But seriously…
Dithering is a crucial part of the mastering process.
It’s also one of the most confusing topics in the audio world.
I’m going to cover what it is, when to use it, and how to apply it properly.
What Is Dithering?
Just to keep things simple: dithering is noise.
It’s noise you add to a signal when you reduce the bit depth (resolution).
More specifically, it’s when you add low-level noise to hi-res audio before you reduce the resolution.
What does that mean?
Most digital audio workstations (DAWs) default your project to 24- or 32-bit depth. This refers to the resolution (or quality) of the audio.
In other words, bit depth/resolution tells you how much information can be put into a sample of audio.

The same idea works with pictures. On the left you’ll see the original image. The version in the middle has had it’s bit depth reduced, making it much harder to see. The version on the right has had dithering added before the bit depth was reduced, so it’s a lot clearer.
This is a really extreme example though. Dithering doesn’t suck the color out of your tracks. It just ensures clarity when the bit depth gets reduced.
When Do I Need to Dither?

The higher the bit depth, the more dynamic audio you’ll have. So why would you change the bit depth?
Well, the most common use of dithering is in mastering.
When you export a master, dithering is the final step. Mastering engineers do this when they’re downsampling the track in order to bounce it.
Most forms of digital playback have a 16-bit resolution. So you have to cram all the dynamics and quality of your 24-bit track into a smaller space, so to speak.
It’s like one of those clown cars. All the clowns have to get in the car, but it looks like there are too many to fit.
By dithering, you’re adding low-level noise to the mix. Which prevents degradation of the audio being crammed into the clown car.
When you downsample, you lose information.
So you add a little noise with dithering. This basically helps fill in the gaps where that information previously was.
Without dithering, your track will lose some of its dynamic range. For example, the quieter parts of your track may sound crunchy or obviously digital.
In short, the only time you should be dithering is during the final step of the mastering process. Because you shouldn’t be reducing the bit depth of your track unless you’re bouncing the final master.
How to Dither

Well, the only time you should be dithering is at the end of the mastering process. So just leave the dithering up to the mastering engineer.
If you are the mastering engineer, your best option is to use a dithering plugin or the dither setting in your DAW.
Some good dithering plugins are Goodhertz Good Dither and FabFilter Pro-L 2. And for the dither option in your DAW, just google “[your DAW] dithering.”
Now, there are some general tips you must pay attention to when dithering. Here they are:
- Only dither when you’re rendering your track to a 16-bit file (you don’t need to dither when going from 32-bit to 24-bit)
- Avoid dithering more than once
- Save dithering for the final step of mastering and don’t add any processing afterward
- If you’re sending your track to a mastering engineer, don’t dither beforehand
- Don’t dither before converting your file to an MP3 or AAC
Double-Checking Your Tracks
Not sure if your tracks are 16 bit or 24 bit? You can easily check.
You can right-click the exported file and select “Properties” or “Get Info,” depending on whether you use Windows or Mac. There you can check the number of bits per sample.
Or you can use a plugin like schwa’s Bitter. Just play the track, and Bitter will let you know what the bit depth is.
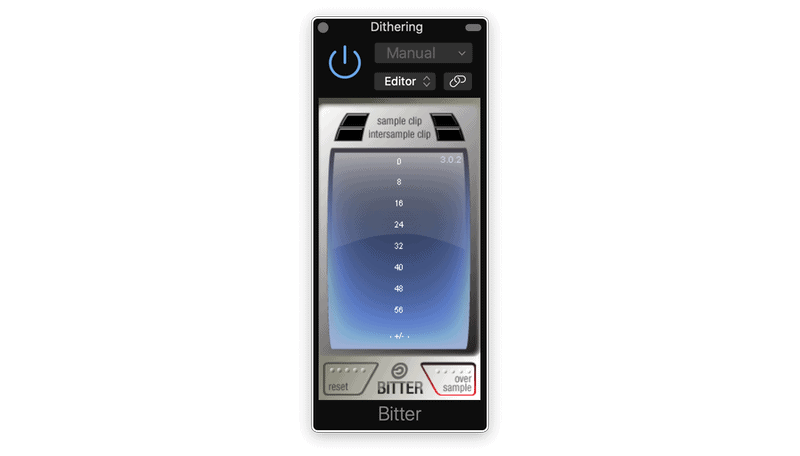
Nice and easy!
Conclusion
Sure, dithering seems confusing. But it’s just a way to retain dynamics and audio quality when you reduce the resolution of your file.
And you should only add dithering as the final step of the mastering process, especially if you’re new to the idea.
Or else you might look like a big dither brain.


