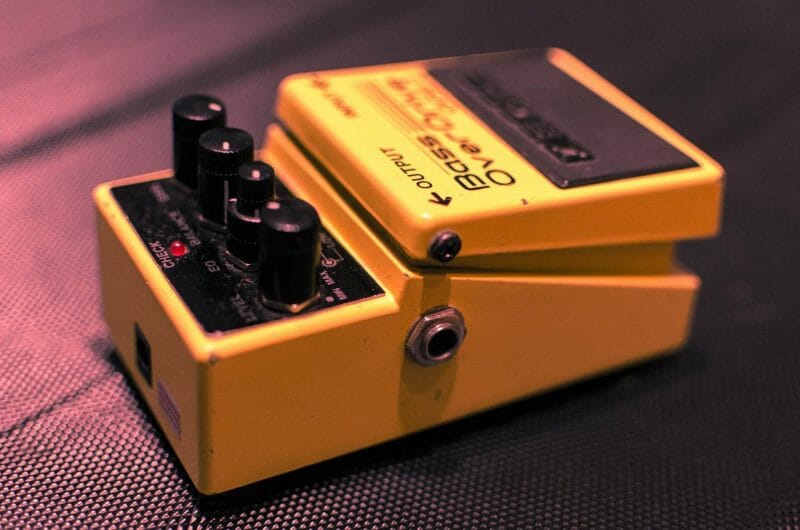
Digital recording has a lot going for it.
It’s precise, efficient, and convenient. The audio is clean.
Sometimes, though, it’s too clean. Something’s missing…
Enter harmonic distortion. If you want to achieve mixes that aren’t only good, but warm and pleasing, stick around.
I’m guessing you’re here because you want to make your mixes sound professional. We put together a brief training that covers a totally new approach to music production. Until now, everyone has been teaching production totally backward. Just click below to watch.Get industry-quality every time (steal this framework)
But if you just want to learn all about Distortion specifically, keep reading.
What is Distortion?
Distortion is like most other effects music makers have – it’s very misunderstood.
Just think about it. When you think of distortion, where does your mind go?
If it’s not fuzzy guitar sounds, I’d be very surprised. After all, that’s what everyone seems to think it is.
There was a point that I certainly did.
It turns out that the word “distort” actually translates to reshaping. For example, when an image gets distorted, it gets changed.

Audio is no different. Distorting or saturating audio can add overtones to a waveform, producing some nice coloration.
Sometimes it gets changed subtly. Sometimes it gets changed dramatically.
So, why is distortion a big deal? Well, if you’re a fan of character, color, and warmth, then it’s right up your alley.
In this guide, we’re going to explore harmonic distortion. We’re going to talk about different types of distortion, what each of them do, and the context for each one.
Let’s start with saturation. Saturation is a subtle form of distortion.
You can saturate a signal by cranking a plugin’s preamp.
Technique #1: Driving Ms. Preamp
Every preamp has its own character. Each has a signature sound that its creators had in mind in the design phase.
So, let’s start there. This is the foundation for shaping.
Preamp distortion will give your tracks a signature tone that can serve as a canvas for shaping the rest of your sound.
Driving your preamps will help you add some very tasty distortion to your mix. Depending on what you use, different preamps will add different flavors to your material, and you’ll find one will be more pleasing in your mix than all the others.
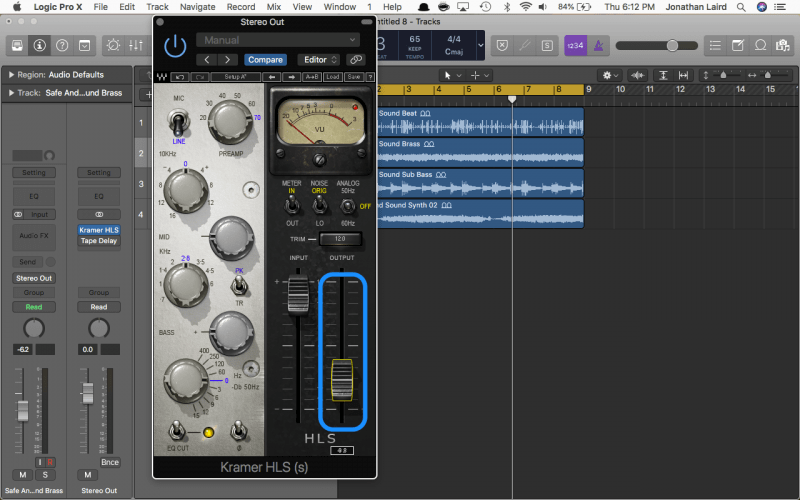
On a plugin like the Kramer HLS from Waves, you can drive the preamp by taking the knob and cranking it. You can also drive more distortion into the unit by boosting the input fader.
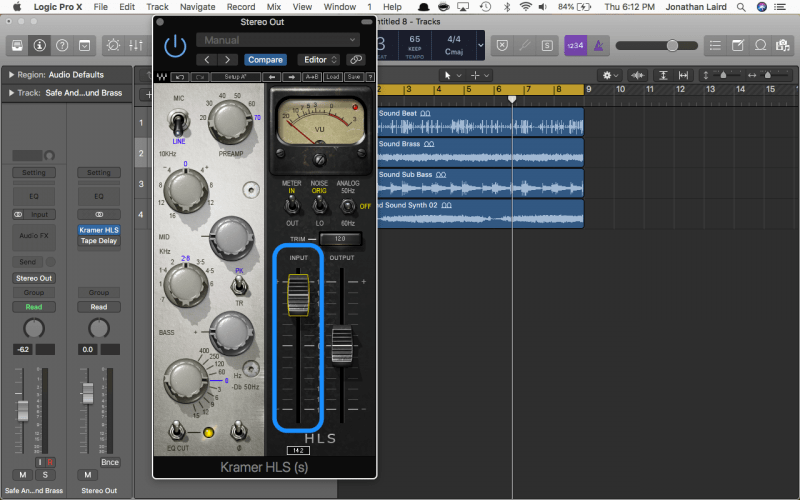 When you do this, adjust your output. You don’t want to fool yourself into thinking it’s better just because it’s louder.
Wanna see this in action? Watch Andrew Scheps play around with preamp distortion while EQing the snare on Ziggy Marley’s “Fly Rasta”
Technique #2: Console Yourself
Console plugins imitate the imperfections in the hardware they emulate.
While these things are technically imperfect, character and color is often found in the imperfections.
One hidden feature your DAW may have is a console emulation hidden within your reverb plugins.
When you insert this plugin in your mix buss, you may be surprised just how much it influences the sound.
As with the last example, adjust your “Wet” control so you keep your levels consistent.
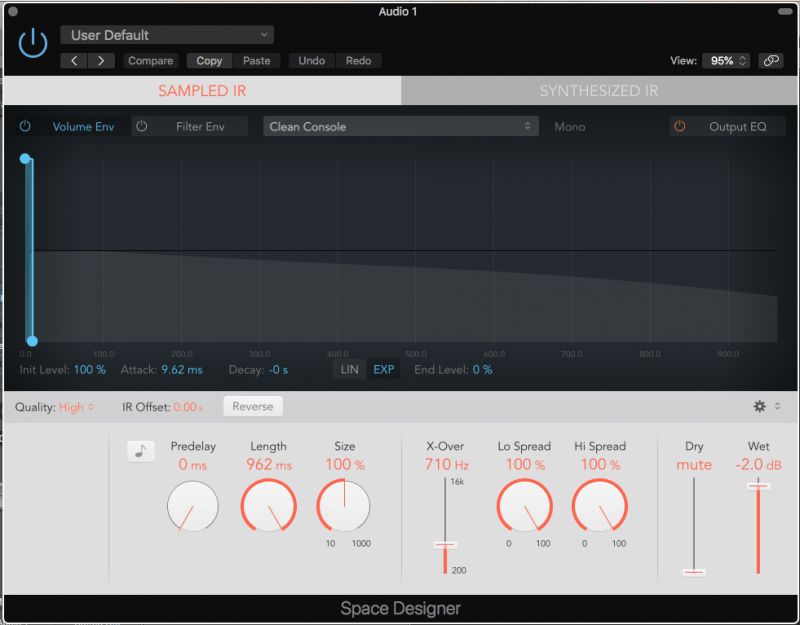
Here’s a track without any processing:
And here’s that track with the reverb’s console emulation:
On a physical board, each channel has a different character. How do we imitate this when the character of a plugin is built into it already with consistency?
One of the advantages of mixing in-the-box is that we have so many options. Consider Logic Pro’s Vintage Console EQ.
Even without any EQ shaping, we can use the drive control to saturate our signal. The “Output Model Section” will change the circuit giving you a different flavor of distortion with each selection.
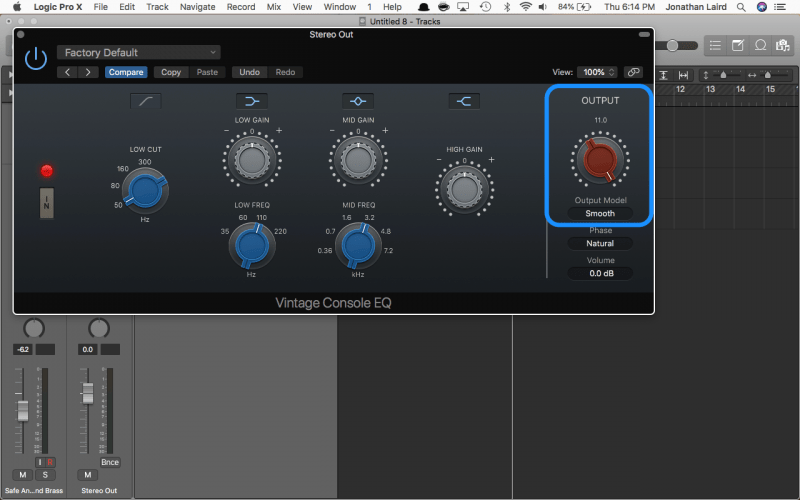
It also has a built in volume control for gain staging.
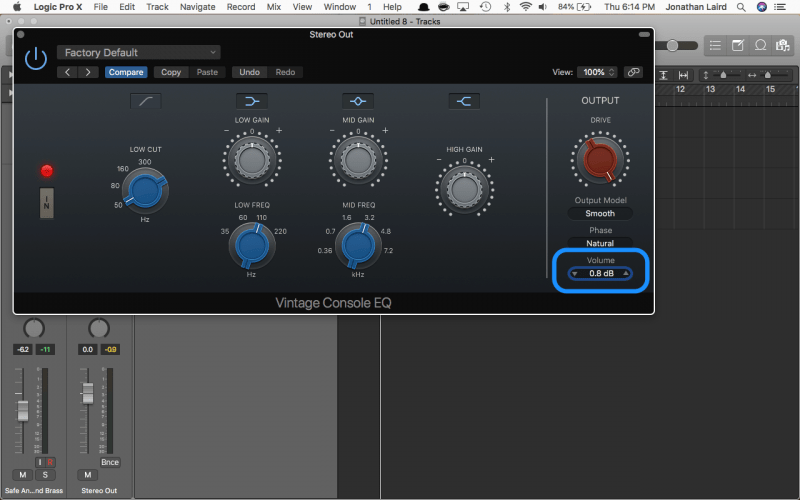
In this example, our drive control is maxed out. Even with that, we actually have to drive the volume up a bit to make it volume transparent.
Listen specifically to what happens to the lows and the excitement in the synths. Headphones work best for this, by the way.
Here’s our track without any processing:
And here’s our track with the distortion from the Neve EQ:
Pretty cool… As you can see, console distortion does quite a bit to glue elements together.
Technique #3: Tubes and Tapes
To this day, people who’ve never had to work with tapes and tubes are fascinated by them. They add the character and warmth that you hear on countless classic recordings.
Lucky for us, we have plugins that can emulate that sound.
They do a good job, too.
Let’s check out tubes.
Stock compressor plugins have come a long way. Not only does the version below come with a stock circuit and six others modeled after some classic hardware units, but it actually has a distortion feature built in.
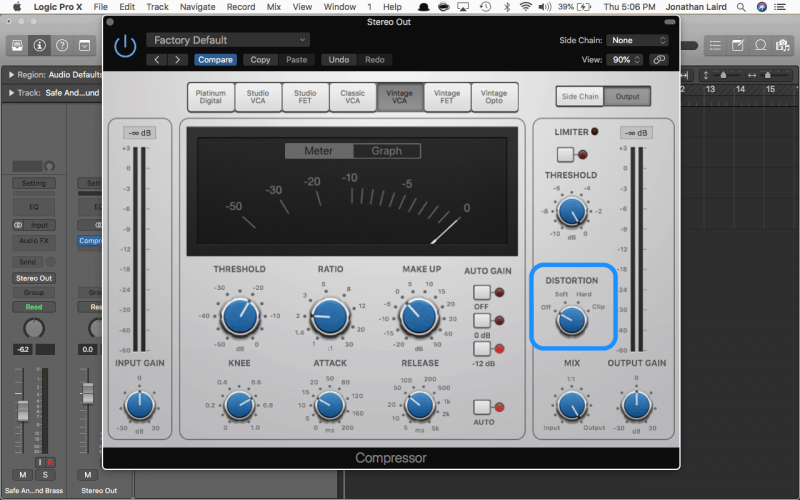
Strangely enough, the “soft” selection is actually the most aggressive. By driving the “Make Up” gain, more tube distortion is sent through.
By finding the right level of grit and using the “Mix” knob, you can blend in the natural sound with the distorted one to your tastes. Also, we want “Auto Gain” off for this.
Here, we will use the Vintage VCA (modeled after the SSL 4000 G-Channel), and the mix control to add tube warmth. Since we’re not compressing right now, let’s turn the ratio all the way down.
Here’s our track without any processing:
And here’s our track with the Vintage VCA distortion:
Want more contrast? That’s cool!
Let’s cycle through some of these circuits and see how they alter the sound. I’ll begin by making our way down the list:
Platinum Digital – (Logic’s Stock Circuit Model)
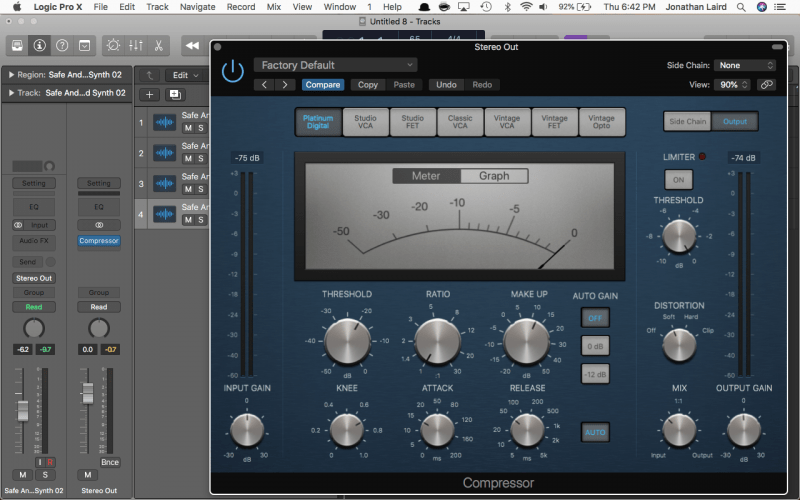
Here’s our track without any processing:
And here’s our track with the Platinum Digital distortion:
Studio VCA – (modeled after the Focusrite Red 3)
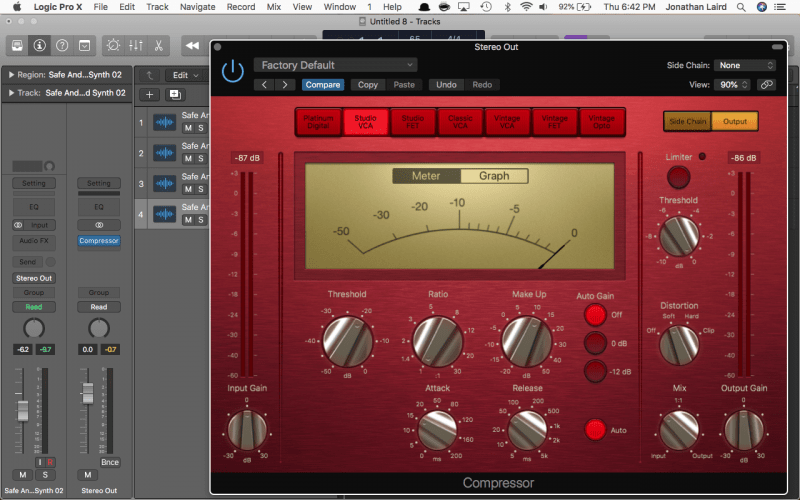
Here’s our track without any processing:
And here’s our track with distortion from the Studio VCA:
Studio FET – (modeled after the UREI/UAD 1176 Rev E “Blackface”)
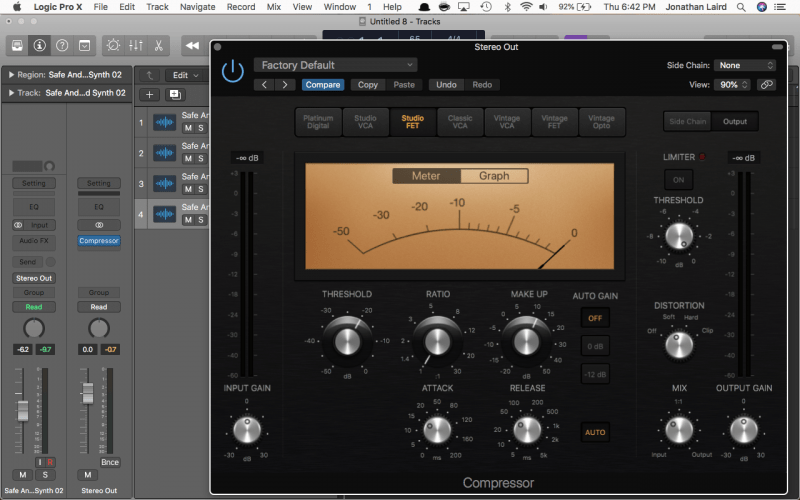
Here’s our track without any processing:
And here’s our track with the distortion from the Studio FET:
Classic VCA – (modeled after the dbx 160)
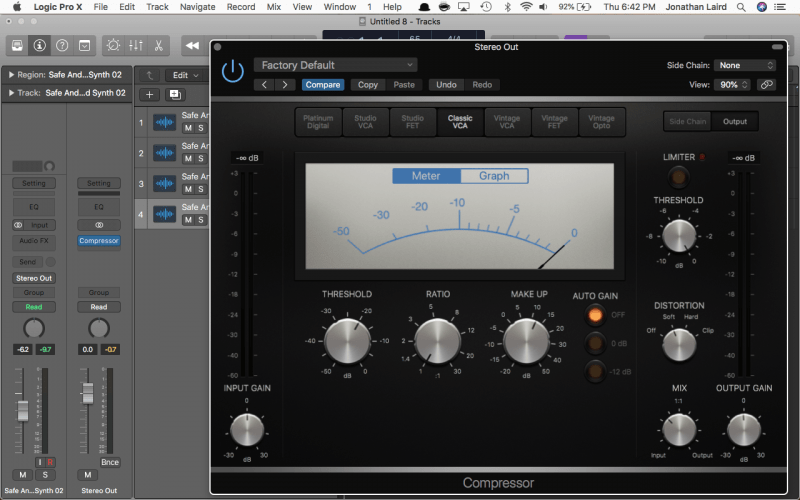
Here’s our track without any processing:
And here’s our track with the Classic VCA distortion:
Vintage FET – (modeled after the UREI 1176 Rev H “Silverface”)
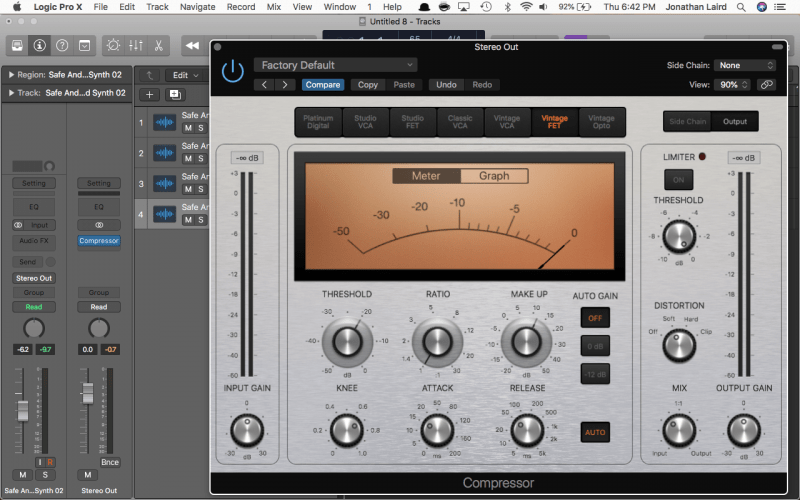
Here’s our track without any processing:
And here’s our track with the Vintage FET distortion:
As you can see, each one of these circuits lend a character to your arrangement, and they’re all different.
Tubes can make an arrangement sound fuller, and more pleasing.
When you combine them with tape… that’s where the magic happens!
Check out Graham Cochrane’s tutorial on tape saturation:
These examples mimic the character of tape. They add a signature EQ curve, a pleasing compression, and often, a hiss.
Depending on what you’re going for, that can be a pretty nice thing.
UPDATE: We released a new video that shows how you can use saturation to improve your mixes:
Technique #4: Let’s Get Excited!
Ever seen the movie, “Cars?” There’s a scene where the main character, Lightning McQueen, realizes if he wants to take a turn around the racetrack at top speed, he has to turn into the wall.
I think of that a lot when it comes to mixing, because some of the best moves don’t seem to make sense on the surface. When people add reverb, for example, they may add too much thinking it will create a feeling of hugeness.
But it doesn’t work that way. Likewise, if something just screams for heavy distortion, it helps if that sound isn’t in competition with other heavily distorted sounds.
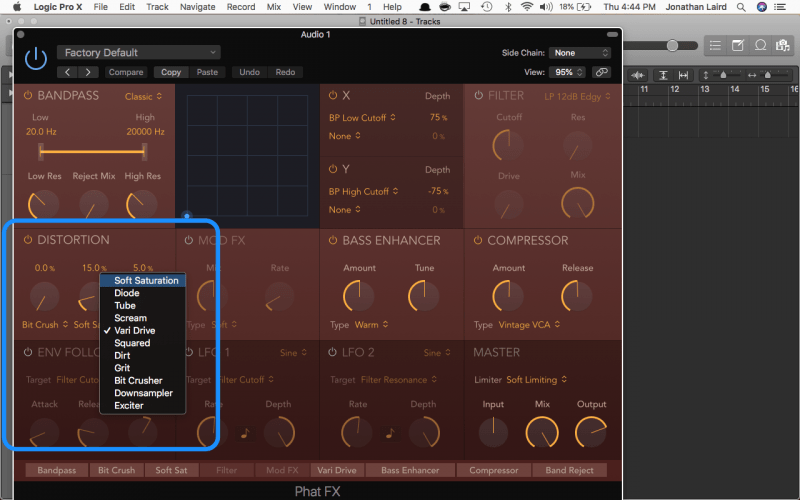
Using “Exciter” from Logic’s plugin suite or Phat FX dropdown menu, we can add distortion to select frequencies. Just turn the knob till it sits right where you want it.
This adds brightness. That can be a great thing if something is getting buried in your mix.
Here’s our track without any processing:
And here’s our track with our Exciter:
This process is good on both individual channels or the entire mix, if it needs a little perking up.
Conclusion: Distortion
A few final notes before you start your next mix:
- Have fun, but be conservative with it. You’d be surprised how much you can do with subtle moves here and there.
- There’s no point in distorting if it ruins your mix in the process.
- Try your hand at cycling through different compression circuits. Each has its own sound.
- Try a tape delay with the feedback and delay turned off, and drive that clip distortion. Above all, listen to what it does in the context of the mix.
- No one’s listening in solo mode. Change it up.
- Do what works for each part, and chances are your mixes will have that extra something you’ve been looking for.
Alright, soldier! Get out there and distort something!
Next Steps
If you want to dig deeper into music production and learn what it actually takes to make mixes that sound pro…
And you’re an intermediate or advanced producer…
Be sure to check out the free masterclass:
Enjoy!

