
One of the tricks pro mixers use to “glue” their tracks together is mix bus compression.
It’s frequently used, but rarely done right.
A well-tuned compressor on the mix bus can make a big difference in your mix! But a poorly-tuned compressor will wreak havoc.
Here’s 6 mistakes to avoid when setting up your mix bus compression. Avoiding these should save you from killing your mix – and should get you one step closer to that pro sound.
I’m guessing you’re here because you want to make your mixes sound professional. We put together a brief training that covers a totally new approach to music production. Until now, everyone has been teaching production totally backward. Just click below to watch.Get industry-quality every time (steal this framework)
But if you just want to learn about Mix Bus Compression specifically, keep reading.
Mix Bus Compression Mistakes
What is Mix Bus Compression?

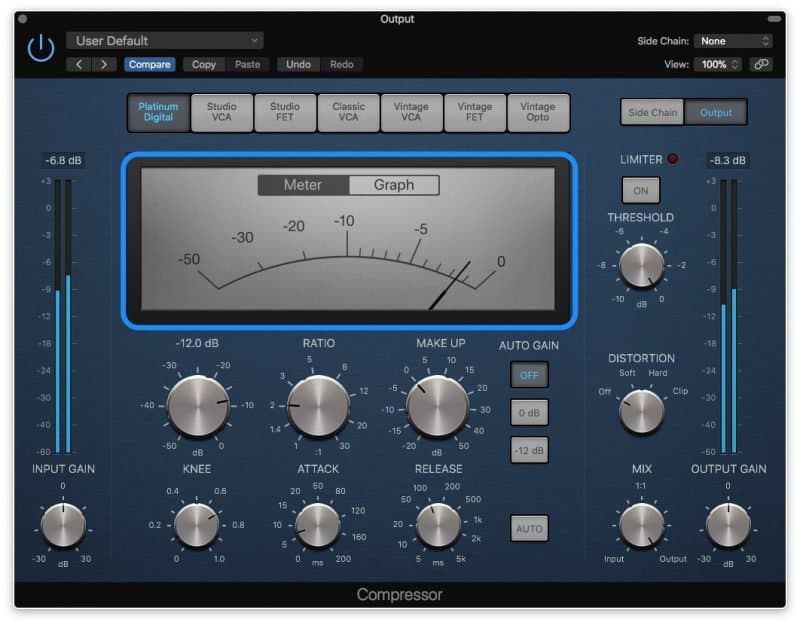
Mix bus compression is the act of adding compression to your entire mix.
The mix bus is another name for the output of your DAW. It’s the channel that all of the audio from a session flows into. Depending on the software, it’s also called the master bus or stereo bus.
Adding a small amount of compression to your mix bus chain can take your mixes to another level. When done correctly it can add more excitement and cohesiveness as it controls the dynamics of the mix. It helps to “glue” your tracks together.
You don’t even need a special compressor to do it! Your stock compressor will work just fine.
This process should be done very carefully though. Making any of these 6 mistakes could cause your mix bus compression to do much more harm than good.
Remember, it’s compression that’s added to the entire mix. So whatever mistake is made affects every single instrument of the song.
That said, if you follow the advice below, you’ll be setting up your mix bus compression like a pro in no time.
Let’s get into it.
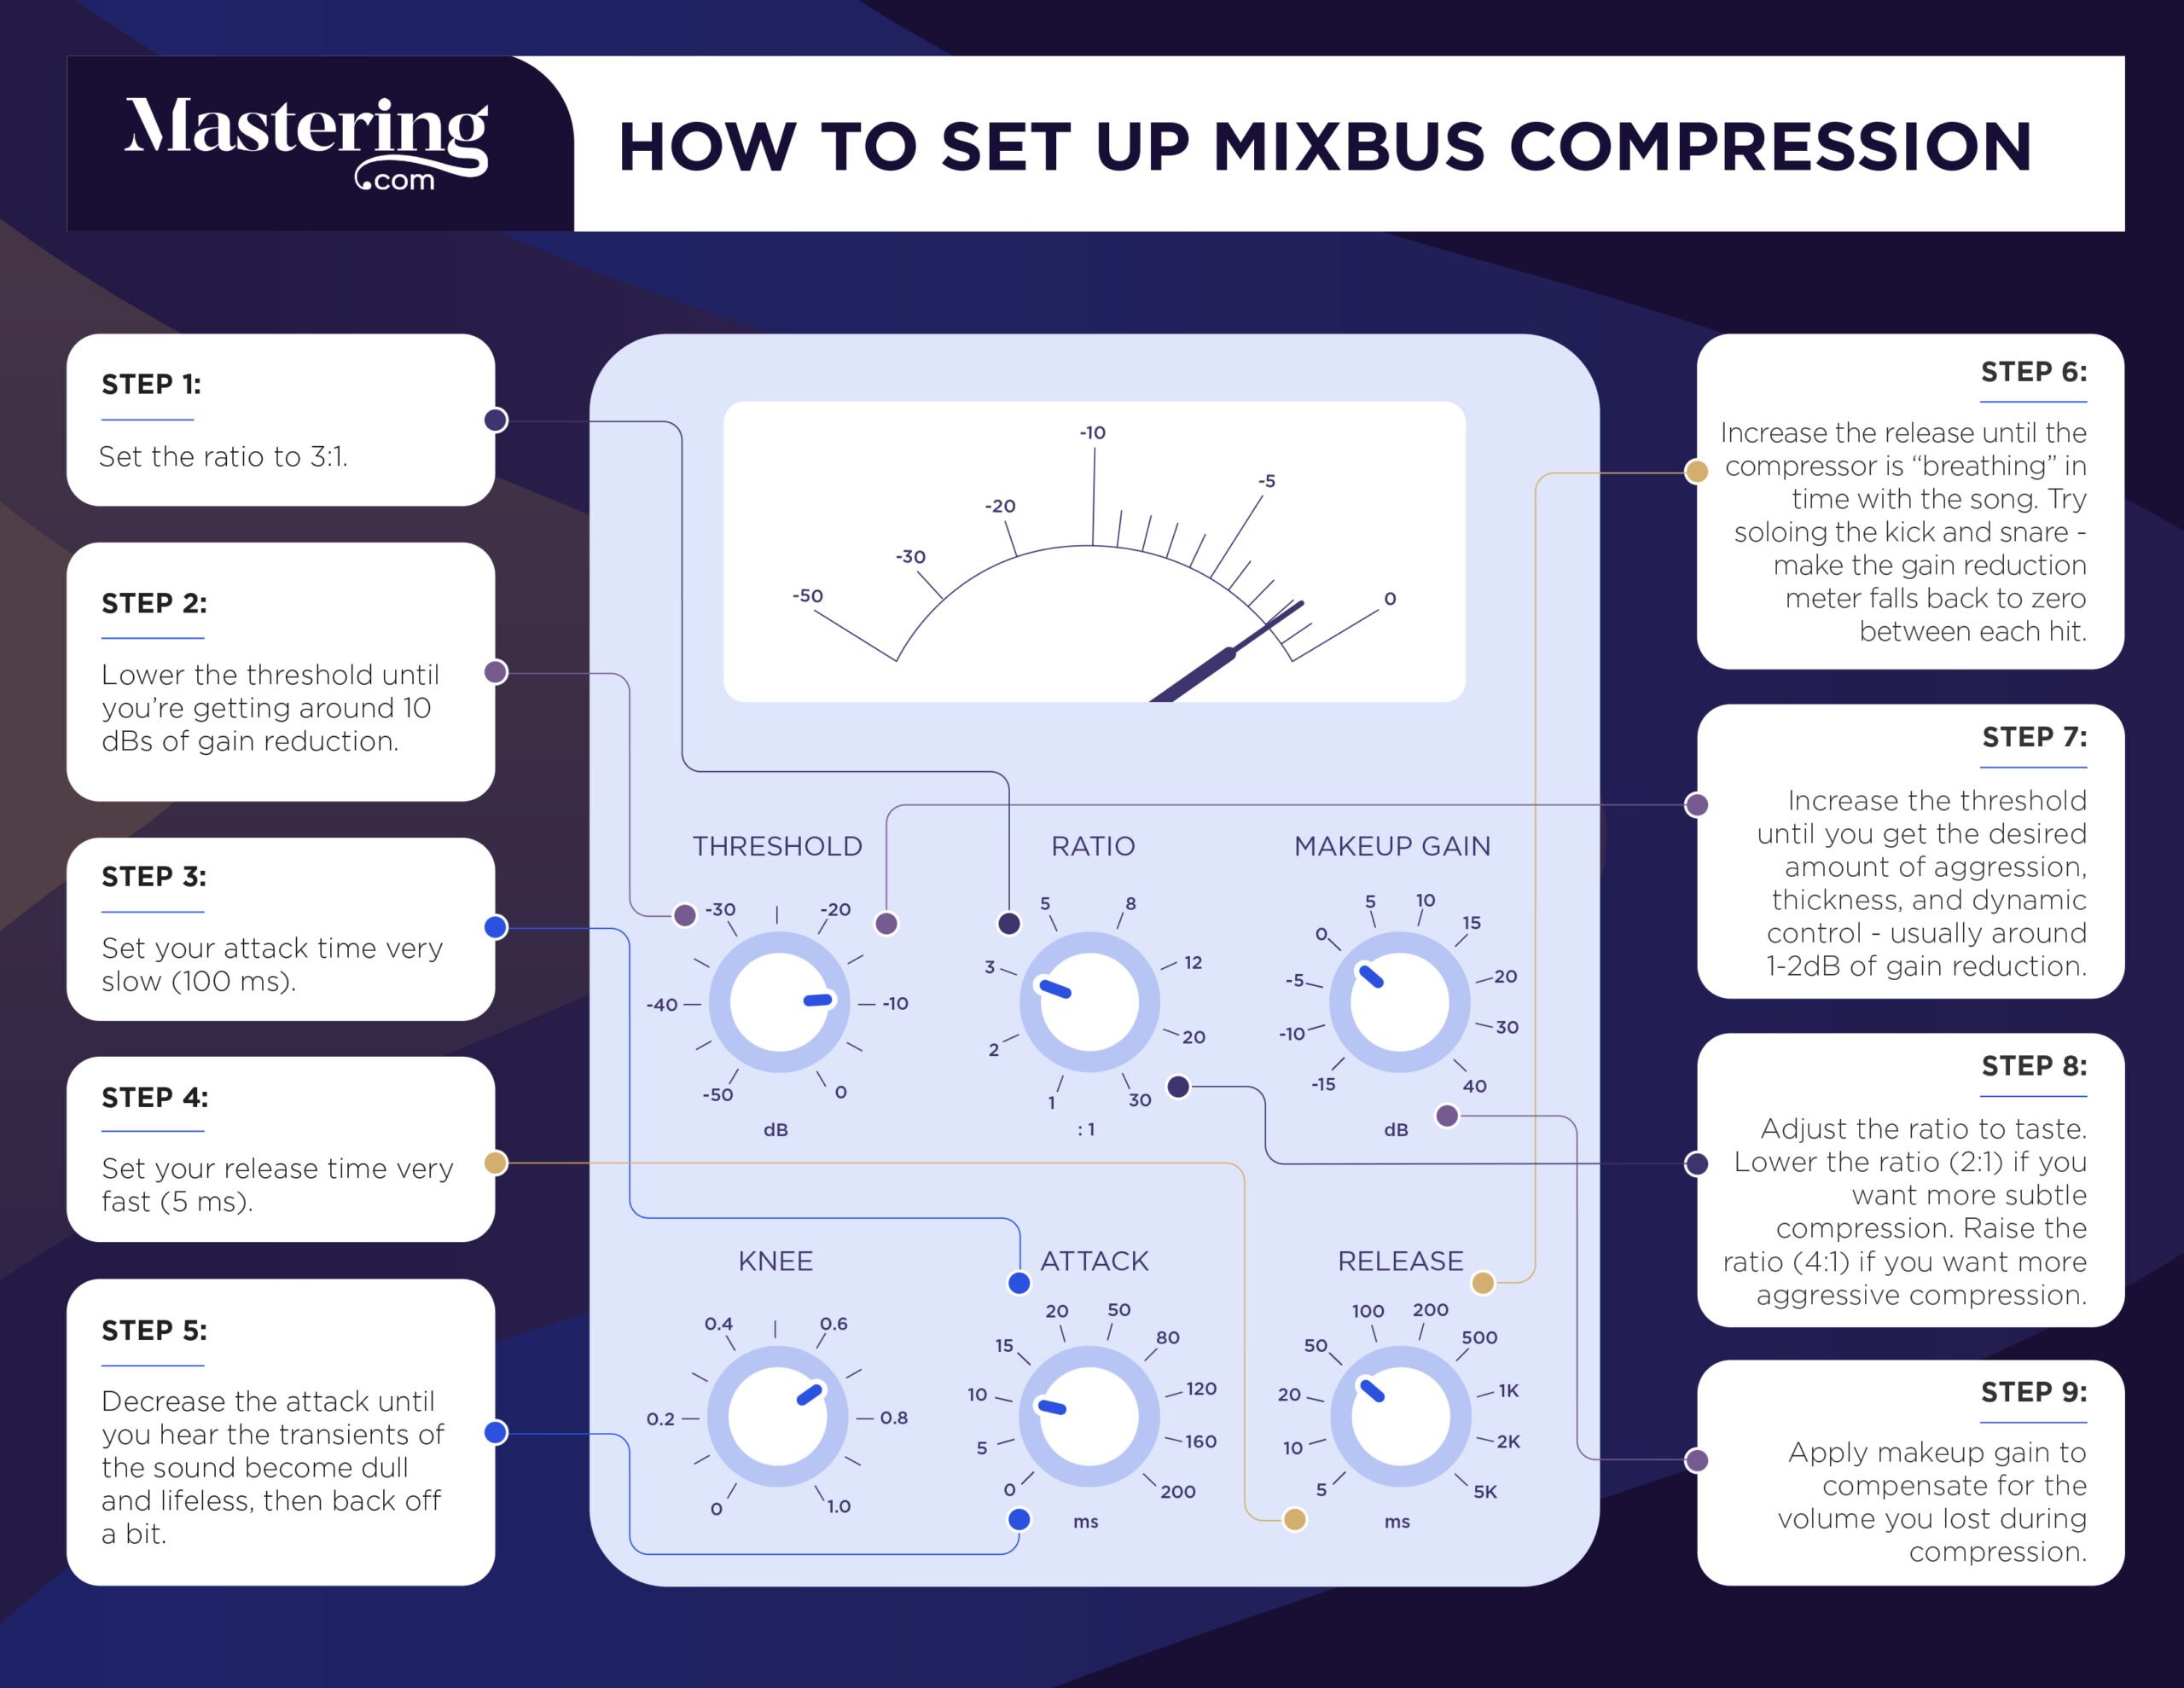
How to Set Up Mixbus Compression
Mistake #1: Avoiding Stock Plugins
I mentioned this above…
You don’t need a premium plugin to do mix bus compression.
There’s no special bus compressor that will do the magic for you.
All you need is your DAW’s stock compressor.
That said, there will be a time when upgrading to a better compressor will help you take your mix bus compression to the next level. Analog compressors add a certain “color” to the sound that can be very pleasing to the ear.
But it’s more important that you’ve mastered this technique with your stock plugin first. It doesn’t matter that you have a nicer plugin if you still can’t do the technique right.
It’ll just be a waste of money. So hold off until you really need it.
Mistake #2: Using Too High a Ratio
Mix bus compression gets added to the entire mix, so subtlety is the key here.
You don’t want the compressor to act too aggressively. In general, a 2:1 ratio is enough.
 Sometimes, even a 2:1 is too much. I’ll often set my ratio at 1.5:1. It’s small, but it makes a difference.
Mistake #3: Using Too Much Gain Reduction
A lot of the time, 1-2dB of gain reduction is all you need. Again, subtlety is the key to making this technique work in your favor.
I like to use the “2-and-2 Rule” to remember this during my mixes:
Start with a 2:1 ratio and 2dB’s of gain reduction.
It’s a helpful trick to make sure you’re not making your compression too aggressive.
Mistake #4: Using a Fast Attack Time
You rarely want to use a fast attack time on your mix bus compressor.
The faster the attack time, the more the transients of your notes will get cut off. Too fast an attack time will make your mix sound flat and lifeless.
I can’t give an exact suggestion for where you should set the attack time at, because it all depends on the nature of the song itself. Some songs need it slower, some songs need it a bit faster.
Generally, through, a medium to slow attack time works best.
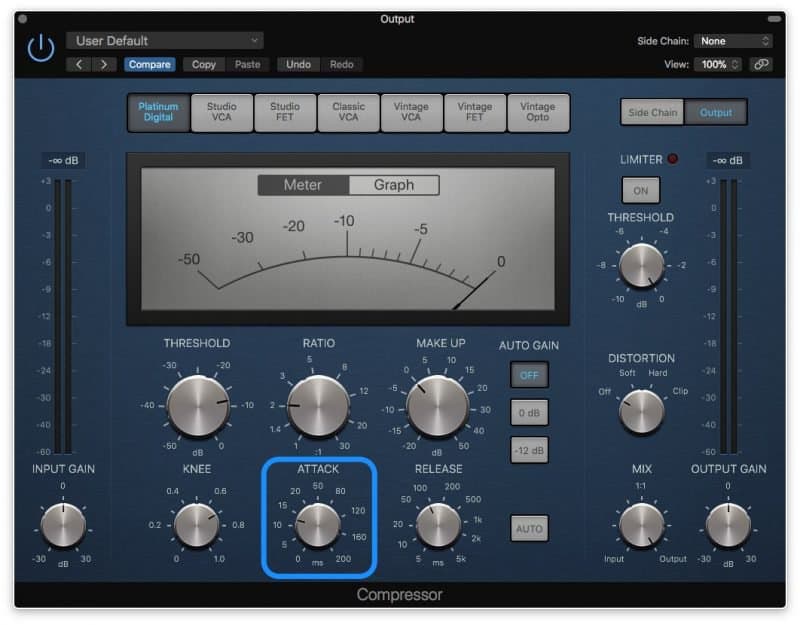
I would start with a very slow attack (think 100ms) and gradually move the attack time faster and faster. Once the transients start to sound dull, back off a bit.
If you need help hearing this, turn your threshold down until you’re getting 10dB’s of gain reduction. Whatever moves you make will be more obvious now. Once you’re done, just put your threshold back where it started.
Mistake #5: Using a Fast Release Time
Using a fast release time can be just as bad.
If the release time is too fast, a phenomenon called “pumping” can occur.

Pumping is when the compressor clamps down on a note, but releases too quickly – so that the end of the note is actually louder than the middle of the note.
Though it’s a desired sound with certain instruments and styles, it’s very unnatural on the mix bus.
Having a release time that’s too fast can even cause distortion!
The most important rule of thumb is this:
Time your release to the tempo of the track.

You want your compressor to be engaging and releasing in time with the drums. That will add to the groove of the whole song.
The process for finding the right release time is the same as finding the right attack time. Set your release time very slow, then gradually increase it until you can feel the compressor “breathing” in time with the song.
Make sure not to go much faster than 50ms, though. That’ll definitely lead to pumping.
Mistake #6: Using a Slow Release Time
Just as the release can be too fast, it can also be too slow.
If you set your release time too slow, then the compressor simply won’t work properly.
Rather than catching each individual note, it will just be constantly on. Instead of having more dynamic control, your track is just 2dB’s quieter than it was before.
Your compressor needs to be returning to 0dB’s of gain reduction around once per bar.
A good rule of thumb to help you out is that it should be returning to 0dB’s between snare hits or kick hits. That should help to improve the groove of the song.
Bonus Mistake: Adding the Compressor at the END of Your Mix
This is a common mistake to make, but it can be just as dangerous as the rest.
Mix bus compression only works if you are mixing INTO the compressor, not just adding it at the end.

The compressor changes the dynamics and tone of the entire mix. Adding it at the END of your mix will change everything you’ve been working on.
It doesn’t matter what compression settings you put on there. It’s going to mess with your mix.
But if you add it at the START of the mix, you’ll be constantly hearing what it’s doing to your mix and can adjust accordingly until you get the sound you like.
There’s a good chance it will lead you to use less compression on the mix itself, and that’s okay!
You’ll likely need to tweak the threshold during your mix to make sure you’re not going above 1-2 dB’s of gain reduction. But as long as you check it every 30 minutes or so, you should be just fine.
Check out Rob’s video on Backwards Mixing, his personal step-by-step mixing system. I’d fully recommend it.
Conclusion: Mix Bus Compression
If you avoid the mistakes above, you should be using your mix bus compression correctly. Simple as that.
This is the best bus mixing technique there is. With a little practice, your mixes will sound tighter, more energetic, and one step closer to professional.
If you want to dig deeper into music production and learn what it actually takes to make mixes that sound pro… And you’re an intermediate or advanced producer… Be sure to check out the free masterclass: Enjoy!Next Steps