
Want your vocals to sound more professional?
Here’s the key…
First, mix your vocals with EQ and compression.
Second, apply some cool vocal effects.
If your lead vocals stay exactly the same for an entire song, that can get boring.
So I want to show you how to add unique vocal effects to make things sound more interesting.
But if you just want to learn about Vocal Effects specifically, keep reading.
Why Use Vocal Effects

Every time you mix vocals, you need to be using EQ, compression, and reverb or delay (even if it’s just a little).
Those are the basic effects you need.
But there are other methods for using these effects that can make your vocals pop out, sound grittier, or just be more interesting.
Applying vocal effects can give your voice a unique sound. It can make your track sound more professional.
Listen to the radio and you’ll hear the vocals don’t sound exactly the same the whole way through a song. It could be as subtle as adding an effect on the vocal during the chorus only.
The point is you need to at least try using these vocal effects. It could really improve the quality of your vocal tracks.
Interesting Vocal Effects
Let’s cover some cool vocal effects you can use in your mix.
These aren’t effects for polishing your vocals, like EQ and compression. These are more like production choices than anything else.
Add Wet Reverb
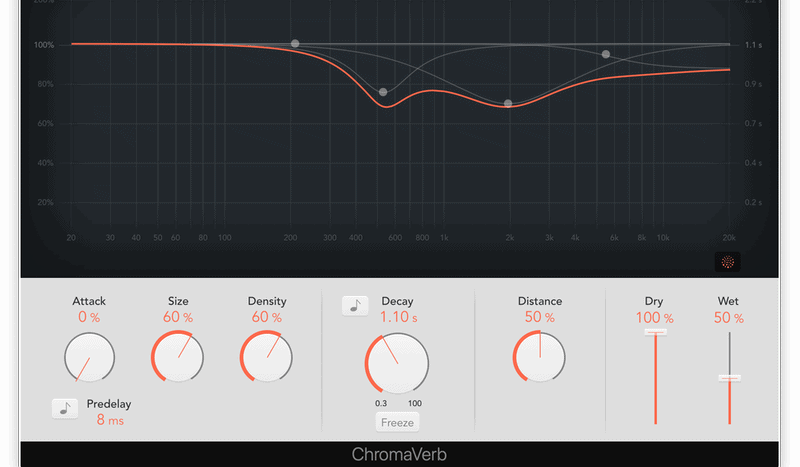
Reverb should be on every one of your vocal tracks, even if it’s just a little bit.
But on top of that, you can add extra wet reverb to emphasize certain lines or words.
You can also add heavy reverb to a background vocal and then bring the gain down. This will create space in the vocal mix without muddying the lead vocal.
Your go-to reverb plugin probably has a preset that has intense reverb. So try applying that first.
But if you want more or less, just adjust the wet setting.
Pre- and Post-Delay
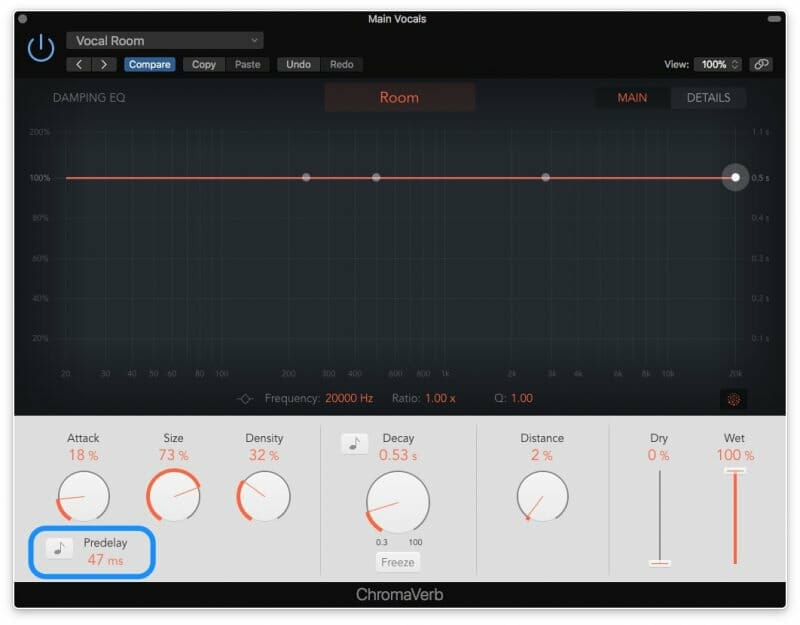
Pre-delay is a setting on your reverb plugin. Most reverb plugins include it.
It delays the time between the vocal signal and when the reverb first kicks in. This makes the vocal sound bigger without muddying the vocal.
For pre-delay, start with 20–40 milliseconds (ms) and tweak to your liking.
You can also use post-delay, which is another way of saying, “Add delay after your reverb.”
The reverb will soften the gradual fade of the delay that follows it, diffusing it slowly. Just use a short delay.
Depth with Delay
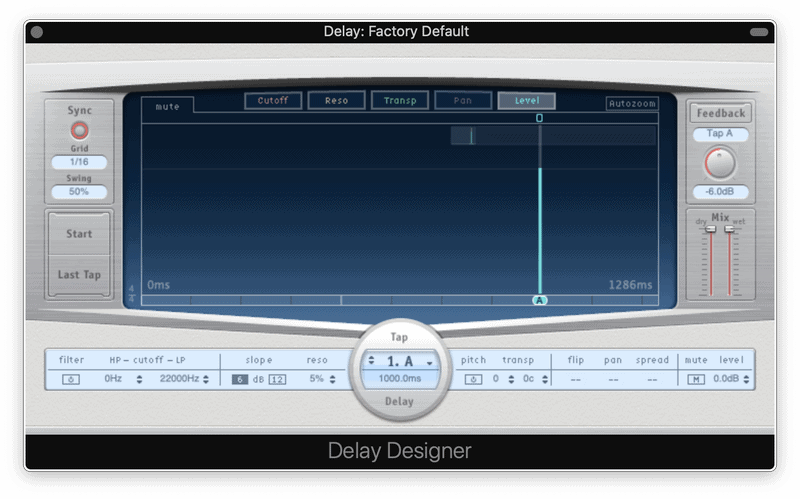
Just like reverb, it’s a good idea to have at least some delay applied to your vocals.
But if you want to add more depth without barraging your mix with too many delay repetitions, here’s a trick:
Apply delay and change the ms to 100. Then change the number of repeats to one.
You can either apply this directly to the vocal track or send it to a bus, whichever you prefer.
Either way, it should make your vocal have more depth without cluttering it.
Turn Yourself into a Choir

Just because there’s only one of you, doesn’t mean there can only be one of you in your song.
You can turn yourself into your own little choir.
This is a trick used by Queen in “Bohemian Rhapsody,” Jacob Collier in nearly every one of his songs, and so many other artists.
Here’s how you can do it:
First, you want to ensure the lead vocal is exactly how you want it. Edit it, comp it, de-ess it, and whatever else you need to do in order to finalize it.
Then I’d suggest recording one or two layers of the melody on new tracks.
You can even sing the layered parts differently. Yell one take, whisper another, and pinch your nose while you sing the third.
Also, sing the melody in different octaves. Reach up into your falsetto an octave up. Find your morning voice an octave down.
Next, find as many harmonies as you can. Singing the harmonies that start on the third and fifth notes of the chord is a good place to start.
Then sing those harmonies in different octaves, if possible.
If you can’t reach all the different octaves, simply pitch that track up or down with a pitching plugin.
You can imagine how many additional vocal tracks you could end up with.
Some tips on what to do after recording all these parts:
- Be generous with your panning: I’m talking 50–100%. You need to leave room in the middle for the lead vocals.
- The gain knob is your most important tool. Gain staging is very important when you have this many vocal tracks. Spend time getting the levels right.
- Use bussing. With so many BGV tracks, you should bus them all to an EQ bus, a compressor bus, a reverb bus, and a delay bus.
Bus the Autotune for a Vocoder Effect

Speaking of bussing, you can get a vocoder-like effect if you bus your BGVs to an autotune.
This works whether you’ve recorded a choir of yourself or you just have a few vocal tracks.
Here’s how to do it:
- Create a new track and title it “Autotune bus”
- Route your vocal tracks to this bus channel
- Apply heavy autotune to the bus channel (i.e., use a fast attack time)
- You may have to bring the gain of this bus channel down a bit so it’s not overwhelming the mix
So what happens when you do this?
The bus channel compiles the signals you’ve sent to it, applies the autotune, copies those signals into one new signal, then mixes it back into the song.
So you have the original vocal tracks (without autotune) in the mix. But you also have a copy of the bussed vocal takes (with autotune) layered in.
This creates a vocoder-like effect.
Widen the Vocals

If you want to make your vocals feel bigger and, well, wider, this method is for you.
Yet again, it involves bussing.
Here’s how to do it:
- Create a new track and title it “Vocal widener”
- Route your vocals to this track
- Add a vocal widener (like the free Ozone Imager plugin)
Adjust the settings of the widener until you hear and feel the vocal become wider.
If you want big vocals, this can help.
Get a Megaphone Sound

If you want a vocal that sounds like you’re singing through a megaphone but you don’t own one, use this method.
Think Green Day, Rage Against The Machine, and The Flaming Lips.
Here’s how you can get a pseudo-megaphone:
- Apply a high-pass filter and cut everything below 300–400 Hz
- Apply a low-pass filter and cut everything above 2–3 kHz
- Then listen for fuzzy frequencies in the middle and boost them
To add a little more grittiness, apply a little saturation after the EQ.
Conclusion
These tricks are just starting points.
Now it’s up to you to use your creativity to shape some pro-level vocals.