Getting the low end right isn’t easy.
Your speakers, your room and your headphones are tricking you.
But when you DO get the low end right… wow, does it make a difference.
You start to notice that your mixes translate better…
…and your music sounds powerful and impactful.
I’m guessing you’re here because you want to make your mixes sound professional. We put together a brief training that covers a totally new approach to music production. Until now, everyone has been teaching production totally backward. Just click below to watch.Get industry-quality every time (steal this framework)
But if you just want to learn about Mixing Low End specifically, keep reading.
Now, to help you get the low end right, here are 8 of my favorite tips that I have accumulated and learned over the years.
Start With the Basics
Before I share these tips, I want to make sure you are starting in the right place.
You cannot underestimate the importance of room setup and balancing.
In this guide we are going to focus on compression and EQ…
But, if you don’t have a good listening environment and good levels first, it will be an uphill battle.
Compression: Managing the Low End
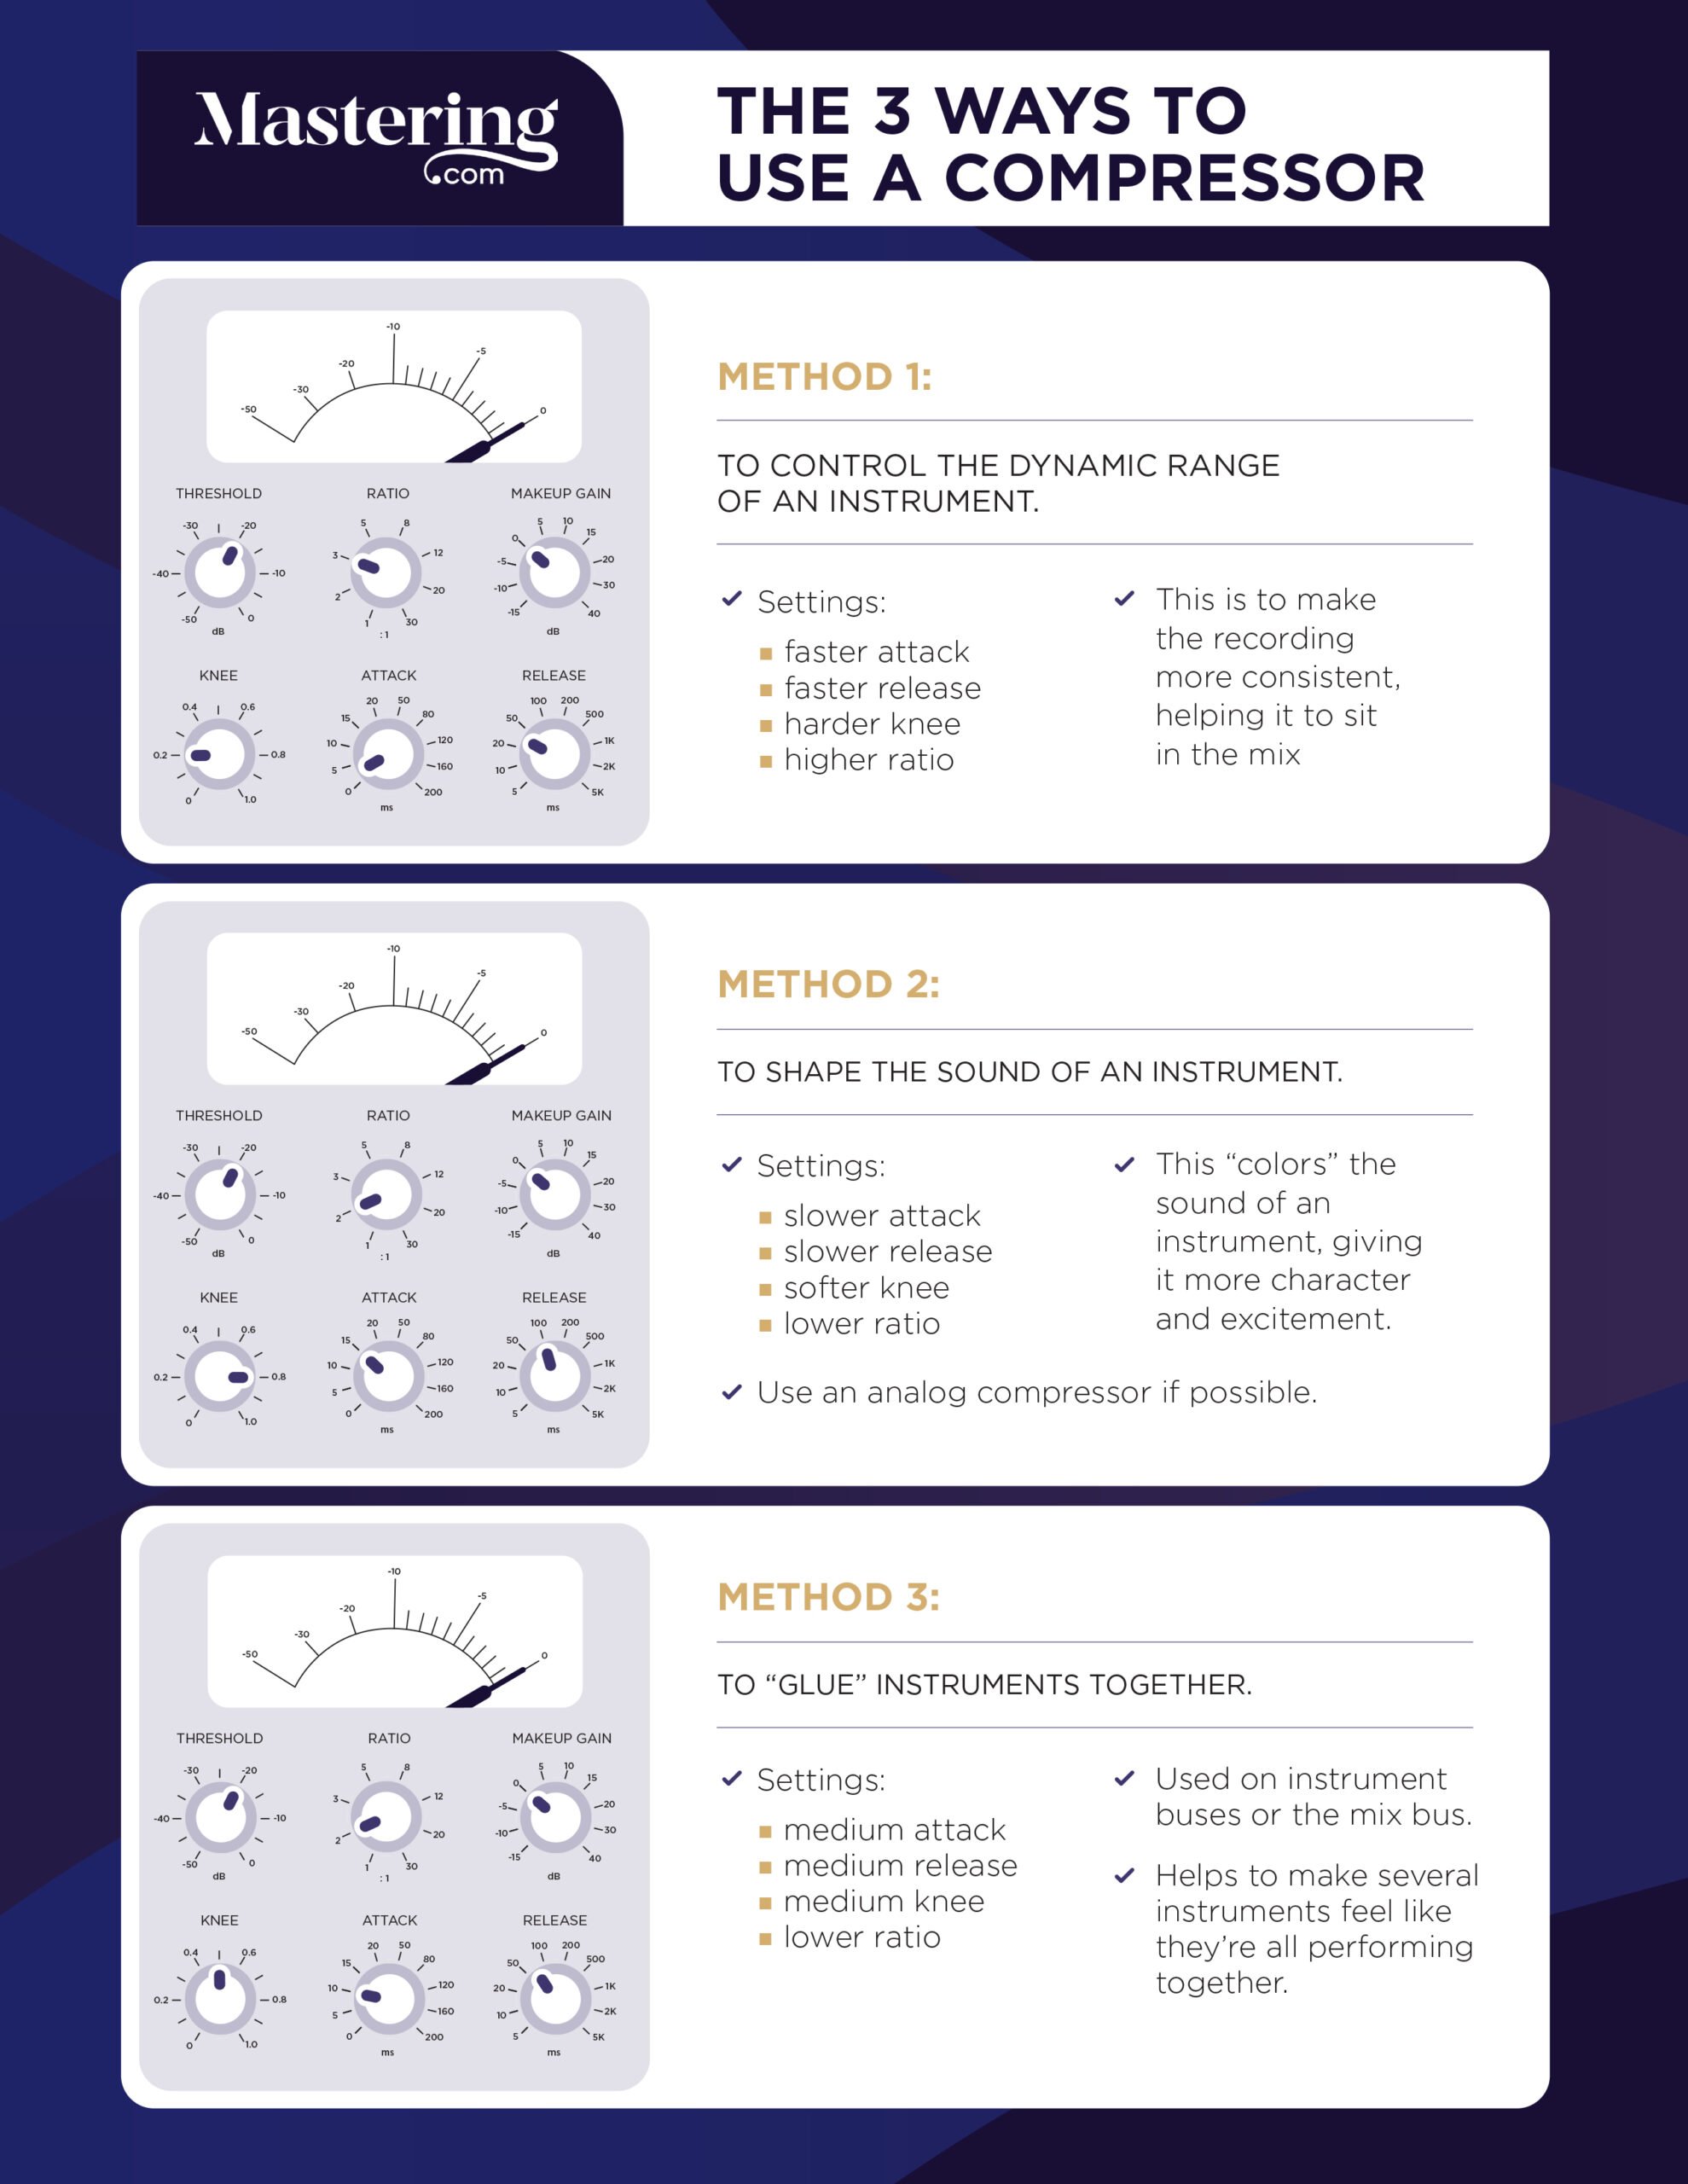
When it comes to the low end, you should be more aggressive with compression.
The bass and kick are probably going to be compressed more than anything else in the mix.
Most of the time, you can apply 5dB+ of gain reduction without making the kick or bass part sound over-compressed.
You don’t want any sudden changes in the volume of the low end. In order to achieve this, compression is needed to tame the dynamics.
Tip 1 – Pay Close Attention to Attack and Release Times
For the kick drum, pay close attention to the attack time.
If you go too fast, you will lose the attack of the beater.
Equally, set your attack time too slow, and the compressor won’t engage fast enough to control the kick.
Start with a medium time and increase the attack time (faster) until you notice the kick becomes less punchy. Then bring the attack time back down a touch (slower) until you are happy with the amount of attack.
As for bass guitar, watch the release time. If the notes are long and sustained, you don’t want a fast release time – this will cause noticeable pumping.
Tip 2 – Compress the Kick and Bass Together
This is an old trick for making the kick and bass sound tighter and more unified.
Don’t be too aggressive here, as it’s difficult to get the attack and release times right.
Just 2-3dB of gain reduction is normally enough to add a bit of glue to the low end.
Send the kick and bass to a new group buss and add compression there.
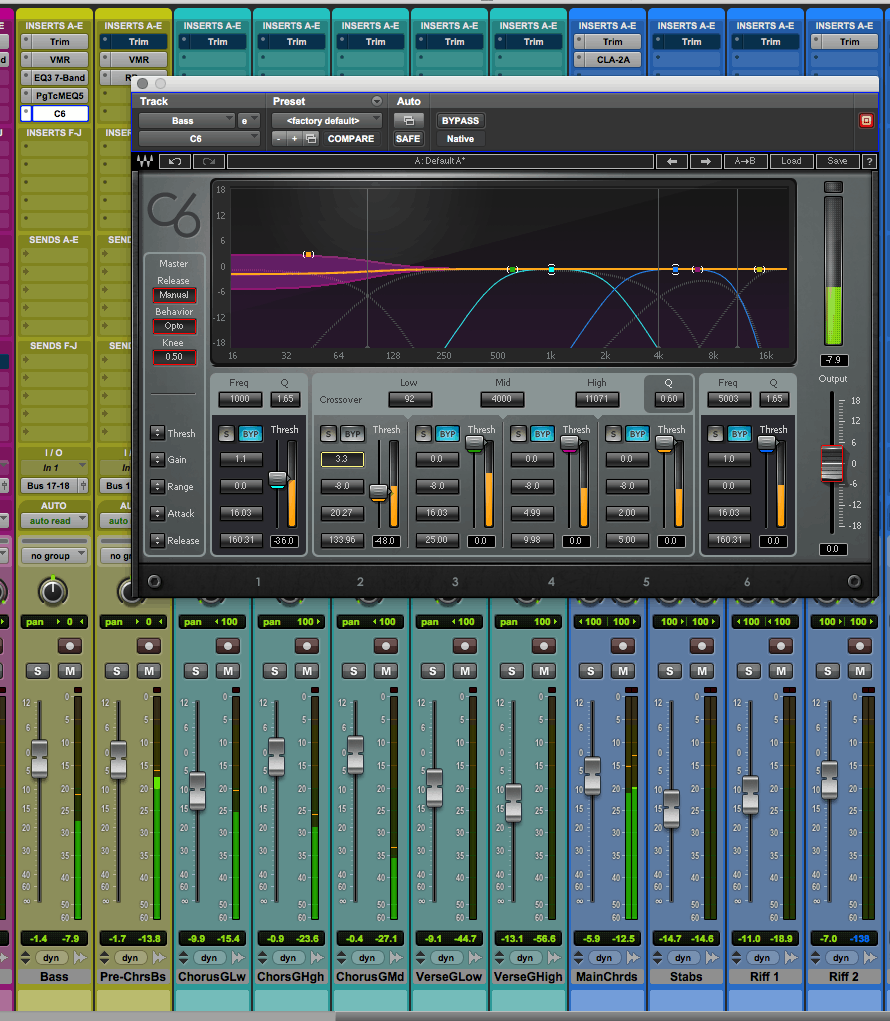
Tip 3 – Heavily Compress the Low End of the Bass
Try using a multiband compressor to really squash the lows of the bass part – if this is providing the low end in the track.
This will provide a constant, powerful low end for the track without ruining the dynamics of the bass part.
Try compressing everything below 80Hz and opting for 5dB+ of gain reduction.
Tip 4 – Use Sidechain Compression on the Bass
This trick works well if the kick is getting drowned by the bass part.
Add a compressor to the bass and sidechain it to the kick. Now dial in 2-3dB of gain reduction every time the kick hits.
Start with a fast attack (below 50ms) and medium release (around 200ms).
Tip 5 – Use Multiband Compression on the Mix Buss
This is a good last resort if you need a way to control the low end a bit more.
Generally, we want the kick and bass to be pretty consistent in terms of dynamics. This is why aggressive compression is needed.
But after controlling the low end through balancing and compression, we can add another layer of control with some multiband compression on the mix buss (master fader).
This doesn’t need to be complicated. In fact, it’s very easy. Don’t be afraid of multiband compression.
All you need to do is engage one band of the multiband and compress everything below 100Hz, for example. Don’t touch anything else.
Now just dial in 2-3dB of gain reduction on the low end. Simple!
Here’s a video walking through this process:
Equalization: The Final Step
Using EQ to create space in the low end isn’t as easy as the rest of the mix.
You should be careful when boosting the lows. It rarely works – instead you should use a plugin like RBass if you need more low end. This is discussed in more depth in my video on fixing thin mixes.
Still, I have a few tips for managing the relationship between the kick and bass using EQ…
Tip 6 – Avoid Narrow Cuts
Narrow cuts don’t work as well on the low end as the rest of the mix. Instead, focus on delegation.
For example, maybe the kick has been delegated to the sub bass range (30-80Hz) and the bass guitar is more prominent in the upper bass range (80-300Hz).
In this case you could use a broad cut on the kick between 80-500Hz, and a high-pass filter on the bass around 70Hz.
Tip 7 – If You Do Boost, Watch the Width
If you want to bring out 60Hz in a kick, for example, use a narrow boost rather than a wide one.
A wide boost would likely cover the entire low end – you will run out of space and end up boosting too many low frequencies.

On the contrary, when boosting a bass guitar avoid narrow boosts. In this case, you could be boosting a particular note and making it far louder.
Instead, use a subtle wide boost.
Tip 8 – Boost the Mids for Presence
It’s important to get the levels right before you reach for EQ or compression.
Most of the time, a small change in volume on the bass or kick channel can make a huge difference to the low end of a mix.
Sometimes, though, you might reduce the volume of the bass guitar to reduce the low end of the mix – but then find that the bass guitar gets lost and isn’t as audible.
To counteract this, you can boost the mids to bring the bass guitar further forward in the mix.
Find a sweet spot anywhere between 800Hz-6kHz to boost. The same applies to the kick drum.
You can also try using saturation to achieve the same effect. This will also help the low end parts to stick out more on small speakers.
Tip 9 – Use a Low-Pass Filter
In most cases, the high frequency content of a kick drum or bass guitar aren’t needed.
Remove these frequencies with a low-pass filter to make more room in the top end for the parts that need it.
Improving YOUR Mixes
Getting better at controlling and mixing the low is an important part of developing as a mixer.
Focus on your listening environment first – make sure you can accurately hear the lows.
Then spend plenty of time on balancing and setting levels.
After that, you can use some of these compression and EQ tips to further enhance and control the low end of your mix.
But before you do any of this, you need to address your room, your speaker position, your volume balance and your reference tracks.
UPDATE: Constantly blowing up your speakers with too much low end? You might be making a crucial mistake:
If you want to dig deeper into music production and learn what it actually takes to make mixes that sound pro… And you’re an intermediate or advanced producer… Be sure to check out the free masterclass: Enjoy!Next Steps