The battle against muddy mixes wages on…
This is a never-ending problem that you will most likely need to address in every mix.
It’s the bane of the typical rock-band setup.
If you aren’t aware of this problem, then perhaps your mixes don’t come out the way you like – and you’re not sure why.
Let me tell you… it’s probably a mud problem.
By treating the mud in your mix, you make room for everything else to shine through.
In this part of the One Month EQ Challenge, I want to show you how to prevent and fix a muddy mix.
I have 3 simple, easy-to-follow techniques for removing mud. Let’s get started…
In this video you’re going to learn all about how to prevent and fix a muddy mix. It’s a really common problem, especially with the typical rock band setup, but as soon as you’re aware of the ways that you can prevent and fix the problem of mud in your mix, it really clears up your mixes, gives them more definition, gives them more room for the good stuff to shine through and more clarity in there as well.
First of all, to reap quickly, you need a good listening environment, or you at least need to know your listening environment. It helps if you have acoustic treatment and a pair of actual studio monitors or a good pair of open-back headphones, for example. But if you don’t have those, you can still get good mixes; you just need to really learn your equipment.
Which brings me on to point two, which is make sure you use references when you’re EQ-ing. Compare your mix to a professionally mixed, mastered, and released track, and that will guide you towards making the right EQ decisions and give you something to compare your mix to, to decide if it’s too bright, too bass-y, etc. So two key things I wanted to reiterate there.
Now let’s move on to muddy mixes and how you can prevent and fix them. I find that the guilty frequency range is generally between 200 and 400 hertz. Sometimes 500, sometimes a bit lower than 200, but generally it’s between 200 and 400 hertz.
If you load up an EQ on your mix buss, center a band at 300 hertz, make it quite wide, and boost it – instantly the mix going to sound more muddy. Everything is going to lose its definition; you’re not going to be able to pinpoint the different instruments as much, and it’s just going to sound a bit clogged up.
So 200 to 400 hertz is the frequency range that you want to address with your EQ moves, but before we talk about that, I want to go back to the root of the problem. It’s generally an arrangement problem.
When you’re arranging a piece, you want to think about both instrumentation and also the register and octave that the different parts play in. Because if you have lots of parts playing in that area, in that lower mid area, in the same octave – maybe you have three guitars all playing in the same octave, or even different instruments but playing in that same register – of course there’s going to be a buildup of frequencies in that area.
If you think about a string quartet, it’s a cello to provide the low end, viola to provide the middle, and two violins to provide the top end, but generally they’ll be doing different things. So you’ve got a really nice spread across the whole frequency spectrum with four different instruments.
But now think about a typical rock band setup. You’ve got a drum kit, with the main parts being the kick and the snare; then you’ve got a bass guitar, a rhythm guitar, sometimes a lead guitar as well, an acoustic guitar, a piano maybe, male vocals or female vocals. You could even have keyboard parts. It quickly builds up, and a lot of those instruments are focused around that low mid area. The fundamentals of those instruments are around that area.
You can think about this when you’re composing. You can think, rather than getting three guitars to play chords and a melody in the same octave, put them an octave apart.
But there’s an inherent problem with that rock band setup that is hard to avoid, and generally it does cause muddy mixes – especially when you’re recording at home as well, the kind of microphones you’re going to be using, the microphone techniques you’re using might add to that muddiness. So it’s a common problem.
You can fix it, first of all, by addressing the arrangement if you have that ability. But a lot of the time we also need to use EQ to further remove that mud and treat that problem.
Now let’s go over the 3 ways that you can fix and remove or at least reduce muddiness in your mix.
#1: Avoid Boosting this Range
Technique 1 is pretty simple: don’t boost the frequency range. Now, that may seem obvious, but a lot of people will boost the low mids if they want to make something sound warmer. But instead of doing that, I’d say cut the highs, cut the upper mids. That’s going to make something sound warmer. Or even cut the highs. Experiment with that.
Because as soon as you start boosting here, there’s a couple of problems if you boost the low mids. First of all you’re going to be adding to that mud, and secondly, especially if you get a bit lower, you could be boosting particular notes.
A bass guitar, for example, a lot of the notes are between 60 and 100 if you’re playing in the lower octave. If you just boost it 100, you’re going to be boosting certain notes, and those notes are going to stick out a lot more.
So first of all, if you are going to boost low mids or lows, make sure it’s wide so you’re not boosting particular notes. But generally I recommend to avoid boosting between 200 and 400. Again, that seems obvious, but that’s going to go a long way to preventing mud in your mix.
#2: Address 200-400Hz on Individual Channels
Technique 2 is actually treating those problematic frequency areas on the individual channels themselves. For example, you might apply a wide 2dB cut centered at 300hz on the lead vocal.
This does two things: first of all, it clears some of the mud from the vocal. It helps the upper mids to shine through a bit more, it helps it to cut through the mix a bit more. But then secondly, it has that added benefit of also, because the vocal is going to be one of the loudest things, that’s going to remove some of the mud from the overall mix as well.
Of course, you can do this on your group buses as well, and I’m going to talk more about processing on group buses and on the mix bus in a later video. So that’s technique #2, removing mud on the channels themselves and on the group buses. Just remember that frequency range, 200 to 400 hertz, that’s going to be problematic.
#3: Mix Buss EQ
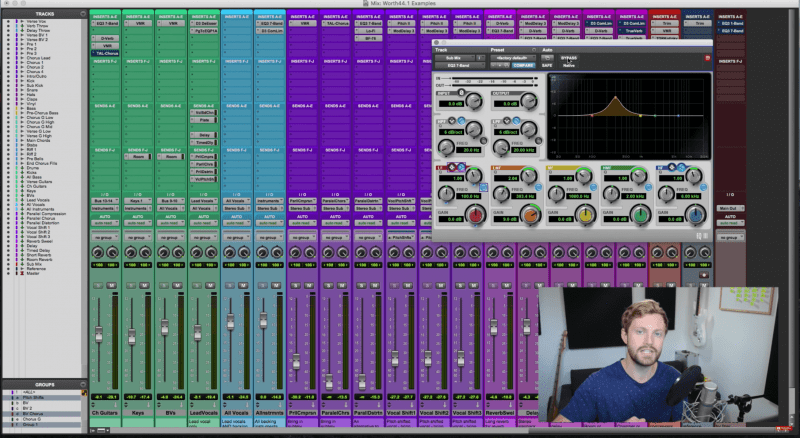
Technique 3 is actually removing that mud on the mix bus itself. In most cases, I would actually apply this technique before cutting frequencies on individual channels.
As mentioned in the video on Backwards Mixing, I mix backwards; I start with the mix bus, then the group buses, then individual channels. So this is the first mud cut that I would’ve added, and then I might remove even more on the individual channels.
You need to be careful, because mix buss EQ can be pretty dramatic. It’s essentially the same as applying an EQ to every single channel. If it starts to sound too scooped, that’s because you’re being too aggressive.
Even the lower mids are really important because that’s what areas are most susceptible to it and that’s where most of the detail is. So if you remove them too much, it’s going to sound scooped and weird, and you’re going to lose a lot of that detail.
So you want to keep it subtle, I reckon 2 dBs is probably about the most you’re going to want to cut by, unless you really know what you’re doing. Generally on your mix bus, you do want to be more subtle.
So that’s approach #3. Just to summarize those 3 key approaches: first of all, try not to boost in that problematic frequency range of 200 to 400 hertz; secondly, treat that frequency range on individual channels; and then #3, treat that frequency range on the mix bus as well.
Once you’ve done all of those things, it’s going to at least get rid of some of that mud. You can fix it with arrangement. Think about that first. But if it’s the typical rock band setup, you’re probably not going to be able to completely remove that problem without EQ as well.