Piano is tough to get right. It’s got the greatest range of any instrument, making it more complicated than most.
By the end of this guide, however, you’ll feel confident about getting your piano to sit perfectly in the mix.
Follow these 10 steps to get your piano sounding full, balanced, and professional.
I’m guessing you’re here because you want to make your mixes sound professional. We put together a brief training that covers a totally new approach to music production. Until now, everyone has been teaching production totally backward. Just click below to watch.Get industry-quality every time (steal this framework)
But if you just want to learn all about Earplugs specifically, keep reading.
Step 1: GIRATS! (or Get It Right at the Source)
Before any mixing begins, the first thing you have to do is…
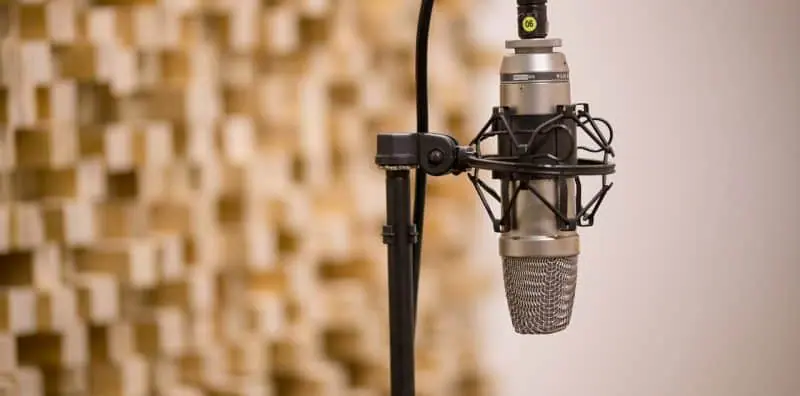
…get good recordings.
I know this is a little bit cheap. This isn’t even a mixing step.
But it’s the most important step nonetheless!
There’s a famous saying in the music world:
“You can polish a turd until it sparkles, but at the end of the day… you’re still holding a turd.”
Mixing is a powerful step in the production process, but without building a foundation of good recordings, you will not get good mixes.
The “quality potential” for any track is dictated by how well was recorded. If the piano is recorded badly, then even the greatest mixer in the world will only get a so-so sound.
But if the piano is recorded really well, then even a novice mixer can make it shine!
I’m not going to go into the proper way to record piano here. That’s a topic for another post.
But I will give you one important tip:
Take your time when recording.
Don’t just throw a few mics up and start banging away at the piano. Take your time to find the places where the mics sound best.
Do your research, but more importantly, use your ears. It’s cliché advice, but if it doesn’t sound good once it’s been recorded, then it’s not going to sound good once it’s been mixed.
Step 2: Take the School Bus
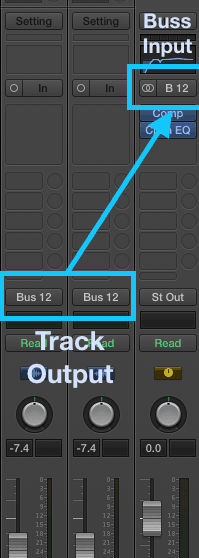
Once your mics are recorded, you’re going to need to route them to a bus.
Bussing’s an incredible thing. If you’re unfamiliar, bussing is when you change the output of each recording of a certain instrument to the same “bus.” All of the recordings are then directed to a single aux track that you can use as a “master fader” for your instrument.
I like to think of it like this:
A school bus picks up each of the students at their houses and then takes them to a single place – the school.

This is exactly what bussing is doing with your recordings.
You are routing each of your piano mics into one single track.
That means you don’t have to apply the exact same plugins to each microphone. You can do all your mixing on this one bus.
It saves on time and CPU. It also makes your piano feel more “glued together,” since you’re processing all of your mics together on the same plugins.
Don’t stop with the piano: do this with all of your instruments and you’ll make better mixes faster!
UPDATE: We released a video recently that shows you 15 tips for faster mixes:
Step 3: Check Your Phase
Phase is something of an enigma to those who are starting to record their own music. I’ve talked to many students who have no idea what the word even means.
So let’s clear up the confusion.
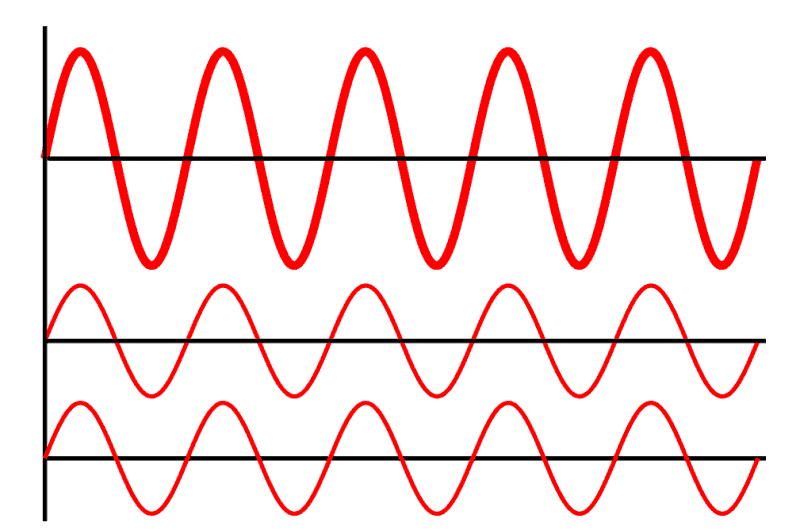
Phase is basically how the location of two similar waveforms react with each other. If two similar waveforms are “in-phase,” then the peaks and troughs of the waves are lined up with each other.
The volume is increased in this sound, but that’s it. Nothing else is changed.
However, if the waveforms are “out-of-phase,” then the peaks are in line with the troughs.
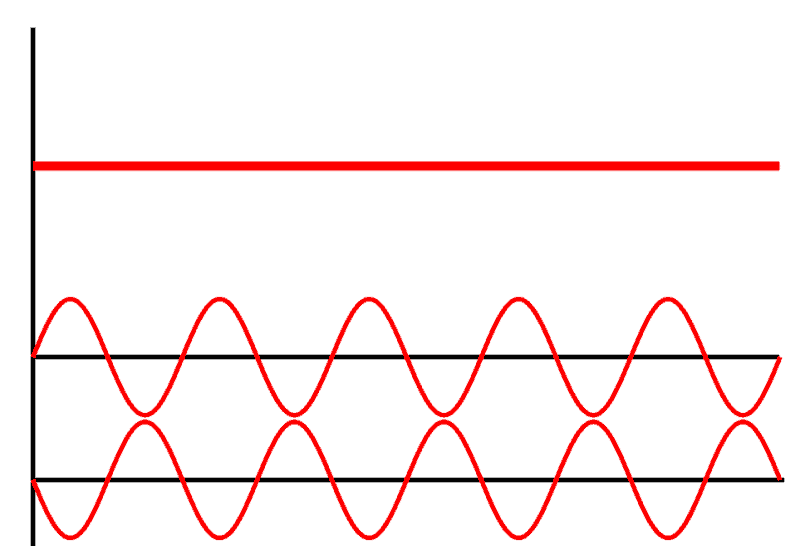
As you can see, out-of-phase waveforms cancel each other out.
This causes low and low-mid frequencies to get lost. Out-of-phase waveforms lose their bottom end, sounding thin and unnatural in the process.
This is pretty common with instruments that had multiple mics on them, like pianos often are. Because sound moves at a consistent speed, if one microphone is slightly farther away from the sound than the other microphone, then the first mic will record the sound of the piano slightly earlier than the second mic.
And if similar waveforms are out of sync… that causes phasing.
There are a few ways to fix it.
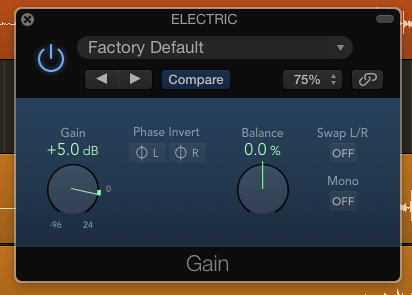
The first is to use a gain plugin and flip the polarity on one of the recordings.
 This basically flips the waveform upside down. If your two waveforms are perfectly out of phase from each other, flipping the waveform will put them perfectly back in phase.
This is a bit of a quick fix, though. It’s the most effective when the two waveforms are REALLY out of phase from each other.
The other method takes a little more time, but is more effective.
First, zoom in as far as you can on both of your waveforms. You’ll probably be able to see that the peaks and troughs aren’t lining up.
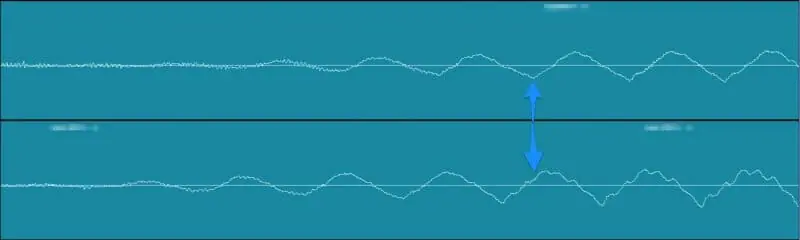
Grab one of the audio files and nudge it a bit to where the peaks and troughs line up.
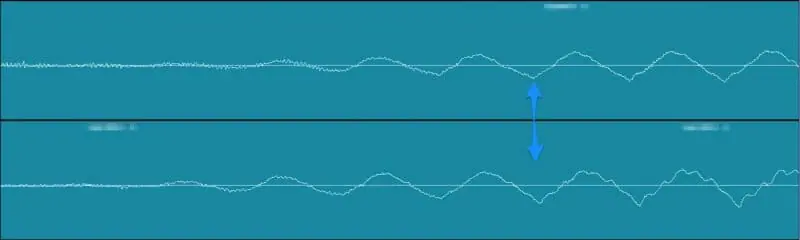
Then hit play. You should hear a lot more bottom end now!
Make sure you check your phase before you start mixing. The frequencies lost due to out-of-phase mics can’t be fixed with an EQ.
They’ll suck the lifeblood out of an instrument. So fix it before it’s ever a problem.
Now that our phasing has been handled, let’s balance our piano with the rest of the band.
Step 4: Get Your Balance Right
Outside of GIRATS (Getting It Right At The Source), Balancing is BY FAR the most important step in the mix.
It’s the foundation of your entire mix. If everything is processed perfectly but the volume’s aren’t balanced, it won’t matter how meticulously you did you EQ…
…it’s still going to sound amateur.
So first things first: mute any unnecessary mics you have.
Some people get a little carried away when they record piano. They’ll use four, five, even six mics to get the whole thing.
Having that many sound sources is just going to muddy up your mix! Especially if the piano is just a background instrument.
So pick one to three mics and stick with them. The more background instrument is, the fewer mics you need.

Next, we’re going to balance the tone of the mics together. One mic will likely be your primary tone, whereas the other mics will add color.
Turn all of your mics down, then bring them in one-by-one. Play with the volume levels until you like how the piano is sounding in context of the mix.
Once you’ve got your tone sounding good, use the volume fader on your piano bus to balance the piano with the rest of the instruments.
How loud you want it will depend on the nature of the song. Is it the main instrument? Is it the melody? Is it the bass? Is it just meant to fill up the background?
Think about this while you’re balancing the piano volume. Then use your ears to make a decision.
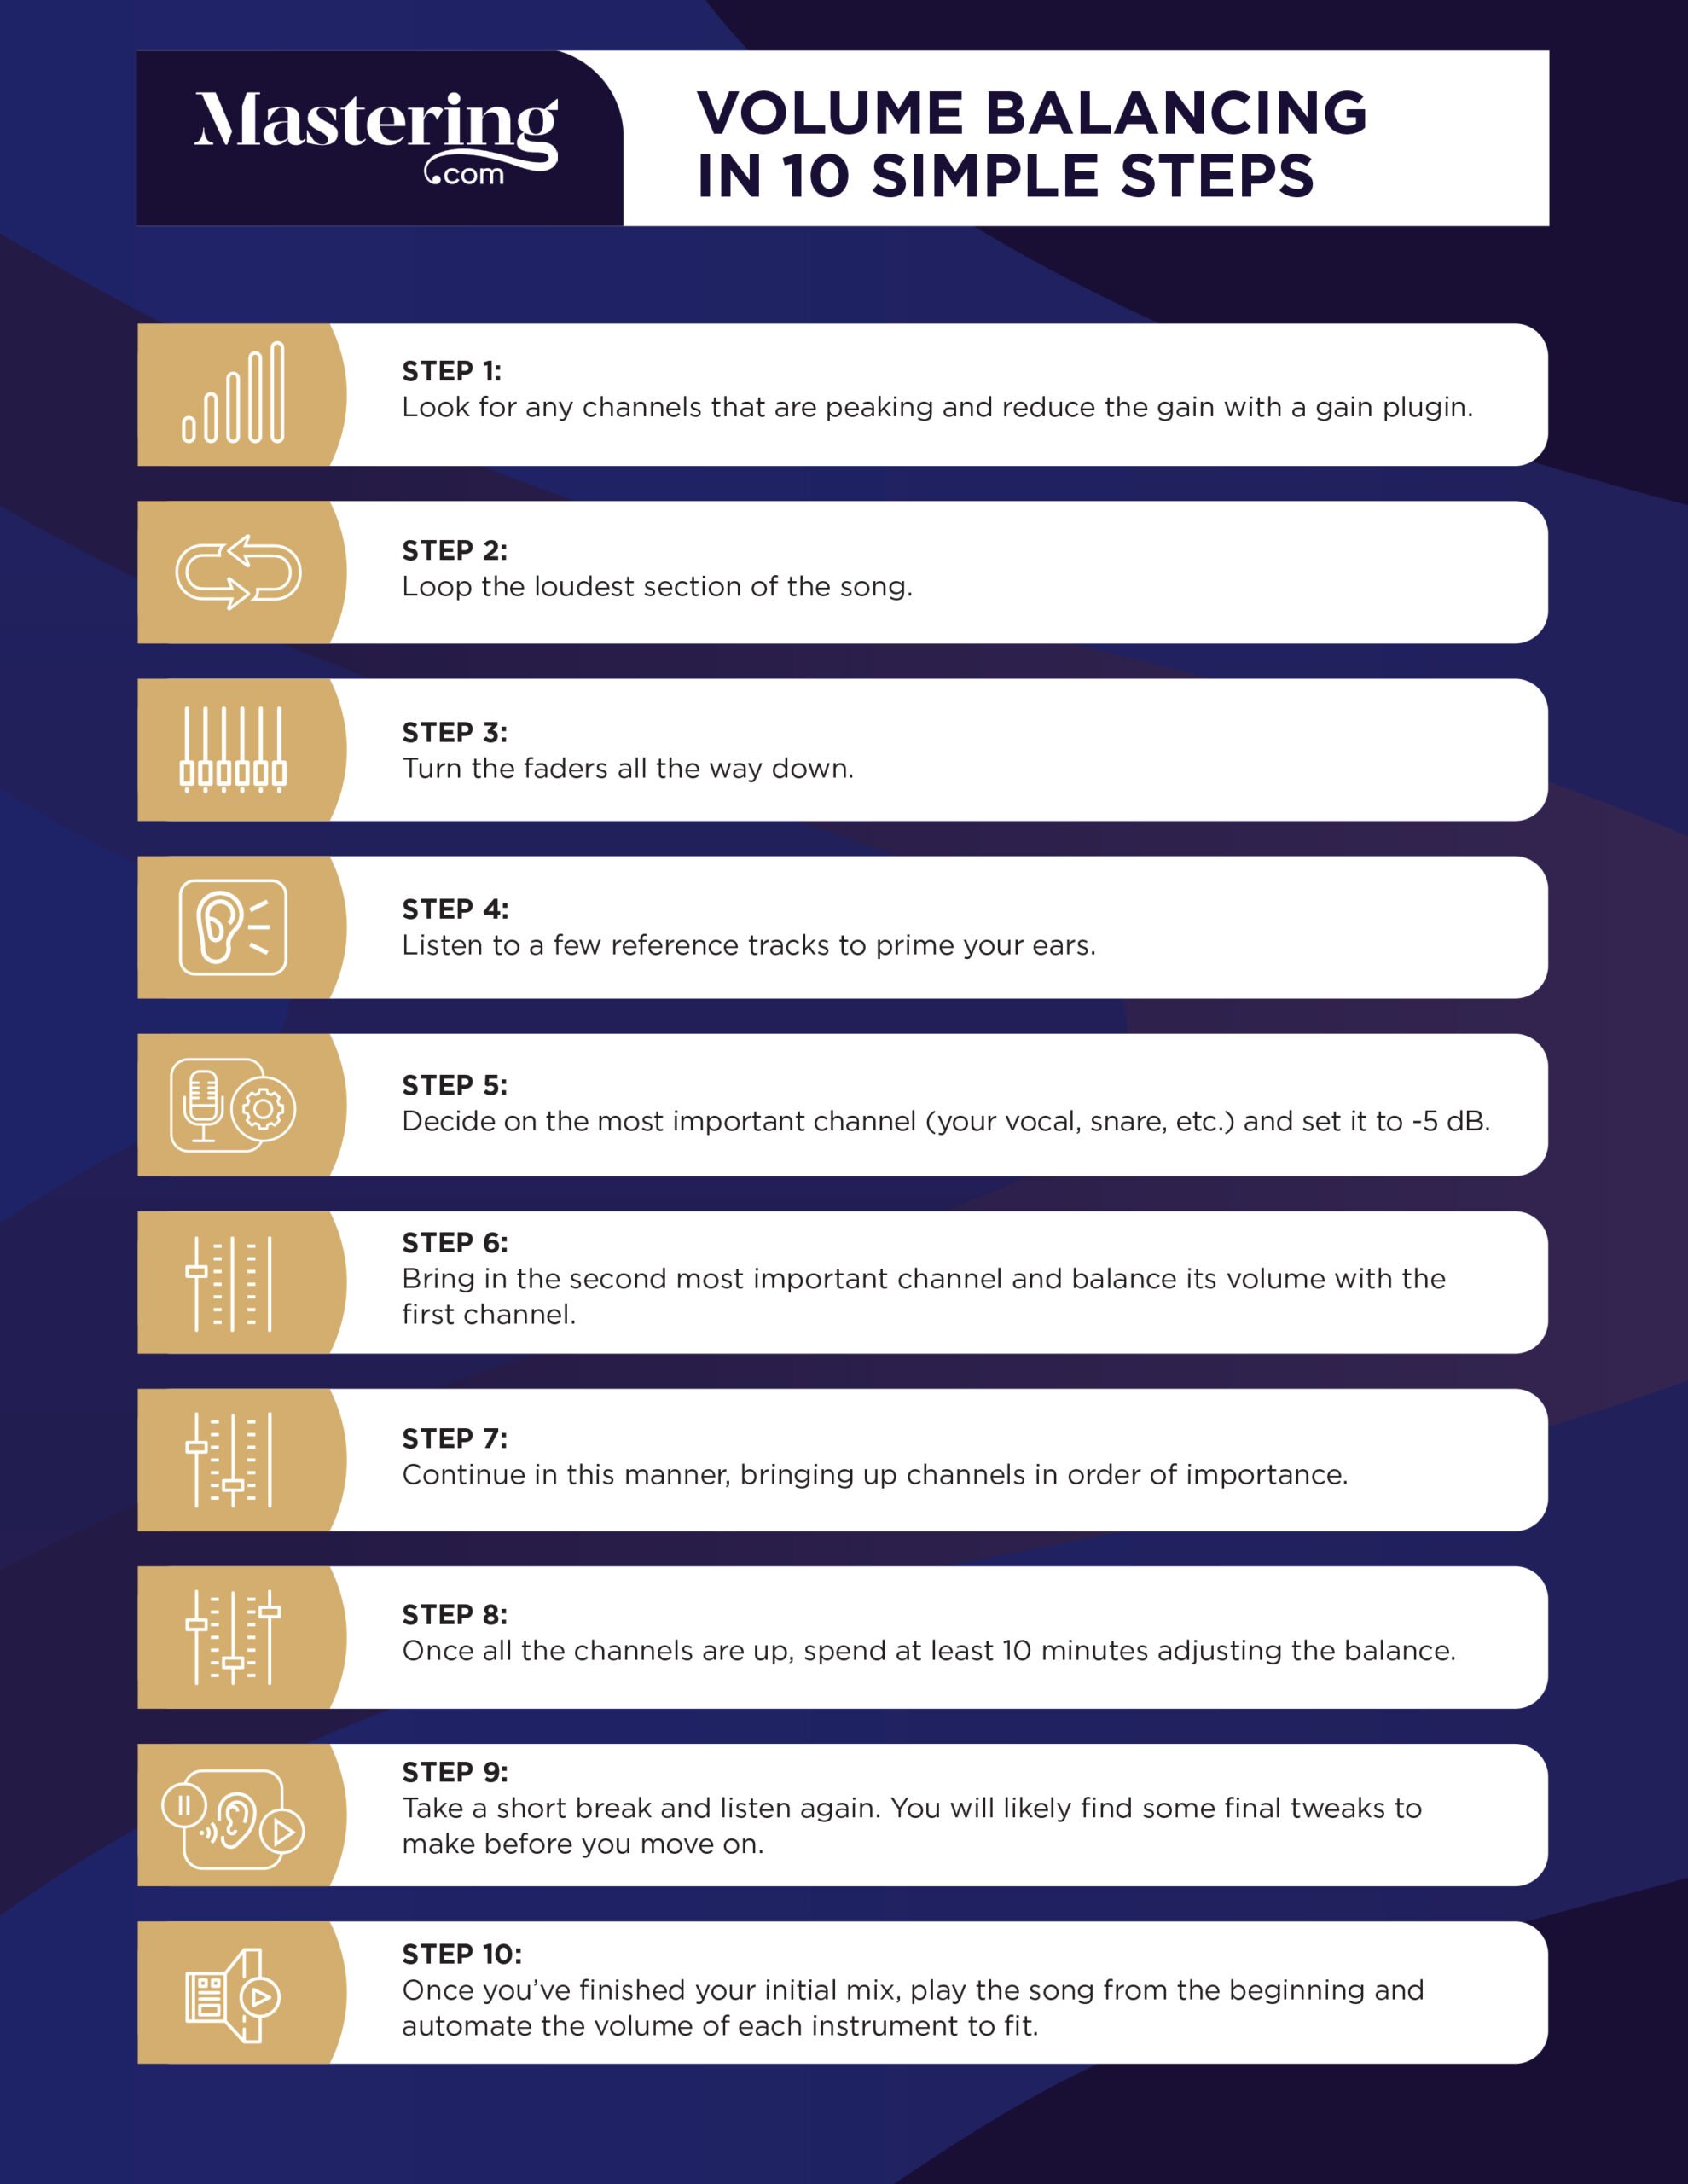
Balancing your piano’s volume is going to go best if you work on the whole mix’s balance at the same. To learn how to do this, check out our guide to volume balancing:
Step 4.5: Never Solo
This is more of a piece of advice than a full-blown step, but it needs to be said either way.
While you’re mixing, DO NOT solo the piano.
Don’t do it. Fight the urge.

When you solo an instrument while mixing it, you’re doing all of your work out of the context of your mix.
Usually when you’re mixing an instrument, you’re actually making it sound worse in solo. There have been countless times where I’ve mixed an electric guitar or a snare drum in context of the mix, only to solo it and think “”…Man. That sounds terrible!”
But it doesn’t matter.
None of the listeners will be hearing the instrument by itself. They’ll only be hearing it in context of the mix!
So believe me, making the instruments fit together nicely is much more important than making them all sound good in a vacuum.
Of course, the obvious problem is this: what if you can’t hear the instrument?
Your piano might be meant for the background, so you’ve made it really quiet.
Easy fix: just turn up the volume.
You’ll still be mixing in the context of the rest of the instruments! You’re just using a magnifying glass on that particular sound.
 I like to use a gain plugin to do this.
Before I start mixing an instrument, I’ll put a gain plugin with 5 dB’s of extra volume at the end of the plugin chain. Then when I’m done, I just turn it off.
Simple as that. No cleanup necessary.
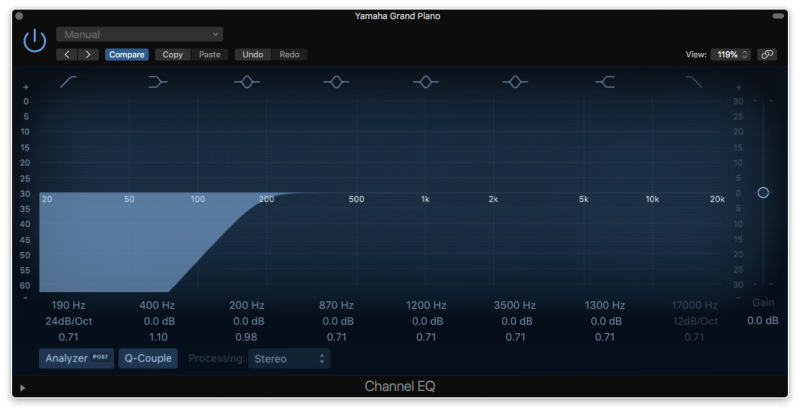
Step 5: Cut Your Lows
Next step is to cut the low end from your piano.
Your piano is likely not the main low end instrument of your song. That title usually goes to the kick or bass guitar.
You want to make room for both of them in the mix. And because pianos have such a huge range of keys, they’re a common culprit for muddying up the low end.
Take your high pass filter and cut the low end out. I usually leave it somewhere between 150 and 250 Hz.
 Of course, your piano might be the main bass instrument of the song. That definitely happens from time to time, especially in stripped-down ballads.
In that case, just move the filter up until you can start to hear the attack of your low notes begin to dull. Then back off to give the instrument a little space. That’s usually the sweet spot.
Step 6: Find the Nasty Stuff with EQ
Next, we’re going to find anything nasty that’s hiding in the frequency range of the piano.
If you recorded your piano at home, there is likely going to be room resonances that have been captured in the sound. These are frequencies that are naturally accentuated by the room you’re in.
One of the best ways to find these room resonances is to grab your EQ, boost one of the bands to +12dB, set the Q around 5, and sweep around the frequency spectrum to listen for areas that sound louder than the rest.
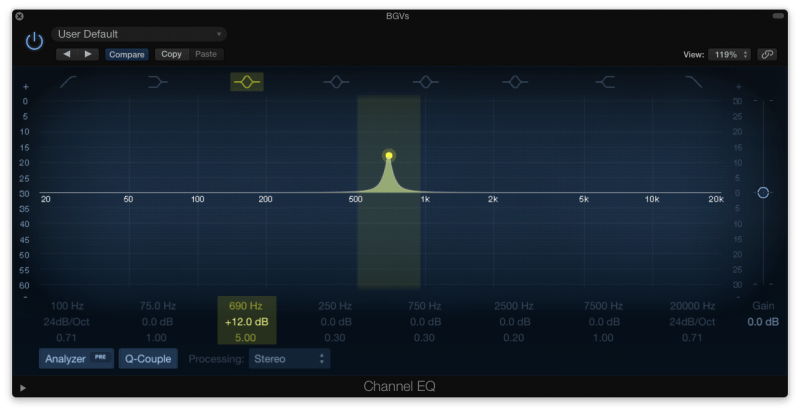 If you find any, you’re going to want to cut those. I’ll usually make a cut of 6dB’s or so. If it’s really bad, I’ll cut 12dB’s or more. If it’s subtle, 3-4 dB’s will do.
Now that we’ve scooped the goop out of the sound, let’s move on to compression.
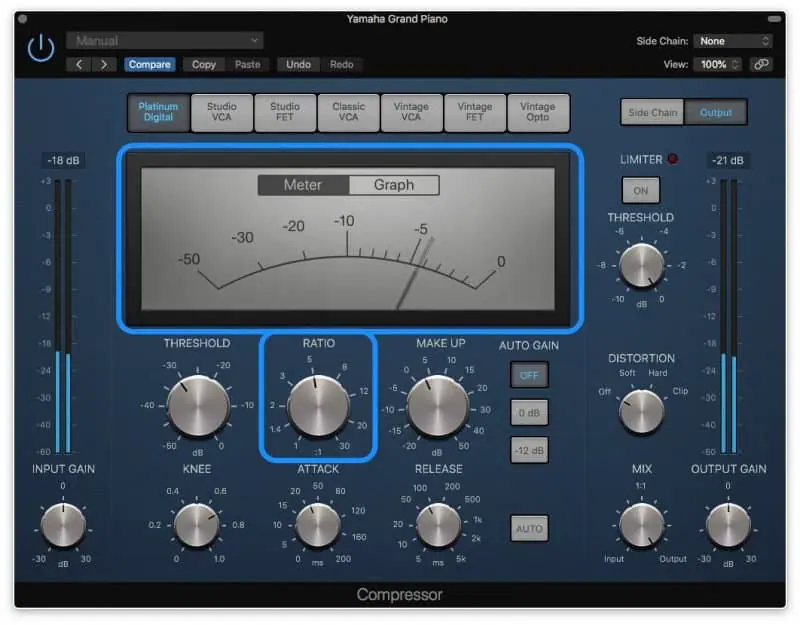
Step 7: Rein It in with Compression
Our next step is to control the dynamics of the piano with a compressor.
Here’s an important thing to cover: there’s not one way to compress a piano.
The piano is not a one-size-fits-all instrument!
In fact, almost all instruments aren’t.
It all depends on how the instrument serves the song.
That’s one of the most important lessons to learn with compression: the amount of compression you use varies by genre.
So how does the piano serve the song?
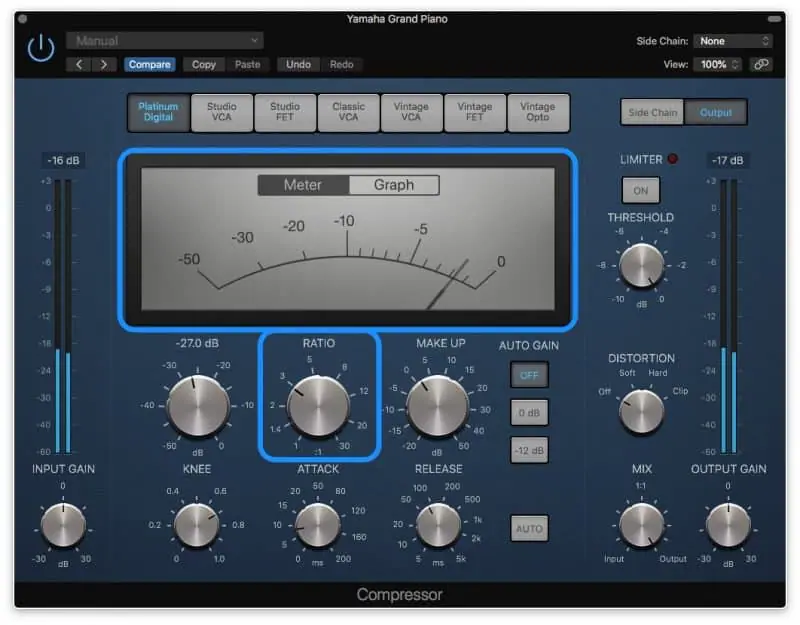
Well if it’s a fast pop track, then the piano is probably pretty rhythmic and aggressive. So you’ll want more control over the dynamics of the track.
You’ll probably want 4-6dB’s of gain reduction and a higher ratio, like 5:1.
If it’s a ballad, the piano is probably more full and subtle. You’ll want to control it less so that it stays dynamic and intimate.
In that case, you’ll probably want 2-3dB’s of gain reduction and a lower ratio, like 3:1.
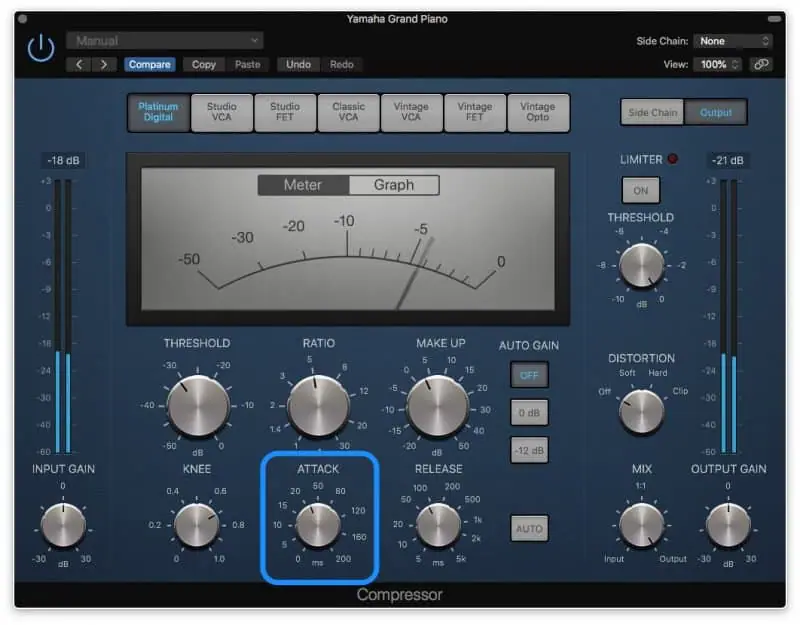
Your attack times are going to depend on the sound you want as well.
Is your piano more of a background instrument, meant to fill up the arrangement? Then a fast attack would be good.
Fast attacks thicken an instrument and push them further back in the mix. Try using an attack between 3-15ms.

Is your piano more percussive, meant to supplement the drums and bass with more bounce? Then a slower attack is more your speed.
Slower attacks don’t thicken an instrument, but they do make them more punchy. Try using an attack between 20-40ms.
As for your release times, you’ll want to time them with the tempo of the track. I usually start around 100ms and move it left to right to see what sounds best. If it’s a faster song, it’ll probably have a faster release. If it’s a slower song, the opposite will be true.
Make sure to use your makeup gain so that the piano stays the same volume as before.

That’s it for compression. Next up, let’s get our piano fitting well in the mix.
Step 8: Use Range Allocation to Make Your Piano Fit
Range allocation is one of the best ways to get all the instruments in your mix to sit well with each other.
It’s a pretty simple concept.
1) Find a place where the instrument sounds good and boost.
2) Then cut that place in all the other instruments.
3) After that, cut areas in the instrument where other instruments are boosted.
So let’s go through that process with the piano.
First, use an EQ sweep to find an area that sounds good:
Boosting in the low end will give it more roundness.
Boosting in the upper mids will give it more presence.
And boosting in the highs will give it more clarity and “air.”
Once you find a space that makes the piano sound better, give it a wide boost of around 3dB’s.

Then, go to your other major instruments, like your kick, snare, guitars, and vocals. Make a 3dB cut at that exact area for each instrument. Also, take note of where those instruments were boosted themselves.
Finally, head back to your piano and make cuts where the rest of the instruments were boosted. No need to make fifteen cuts or anything – just pick the most important three.

Step 9: Put It to The Side (With Panning)
Now that we’ve got the piano sounding the way we want, let’s place it somewhere in the stereo field using panning.
Where you have this panned is up to you.
Some people pan the piano mics hard left and right to get the biggest stereo field. While that’s great if there are very few instruments, that can be problematic if you have a dense arrangement.
If you have a really busy mix, panning the piano to one area can be great. Either that could mean panning the mics to both be in the same area – say 50% to the right – or narrowing the stereo field by panning one mic 100% to the right and leaving the other directly in the middle.
What it really comes down to are these two questions: how busy is your mix? And how wide do you want the piano to sound?
Step 10: Give It a Little Space (With Reverb)
Finally, we’re going to push the piano back in the mix using reverb.
If you’re sending all of your tracks to one room reverb, then don’t forget to send the piano as well. Doing this makes your instruments feel like they are being played in the same “space,” gluing them together a little more. Just adjust the send amount on the channel to dictate how far back you want to push the channel.
If you’re not using a room reverb for your whole mix, then create a send for a new reverb. I’d recommend using a small-to-medium sized room reverb with a reverb time of under 2 seconds.
To mix the reverb in, turn the fader of the reverb aux track all the way down. Then, while the track is playing, slowly mix it back in until it feels “right” to you. Once you reach that place, turn it back down a little to keep it subtle.
BONUS STEP: Make Your Choruses Pop with Automation
Here’s a little bonus tip! Lucky you.
If you’re using a piano with multiple microphones, try automating your panning during the choruses to be a little wider than the verses.
Just keep your piano with a smaller stereo field during the verses. For instance, keep one mic panned 50% to the left and the other panned 50% to the right during the verses.
Then in the choruses, pan them 100% to the left and right.
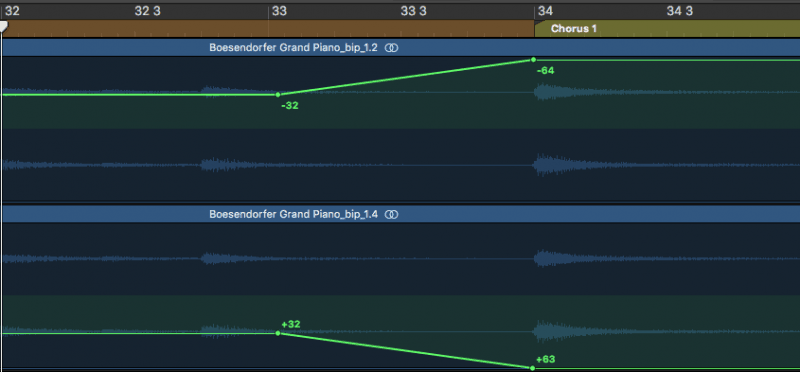
It’s a great trick to make the choruses seem “larger than life.”
Conclusion: Mixing Piano
So that’s it! It’s a pretty simple process.
The more you practice it, the better results you will get.
So to review, you mix a piano by…
- Making sure the original tracks are recorded well
- Sending your pianos to a bus
- Getting your balance right
- Checking your phase
- Cutting out the low end
- Finding the nasty stuff with EQ
- Controlling the dynamics with compression
- Using range allocation to make your piano fit in the mix
- Panning it to one side
- Adding a little reverb
Next Steps
If you want to dig deeper into music production and learn what it actually takes to make mixes that sound pro…
And you’re an intermediate or advanced producer…
Be sure to check out the free masterclass:
Enjoy!