It’s hard to think of a more foundational instrument in modern music than the acoustic guitar.
So many songs are written on the acoustic guitar, and it’s the first instrument for half of all musicians.
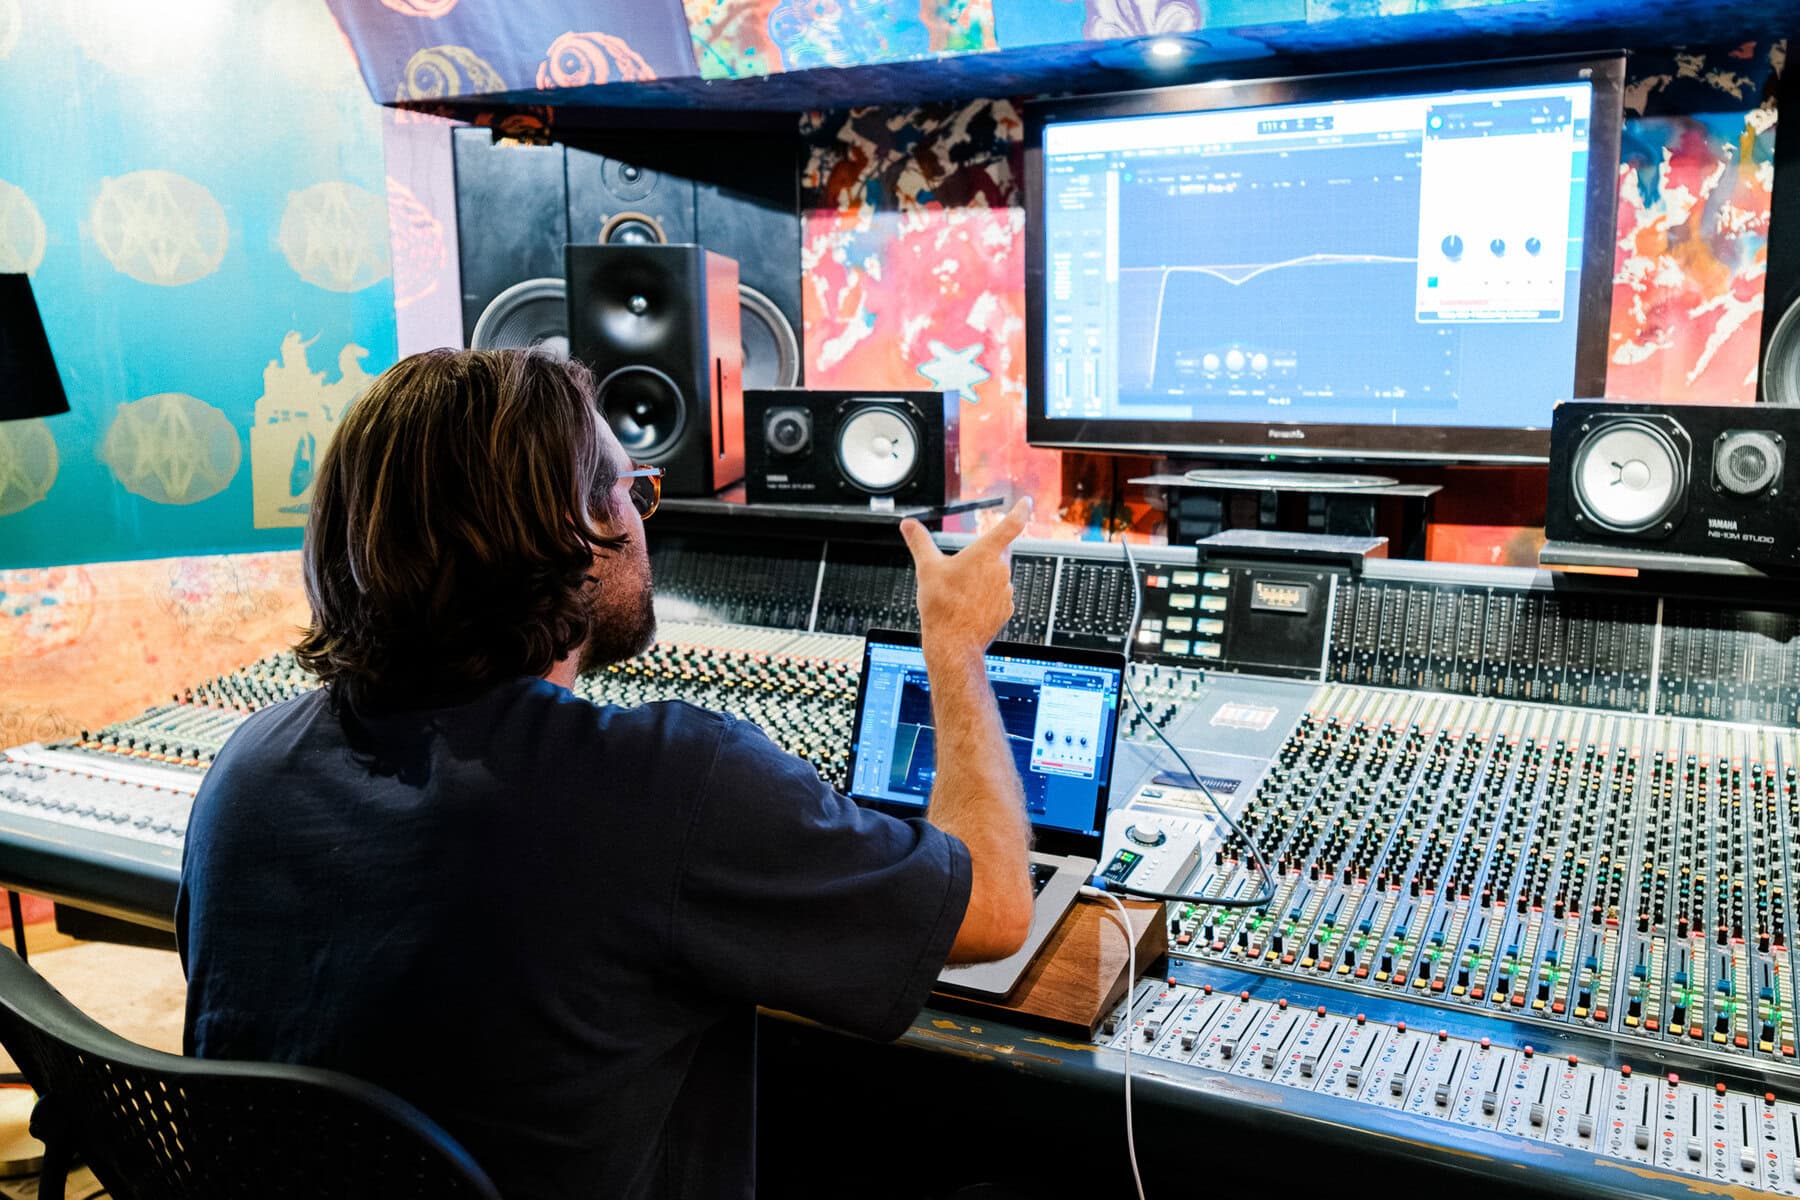
It’s also more difficult to mix right than you think at first.
Tired of spending hours mixing acoustic guitar with little to no results? By the end of this article, those days should be over.
Today you’re going to learn how to make your acoustic guitars sound professional. It only takes a few steps to get there.
I’m guessing you’re here because you want to make your mixes sound professional. We put together a brief training that covers a totally new approach to music production. Until now, everyone has been teaching production totally backward. Just click below to watch.Get industry-quality every time (steal this framework)
But if you just want to learn about acoustic guitar specifically, keep reading.
Step 1: Send Guitars to a Bus
Bussing is a marvel.
If you’re unfamiliar, bussing is when you change the outputs of each recording of a certain instrument to the same “bus.” All of the recordings then are then directed to one aux track that you can use as a “master fader” for your instrument.
Think of it this way: a school bus picks up each of the students at their houses and then takes them to a single place – the school. This is exactly what bussing is doing with your recordings.
 Essentially, you are routing all of your guitar recordings into one single track.
From there, any plugins that you add get applied to every single one of those recordings.
Not only does it help “glue” your track together, but it massively cuts the amount of plugins you need to finish a mix.
For example: If you had three different acoustic guitar parts, each with two microphones, you’d have to use six different compressors just to control all of their dynamics.
But with bussing, rather than six compressors, you just need one. That means you’re going to mix faster and you’re going to save a huge amount of CPU.
Not only that, but because you’re compressing multiple parts at once, it creates the feeling that all of the parts are the same instrument. It “glues” them together, so to say.
Do this with all of your instruments and your mixes will get finished faster and sound better!
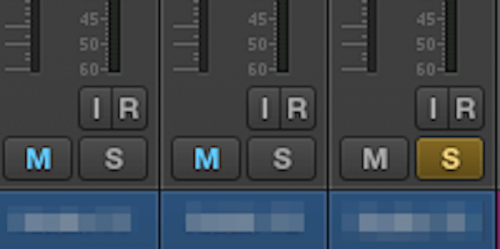
Step 2: Mute Unnecessary Mics or Overdubs
In music, it’s easy to have too much of a good thing.
People often get obsessed with recording as many copies of the same acoustic guitar part as possible, to make it sound “bigger” and “thicker.”
But oftentimes, it can make your mix sound muddy, cluttered, and just… worse!
It’s like adding too much salt to a dish. It’s great in moderation, but after awhile, all you can taste is salt.
 The same is true for music. The more sounds you add, the harder it is to hear the details of each sound.
So before you start your mix, mute any overdubs that aren’t absolutely necessary.
In fact, mute any microphones that aren’t necessary too.
Sometimes people use three or four mics to record their acoustic guitar. The same rule is true for them – it can make your mix sound worse!
So go through with a scalpel and cut out the fat. If it doesn’t make the guitar sound better in context of the mix, then it doesn’t need to be there.
Step 3: Get Your Balance Right
Balancing is BY FAR the most important step in the mix.
It’s the very foundation of your mix. If all of the instruments aren’t well balanced, then it doesn’t matter how much EQ, compression, or fancy effects you use. It’s going to sound amateur.
So before you reach for any effects, take time to balance the volume of the acoustic guitars in with the mix. The extra minutes you spend on this step will pay out dividends in the future.
I like to treat my mix at first as if I don’t have ANY plugins. All I have are the volume faders and automation.
I try to make my mix sound as professional as possible with just those two tools. And it makes a world of difference for the rest of the mix.
Step 4: Never Solo
Seriously!
Don’t do it!
It makes sense logically that an instrument that sounds good on its own would sound good in the mix, right?
But that’s not true.
Mixing your acoustic guitar in solo might make the guitar itself sound good, but when you put it back in the mix, it’s not going to play well with the other instruments.
You need to be mixing your instruments in context of your other instruments. They don’t need to sound good by themselves, they need to sound good together!
Often this means making instruments sound WORSE in solo in order to make the whole mix sound better.
Now of course, you’re obviously grumbling to yourself, “yeah, well what if I can’t hear the guitar? There’s no way I can mix something I can barely hear…”
And you’re right!
If you can’t hear your guitars…
…simply turn them up.
And when you’re done, just turn them back down.
You’ll still be able to hear the rest of the mix, which means you can make the right decisions FOR the mix.
To make this easier, one tip is to put a gain plugin with a +5dB boost on each of your tracks. When you need an instrument you’re working on to be louder, just engage that plugin. When you’re done, bypass it again.
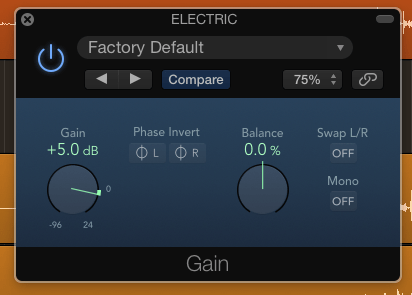 This allows you to temporarily increase the volume of the track, even if you already have automation in.
Make sure you put the gain plugin at the END of your plugin chain, though. If you boost the gain before your plugins, all those mix decisions will be pointless when you bypass it. Your plugins won’t be set at the right level.
Step 5: Cut Your Lows
In acoustic guitars, there’s not much of worth in the low end. It’s pretty much just some string noise, your foot tapping on the ground, and your air conditioner.
So instead of letting all that useless low end energy just pile up, throw on a high pass filter and just cut it.
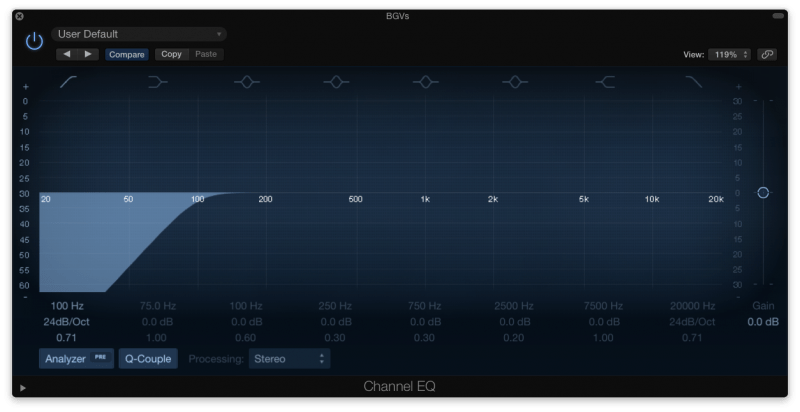 I usually search around 100Hz for the best place to cut.
A little trick is to slowly move the filter up until the acoustic guitar starts to sound weaker in the mix. Then back off a bit to give the instrument a little space. That’s the best place for your filter.
Step 6: Find Any Nasty Bits With EQ
Next, find any parts of the acoustic guitar that are just sounding… gross.
If you recorded your acoustic guitar at home, there is likely going to be room resonances that have been captured in the sound. These are frequencies that are naturally accentuated by the room you’re in.
One of the best ways to find these room resonances is to grab an EQ, boost one of the bands to +12dB, set the Q around 5, and sweep around the frequency spectrum to listen for areas that sound louder than the rest.
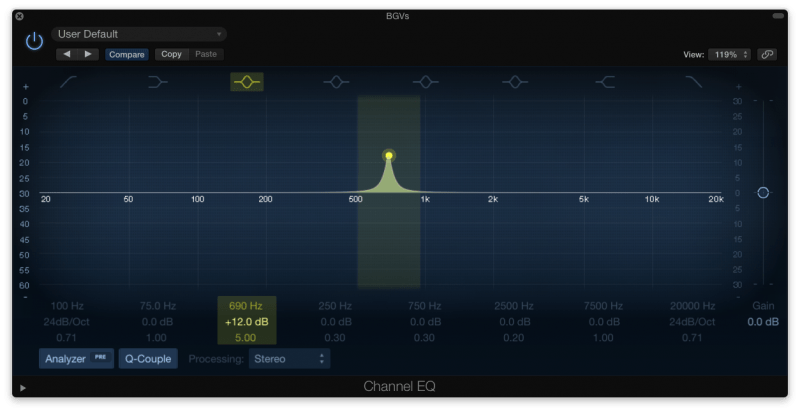 Some of these areas are going to be natural, but others will be your room resonances. It may take some time to get used to figuring out the differences between the two. Usually, the room resonances just sound more unpleasant to the ear.
These cuts don’t need to be huge. Usually 2-5dB is enough. Just use your ear and listen for what sounds more balanced and natural to you.
If you’re having trouble figuring out which frequencies need to go, check this chart of the frequency spectrum.
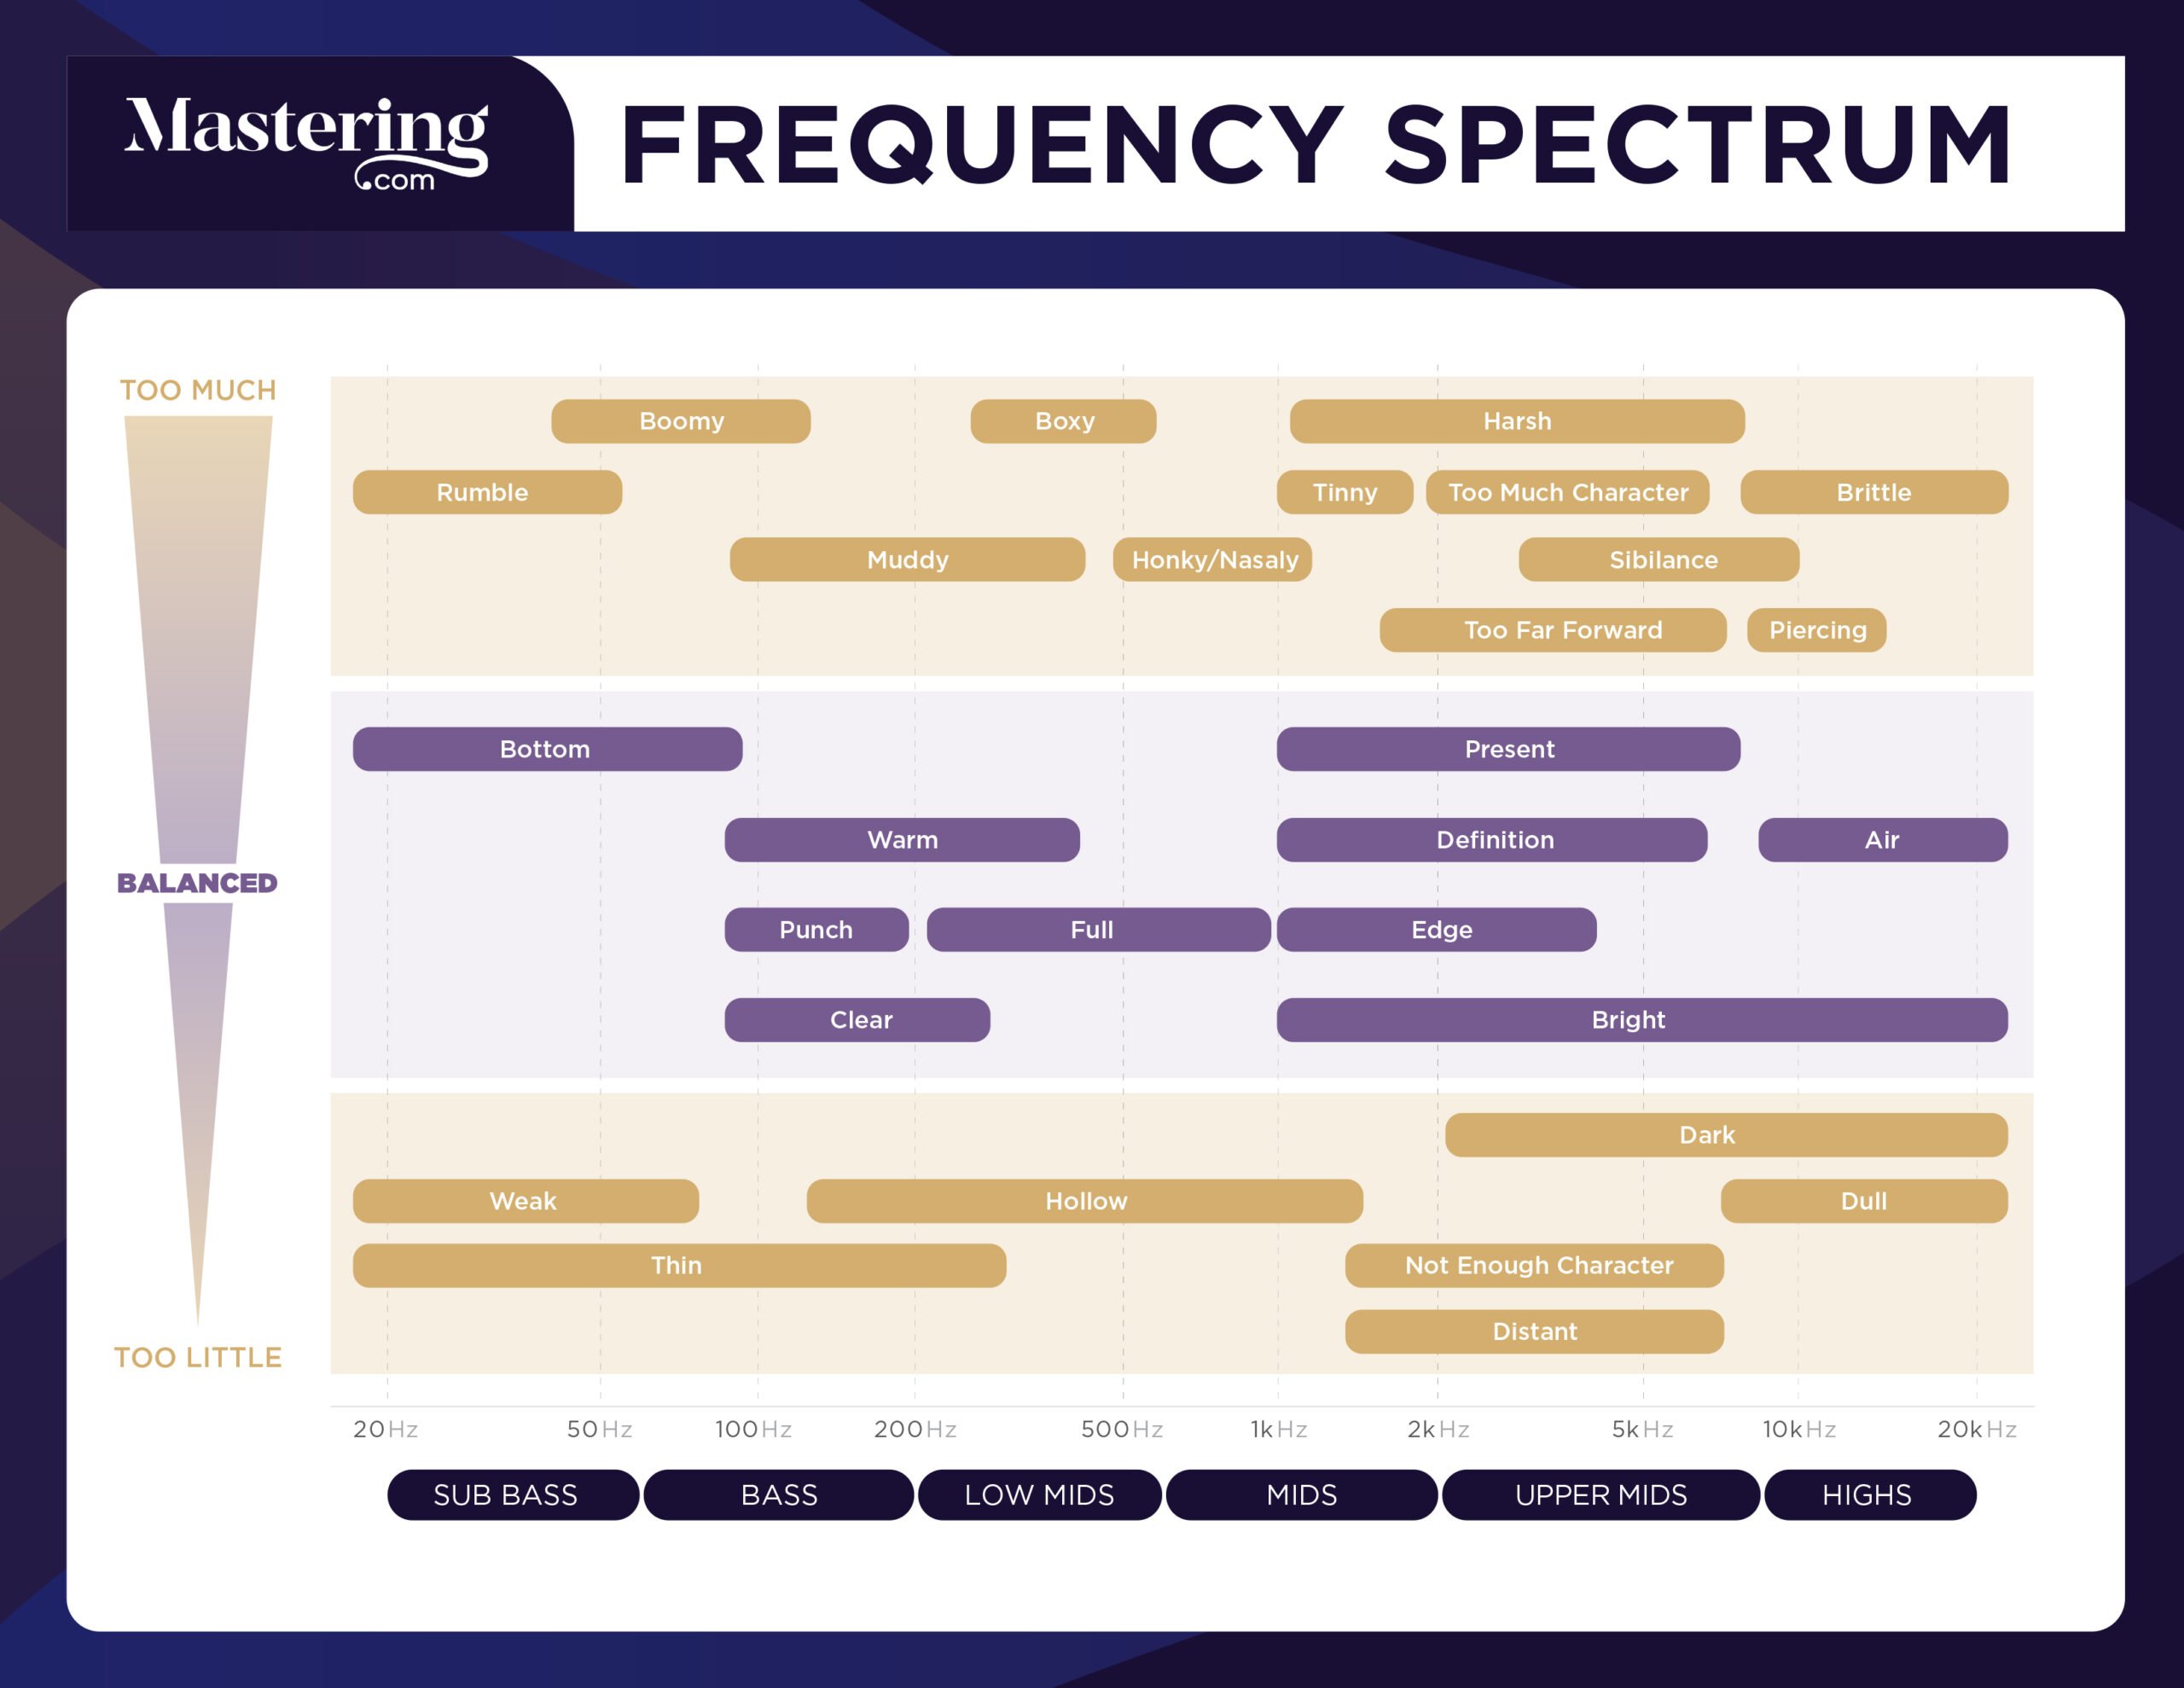
It lays out all of the different EQ issues you might run into and shows you where the problem is probably coming from.
Step 7: Acoustic Guitar Compression. Right or Wrong?
Sometimes acoustic guitars need to be tamed.
 That’s where compression comes in.
Before we get into it, though, a warning:
Not all acoustic guitars need to be compressed!
Acoustic guitars are one of the most natural sounding instruments. Because of that, it’s easy for it to sound squashed when compressed unnecessarily. Don’t use acoustic guitar compression just because you can.
Guitars that are meant to be in the background are often more useful with compression. Compression brings the sound of the strings out, which makes the guitar more percussive and rhythmic.
If you want your acoustic guitar to be a part of the rhythm section, then reach for compression.
If it’s a focal instrument (like with singer-songwriters and folk music), then maybe leave compression for another instrument.
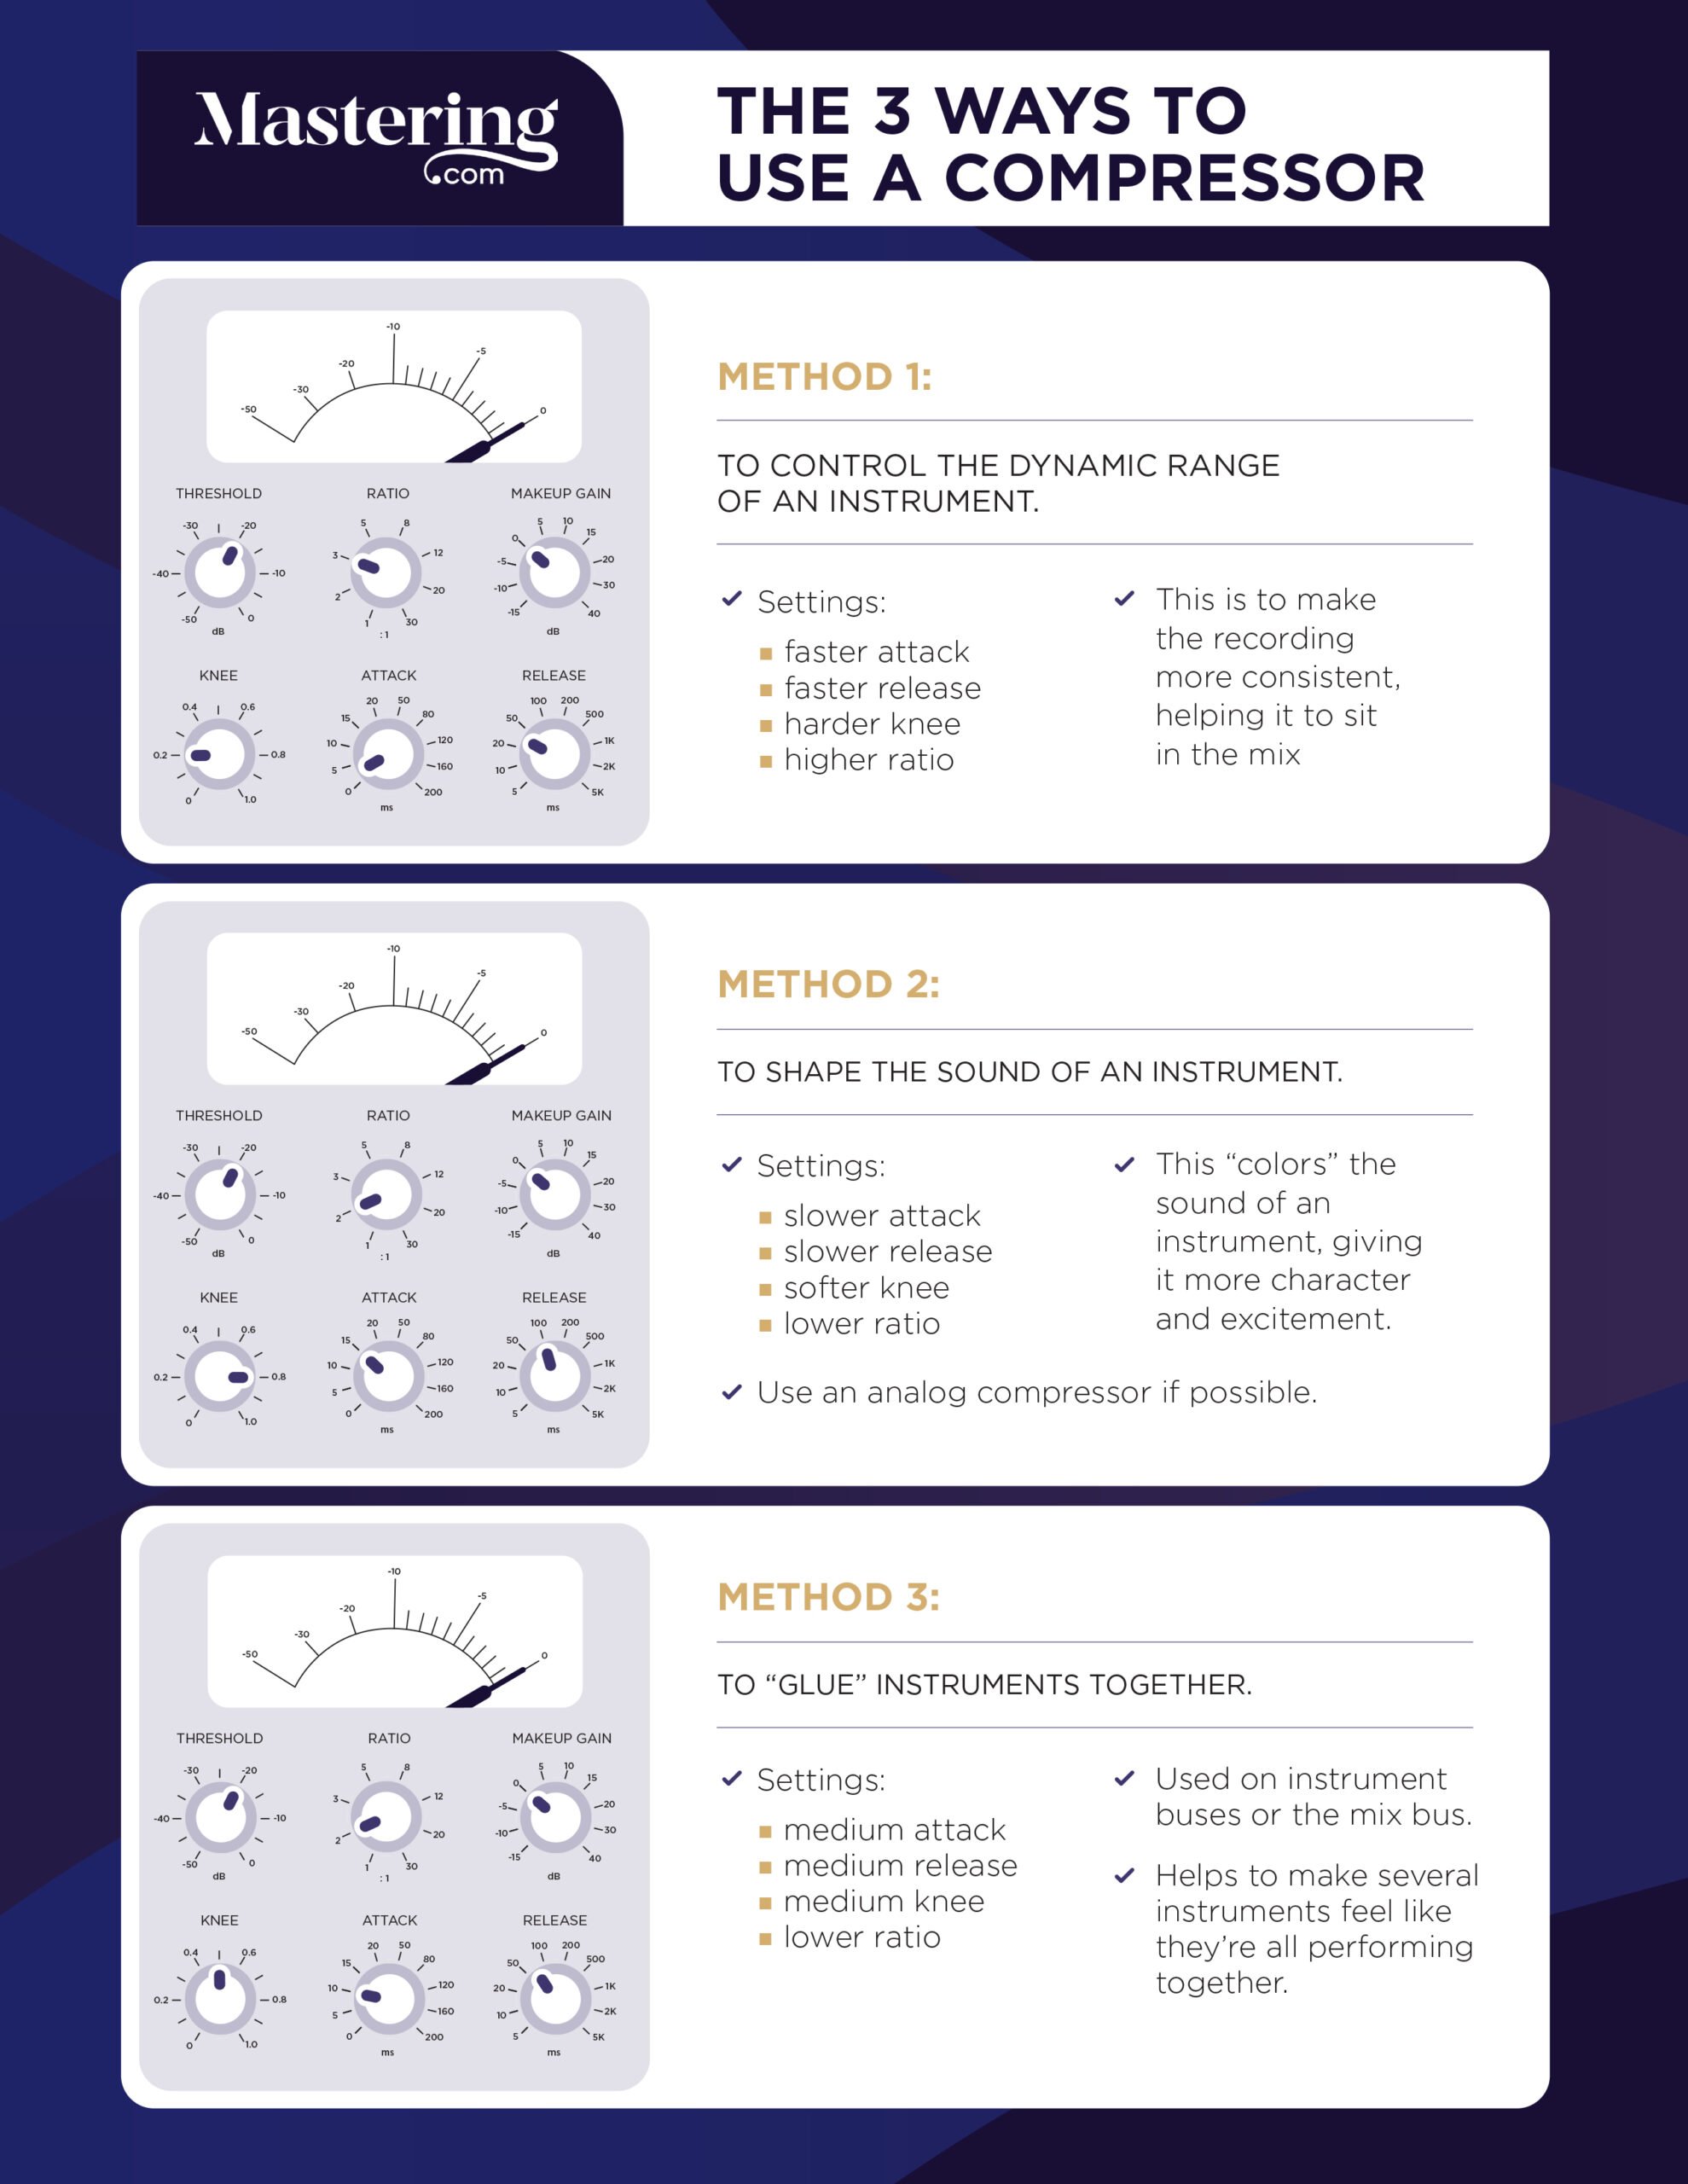
Here are the settings to try if your guitar DOES need compression:
- Attack Time: You want to have a slower attack because you don’t want to accidentally compress the sound of the pick. Try searching around in the 10-25 ms range.
- Release Time: You want a faster release so that you can avoid covering up the attack of other notes. Shoot for between 50-150 ms.
- Ratio: You don’t need to use more than a 4:1 ratio on your acoustic. You’re still wanting it to sound natural. I’d use a 3:1, personally.
- Gain Reduction: Shoot for between 1-3dB’s of gain reduction.
If you’re new to compression, check out this handy image. It lays out all of the important parts of a compressor, so you don’t have to guess what’s what.
One extra tip…
If your compressor has a mix knob, try using it. Your compression might sound more natural when it is blended in with the original sound.
Step 8: Acoustic Guitar EQ – Boost Your Highs
Once the acoustic guitar is compressed (or not), add another EQ and boost your highs using a high shelf.
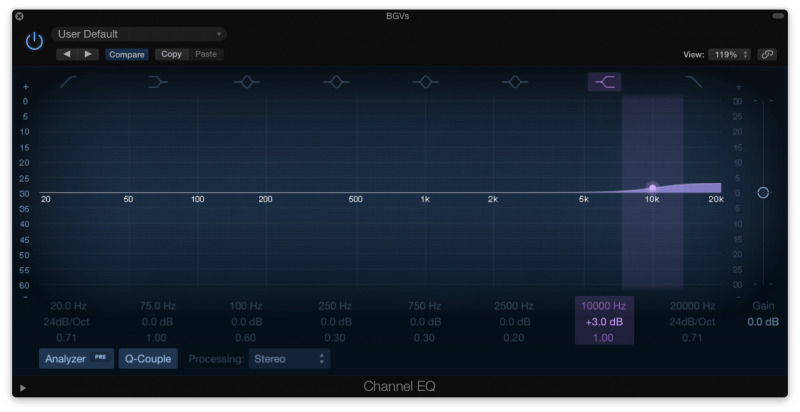 This will give it a little bit of sparkle that may help it cut through the mix.
Just the shelf to boost a few dB around 10kHz. Simple as that.
Step 9: Range Allocation
Range allocation is one of the best ways to get your whole mix to sit well with itself.
Essentially it’s the process of allocating space in the frequency spectrum for each instrument to live in. That way none of your instruments are fighting with each other.
First, find a place in the frequency spectrum to boost the acoustic guitar – somewhere that enhances the guitar’s natural tone.
Then, make sure no other instruments have been boosted in that area. You don’t want to be encroaching on other instruments’ territory.
Once you’ve boosted your section, make small cuts where other instruments have been boosted.
It’s a fairly simple process, though it takes some getting used to. Watch the video above for more information.
Step 10: Add Some Modulation
If you’re wanting your guitars to fade even more into the background, try adding modulation to the track.
Some subtle chorusing can add pitch variations that make the guitar less “sharp” and add a little movement. Try using a chorus with a slow rate.
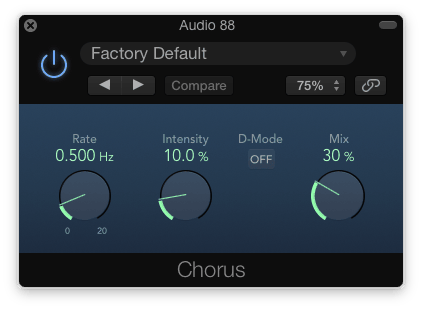 Make sure to put your modulation on a send, though. The effect needs to be mixed in, rather than just put on the recording itself.
Just so you know: this step is OPTIONAL. If your guitar is front and center, chorusing will probably sound odd and unnatural. If you want your guitar to be extra rhythmic and present, then washing it out with some chorus or other modulation may do the opposite of what you are wanting.
But if it’s meant to fill up the background, chorus can be a godsend!
Just experiment with your track. You won’t know until you try.
Step 11: Pan the Guitar
One of the best ways to make the main melody shine through is to give it space in the mix. It needs to be up-front and center, but everything else can be spread throughout the stereo image.
Think about your acoustic guitar. Can it be panned away from the center to make room for the vocal?
Some people love using LCR panning for their sessions, meaning that they only pan things all the way to the left or right.
I think that’s a little restrictive. I like to use 50/50 panning instead.
It’s a variation of LCR panning. Rather than just sticking with hard left and hard right, put some instruments in between.
I give myself 5 options for when I’m wanting to pan an instrument:
- 100% to the left
- 50% to the left
- In the center
- 50% to the right
- 100% to the right
Keeping your panning limited to those 5 options will give you a more realistic stereo image, but will also cut down on decision fatigue.
Step 12: Send It to a Reverb
Finally, finish off your acoustic guitar with a little extra space.
 Push it back in the mix by sending it to a reverb.
If you have a single room reverb for the whole mix, send it there. Make sure to send more there than your melody, otherwise it won’t actually be pushed back in the mix.
If you don’t use a room reverb for the entire mix, then make a new one for just this guitar. Make it subtle enough to be felt rather than heard, but enough to successfully push the instrument back in the mix.
Wrapping Up: Mixing Acoustic Guitar
That’s it! It’s as simple as following a few steps.
Let’s review:
- Send your guitars to a bus.
- Mute unnecessary mics or overdubs.
- Get your balance right.
- Never solo.
- Cut your lows.
- Find any nasty bits using an EQ.
- Compress it (or don’t).
- Boost your highs.
- Allocate a part of the frequency spectrum to the acoustic guitar. Use an EQ to carve out space.
- Add some modulation.
- Pan the guitar to make room for the vocal.
- Send it to a reverb.
If you want to dig deeper into music production and learn what it actually takes to make mixes that sound pro… And you’re an intermediate or advanced producer… Be sure to check out the free masterclass: Enjoy!Next Steps