“I’m only myself when I have a guitar in my hands” – George Harrison.
Capturing a good guitar tone isn’t always easy.
You want to do the guitarist justice – after all, it’s an iconic instrument and an integral part of every band.
But electric guitars rarely sound as good on a recording as they do in real life.
In this guide I’m going to share 14 straightforward, practical tips on how to record guitar that mixes itself.
I’m guessing you’re here because you want to make your mixes sound professional. We put together a brief training that covers a totally new approach to music production. Until now, everyone has been teaching production totally backward. Just click below to watch.Get industry-quality every time (steal this framework)
But if you just want to learn about recording guitar specifically, keep reading.
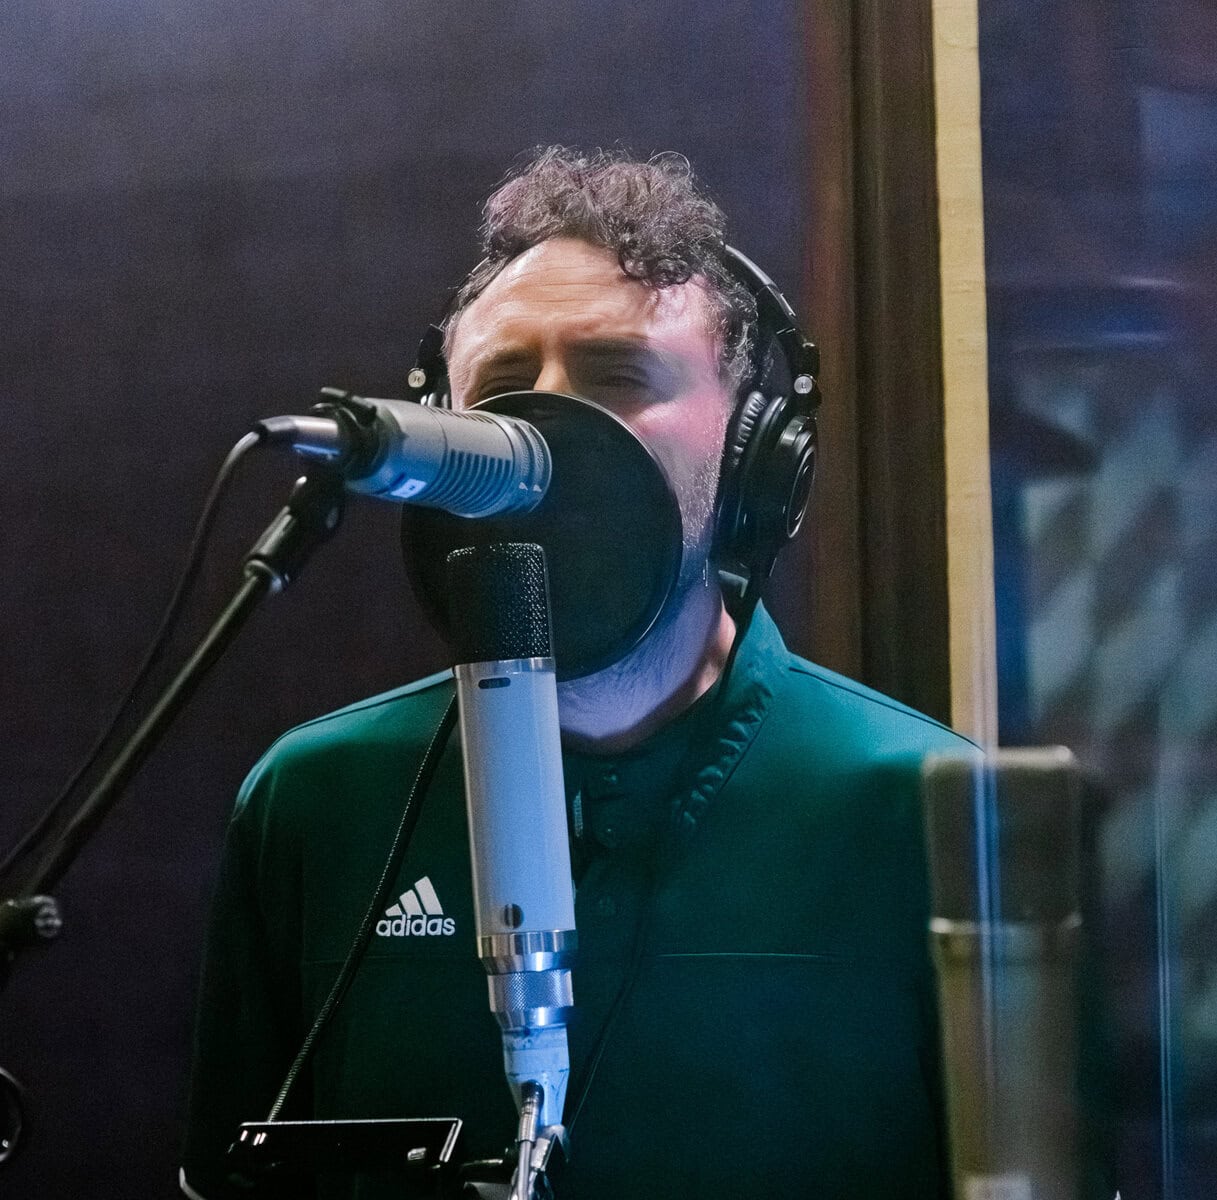
Tip 1 – Use a Cardioid Dynamic Microphone
Let’s start with the basics.
In most cases, I actually recommend recording guitar DI and using an amp simulator when working in a home studio. But more on that later…
There are many reasons why you might want to record your guitar amp rather than using amp simulation (e.g. more natural tone, favorite guitar amp). So let’s cover that first.
If you do go down this route, I highly recommend using a cardioid dynamic microphone.
Cardioid microphones reject sound from the rear. This is ideal for a home environment where the acoustics aren’t ideal.
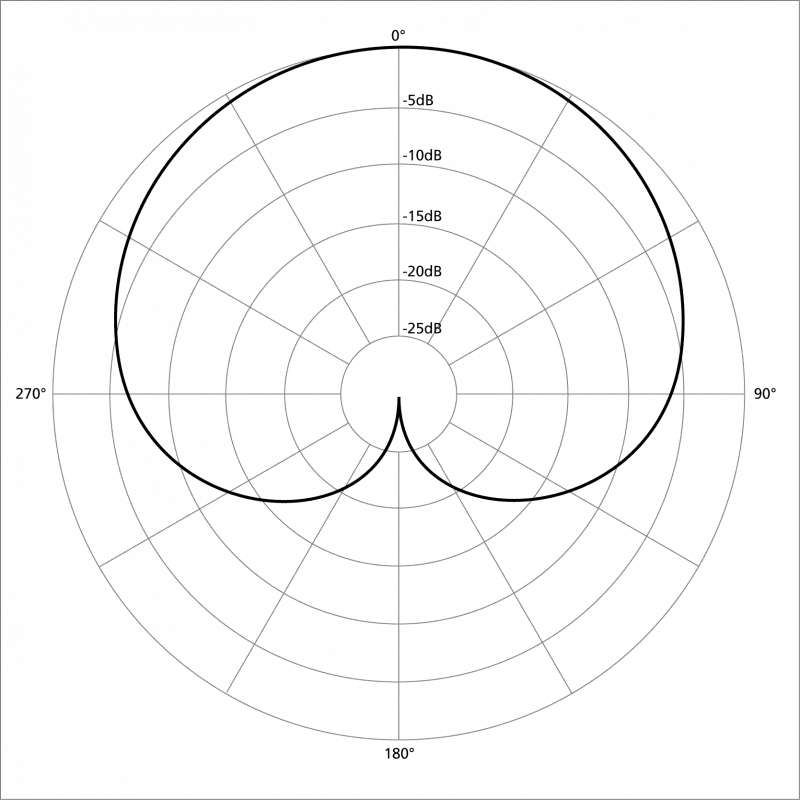
Dynamic mics are less sensitive to high frequencies, which you don’t need when tracking electric guitar. Electric guitars have very little high frequency content, and it’s not needed in the context of the mix.
In fact, I often apply a low-pass filter to electric guitars to remove everything above 10kHz in the mix stage. So there’s very little reason to use a condenser microphone in a home studio environment.
A Shure SM57 is an affordable microphone that is ideal for this purpose.
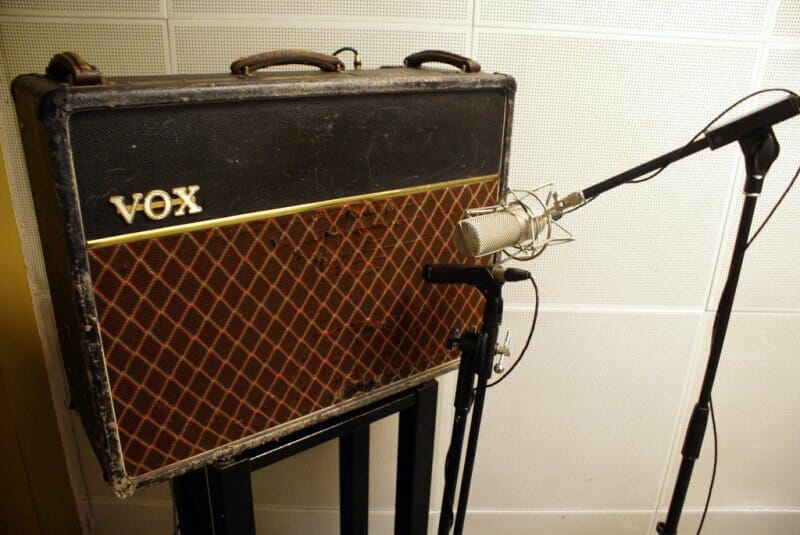
Tip 2 – Position the Microphone Close to the Amp
Your primary microphone should be very close to the amplifier. This reduces unwanted noise and reflections from your room.
It’s also the easiest place to find the right tone. Generally, anywhere between 0-5″ (0-12.5cm) works best. Around 90% of the time, I will chose 1″ (2.5cm) or closer.
Some people like to use two microphones – one up close to the amp and another further back. This second ‘room mic’ can be blended in for a roomier tone.
If you have a second microphone, you can give this try. But I find that it’s rarely needed. Opt for a dynamic microphone again, and check the phase when mixing.
You might need to delay the close mic slightly when mixing to prevent phase issues. If that sounds too complicated, don’t worry about it too much – just decide in the mix if the room mic enhances the sound or makes it worse.
Tip 3 – Find the Right Tone on the Amp
A lot of people get excited during the recording phase. This makes them rush.
Don’t make this mistake.
Spend plenty of time adjusting the EQ on the guitar amp and the tone controls on the guitar.
Here’s your goal – record a guitar tone that needs ZERO equalization in the mix phase.
It’s perfectly achievable, and that’s your main aim.
As a general rule of thumb, turn the bass knob down a few notches. You don’t need much low end on the guitar.
If you want to master the guitar, check out some lessons from Tom Fontana at TheGuitarLesson.com.
Tip 4 – Adjust the Position to Adjust the Tone
First of all, find out where the speaker cone is (look inside the front grill, or gently feel around if it’s a cloth grill).
With the microphone close to the speaker cloth, position it about half way between the center and the edge of the speaker cone.
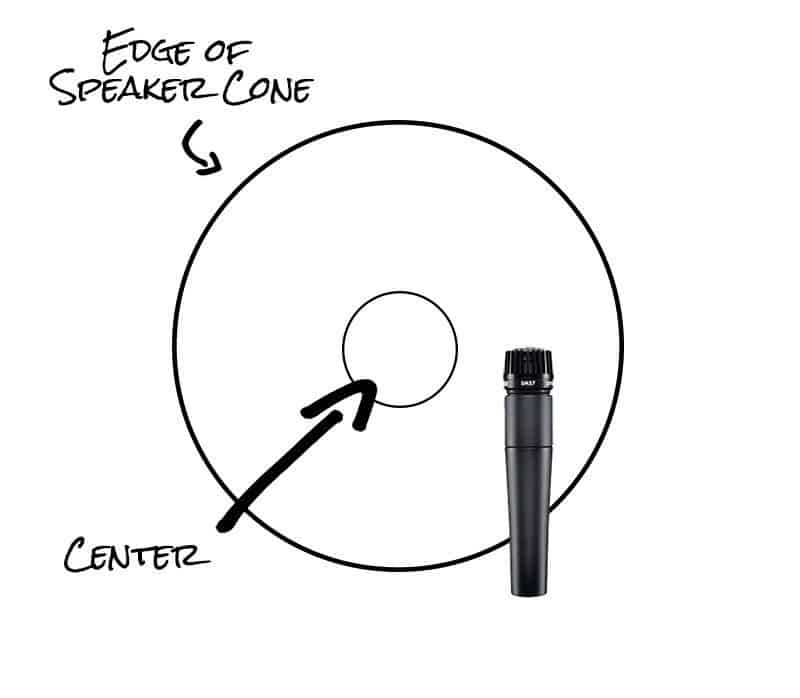
Now move it from left to right and listen to how the tone changes.
When you get nearer the middle of the speaker the tone will become brighter and more aggressive. When you get nearer the edge of the cone, the tone will get darker and duller.
There is no right or wrong answer here. Position the microphone wherever the tone suits the track the most.
IMPORTANT: Consider the context of the guitar in the mix.
Is it a lead part? A brighter tone will probably be more effective.
Is it a supportive part? A slightly darker tone would probably be best.
Is the guitarist playing low frets? A brighter tone might help the part to cut through and prevent muddiness.
Is the guitarist playing high frets? A darker tone might stop the guitar from sounding too brittle or thin.
My go-to position is half way between the edge of the cone and the center of the speaker, as shown in the diagram above.
You can also adjust the angle of the microphone to control the tone. Spend time experimenting and moving the microphone. Try different positions and angles, and see what works.
Tip 5 – Find the Tone in the Context of the Mix
While you are moving the microphone around to find the best position, get the guitarist to play along with the track.
Check then gain on your interface. Then, in your headphones, adjust the level of the guitar with the channel fader until it sits properly in the mix.
Now you can move the microphone around and listen to how the guitar sounds in the context of the mix. This is a much better way of working.
Nobody will ever hear the guitar in solo – so it doesn’t matter if it sounds bad in solo.
All that matters is that it sounds good in the context of the mix.
A bright, twangy tone might sound awful in solo. But it might sound perfect in the mix.
Tip 6 – Use a Reference Track
If you are struggling to find the right tone, you can use a reference track as a basis for comparison.
Find a song that has a guitar tone you like. Import it into your DAW or have it ready to play through your speakers/headphones.
Listen to the guitar tone. Is it bright, or warm? Distorted, or clean?
Compare the tone that you are capturing to your reference track.
If your guitar sounds dull in comparison, boost the highs and move the closer to the center of the speaker cone. If it sounds dull, do the opposite.
You get the idea…
Tip 7 – Change the Tone When Overdubbing
It’s pretty common for one guitarist to overdub and play several parts within a piece.
For example, you might play the same chord progression twice. One part to pan hard left, and the other to pan hard right.
A great way to achieve more separation and space within your mix is to change the tone slightly every time you record a new part.
Switch to a different pickup. Move the microphone slightly. Adjust the tone knob.
Tip 8 – Use Less Distortion Than Usual
Distorted guitars tend to sound more distorted on a recording than they do live.
When playing live, a loud distorted guitar sounds great. But on a record, heavy distortion can quickly fill up space in the mix and create a range of problems.
Guitars somehow appear to sound more distorted on a recording, so you don’t need to use as much.
If you decide in the mix phase that you want more distortion, you can use an amp simulator to add more. But if you record with too much distortion, you are stuck with it.
Tip 9 – Turn Off Amp Reverb
This is something else that’s better to add in the mix.
If you record the guitar with reverb from the amp or a pedal – you’re stuck with it.
Instead, record clean and add reverb when mixing if you need it.
(Unless it’s a vital part of the tone and character you are trying to capture)
Tip 10 – Amp Size Doesn’t Matter
Size matters… or does it?
In a live setting, bigger usually means better.
But in a recording studio, it really doesn’t matter.
Most of the time you are going to put the microphone right up against a single speaker… so it makes no difference if that cabinet has 1 speaker or 10.
The size of the speaker will have an effect on the tone. But that’s not to say that a smaller speaker sounds worse.
In fact, many guitarists chose to use tiny amps in the studio because they like the tone.
Jimmy Page recorded with a small 12-watt amp for the first two Led Zeppelin records. Listen to the characteristic ‘small-amp’ guitar tone in this huge track….
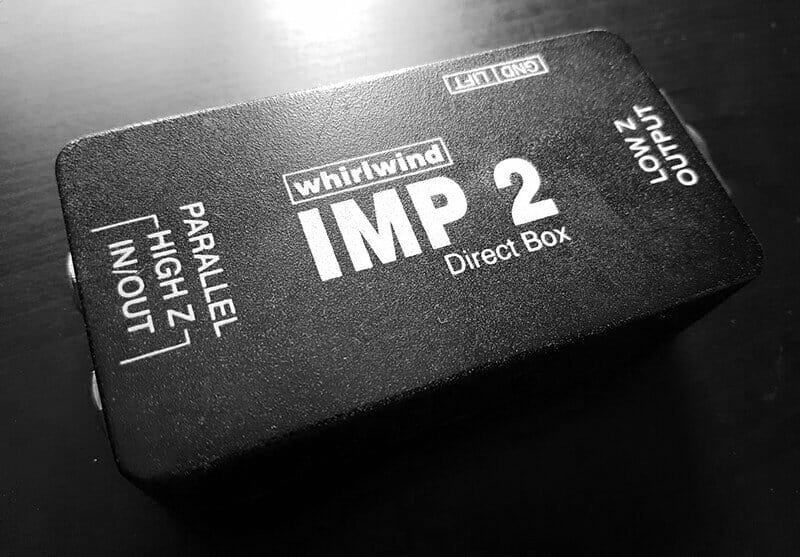
Tip 11 – Record Guitar Direct
If you want to produce radio-worthy mixes in a home studio, you have to make some compromises.
Recording guitar direct and using an amp simulator is the easiest way to capture professional, studio-quality guitar at home.
Some people think that amp simulation lacks ‘mojo’. Sometimes this is true. If you have a favorite amp, then you might never be able to replicate the sound digitally. That’s why I shared the tips above for recording a guitar amp.
But in the majority of cases, you can get better results by recording guitar direct and using an amp simulator.
If you do, make sure you use a proper DI box.
Tip 12 – Record With Plenty of Headroom
If you are recording direct, it’s important to make sure you have plenty of headroom when recording – a clean guitar can be very dynamic.
Try to peak no higher than -10dB (learn more about gain staging here).
There’s absolutely no need to record hot when working with digital audio.
Tip 13 – Record Direct and Re-Amp if You Need It
Even if you record direct and later wish you had recorded through an amplifier – it’s not too late.
You can use a re-amping box to play the dry recorded guitar track out of your DAW and into an amplifier.
This allows you to spend as long as you want tweaking the tone of the amp before recording.
There are many benefits to re-amping, but it’s rare that you would want to do this in a home studio. Re-amping boxes aren’t cheap, and you’re better off making a decision early on and sticking to it.
Tip 14 – Recording Bass? Go Direct
There’s no need to record a bass amp in a home studio. It will cause a range of issues.
Bass frequencies are the main problem in an untreated room. So recording bass through an amplifier is a terrible idea.
Instead, record direct and use amp simulation. A surprising number of professional studios will do the exact same thing.
As with guitar, make sure you use a dedicated DI box and make sure you have plenty of headroom when recording.
If you want to dig deeper into music production and learn what it actually takes to make mixes that sound pro… And you’re an intermediate or advanced producer… Be sure to check out the free masterclass: Enjoy!Next Steps