Welcome to another edition of Sound Advice!
Every Wednesday I send a short email that will help you improve your mixes in one minute or less.
Here’s a quick one to implement in your next mix. This will make volume automation a LOT easier and is a key part of my mixing workflow.
It’s called “freeing the fader”.
I’ll start by explaining the problem:
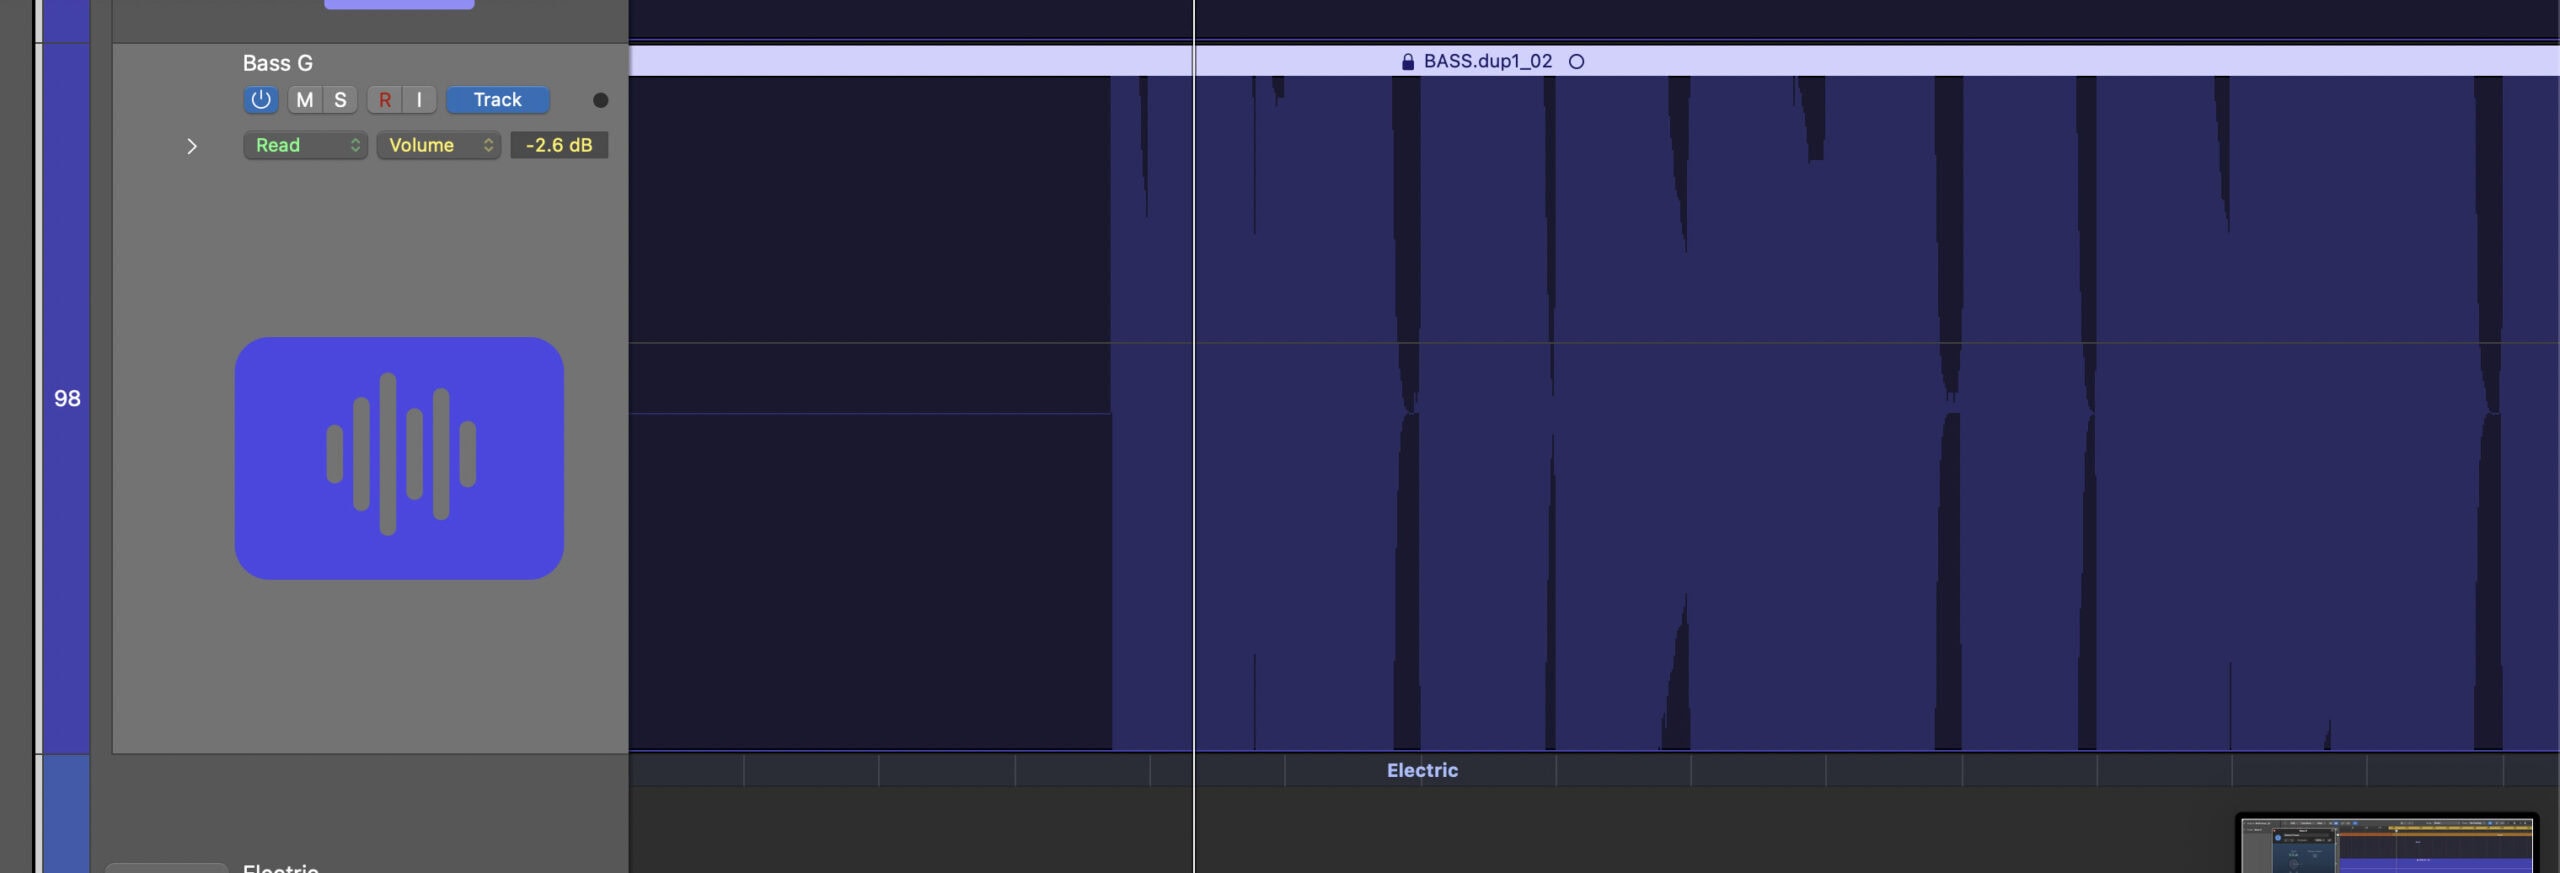
When you add volume automation to a track, it “locks” the fader into place. Now, you can’t use that fader to turn the entire channel up or down.
Let’s say there’s one section of the song where the bass is too loud. So you add some volume automation to turn it down for that section.
Later on you decide the bass is too loud in general throughout the track. So you go to turn it down a bit… but now as soon as you hit play, the volume fader snaps back to wherever you set the automation (quick example).
There are a few ways to solve this problem…
1) If you have the bass channel going to a sub group or instrument group, you could turn down that group instead.
2) If your DAW has the ability, you could use some form of clip gain, or manually cut the region and turn it down.
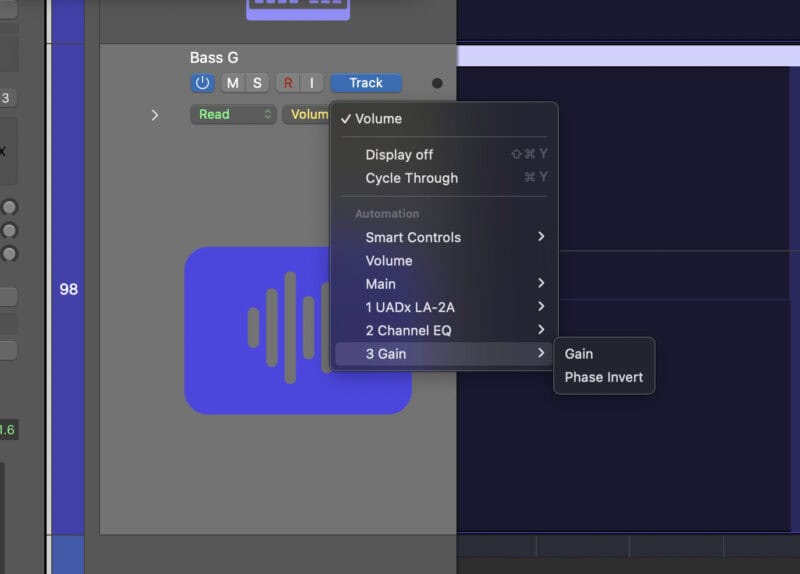
3) You could add a gain plugin and automate that instead of the volume fader.
My preference is number 3, as it works in all DAWs and allows you to use the full automation functionality inside the software.
Here’s how to do it:
Step 1 – Add a gain plugin to the channel you want to automate.
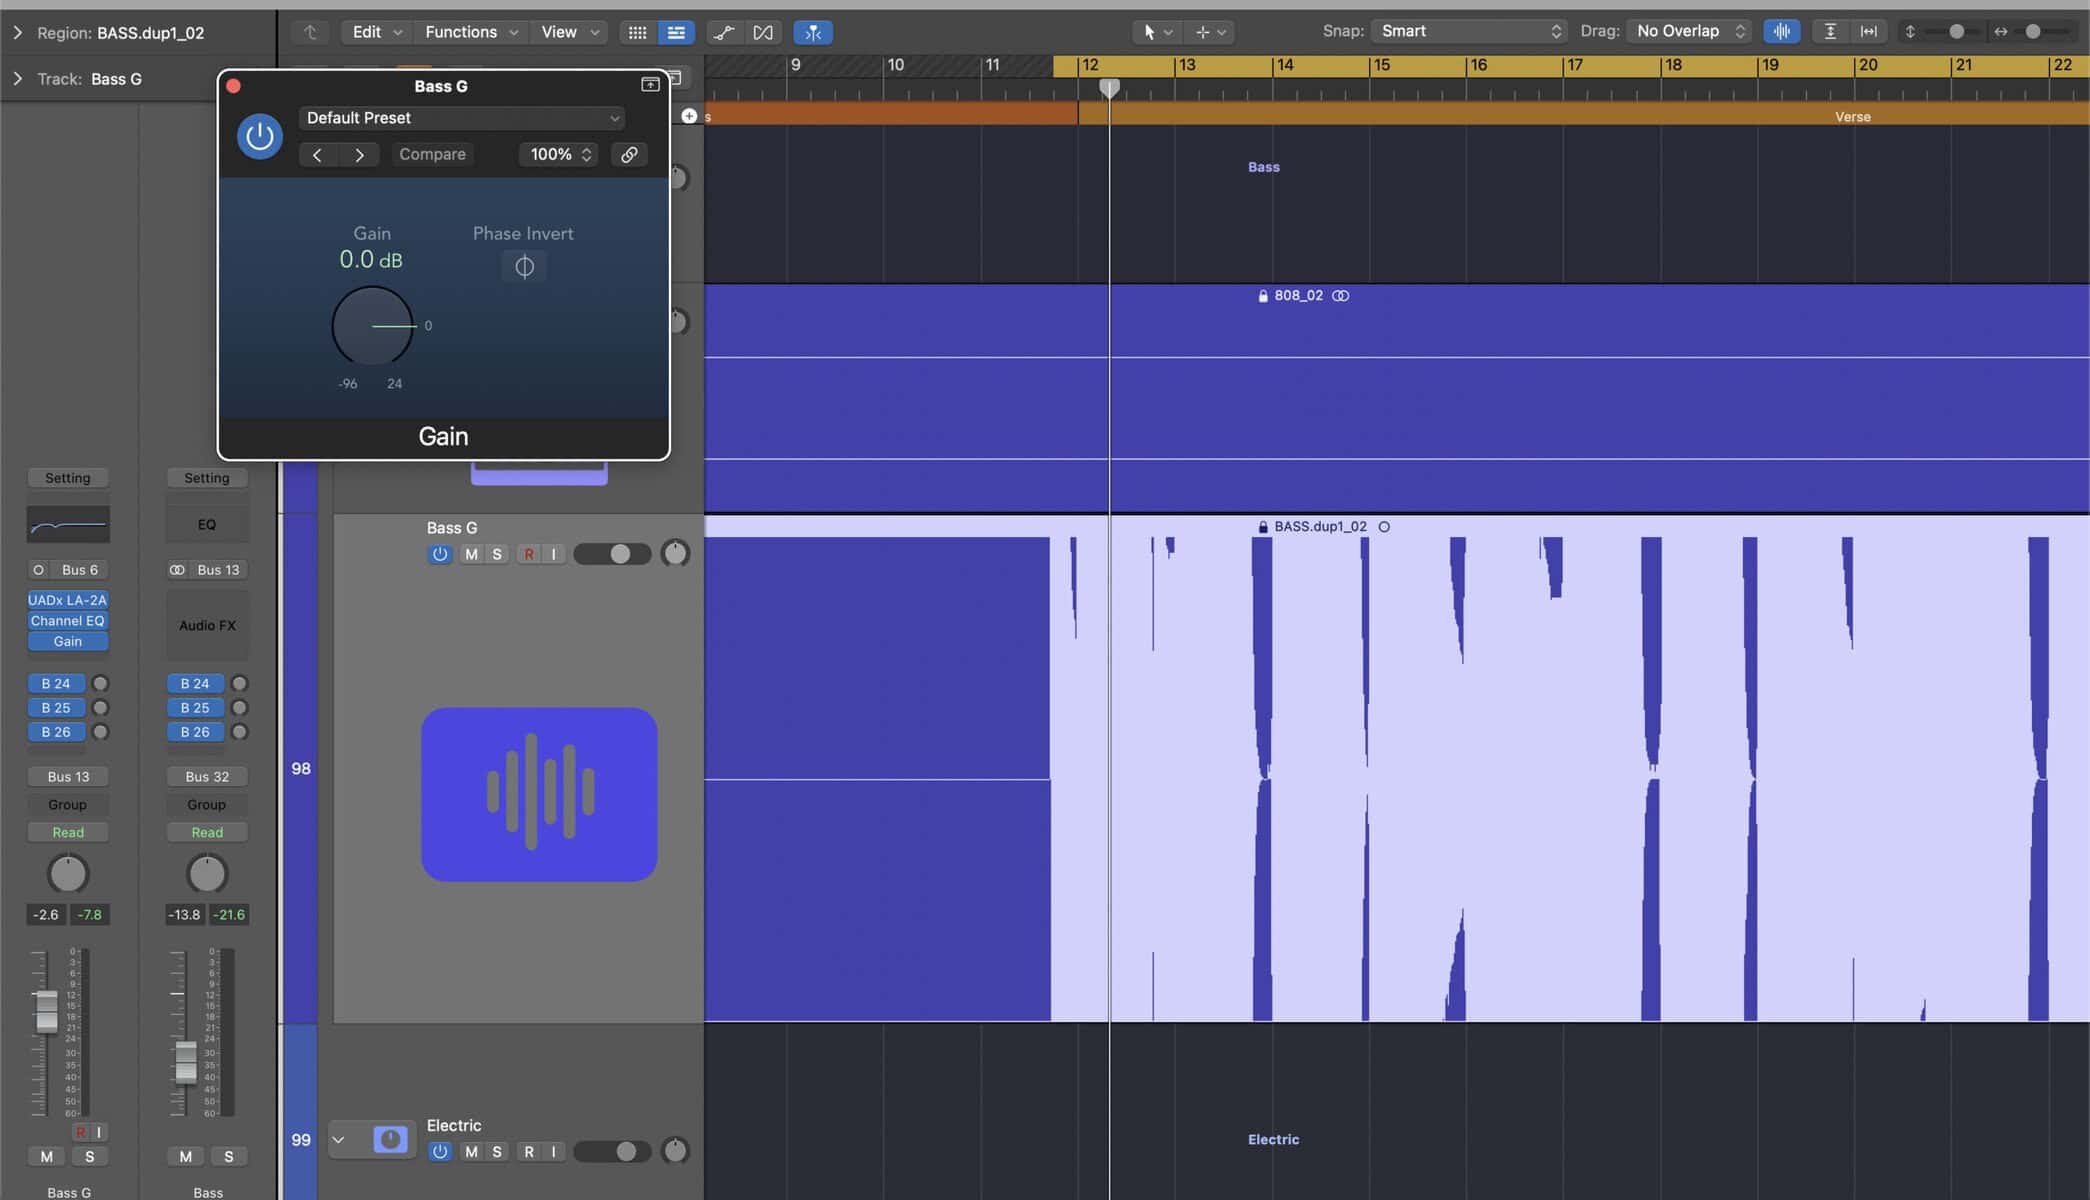
Step 2 – Enable automation.
Step 3 – Select the gain/level control inside the gain plugin as your automation parameter.

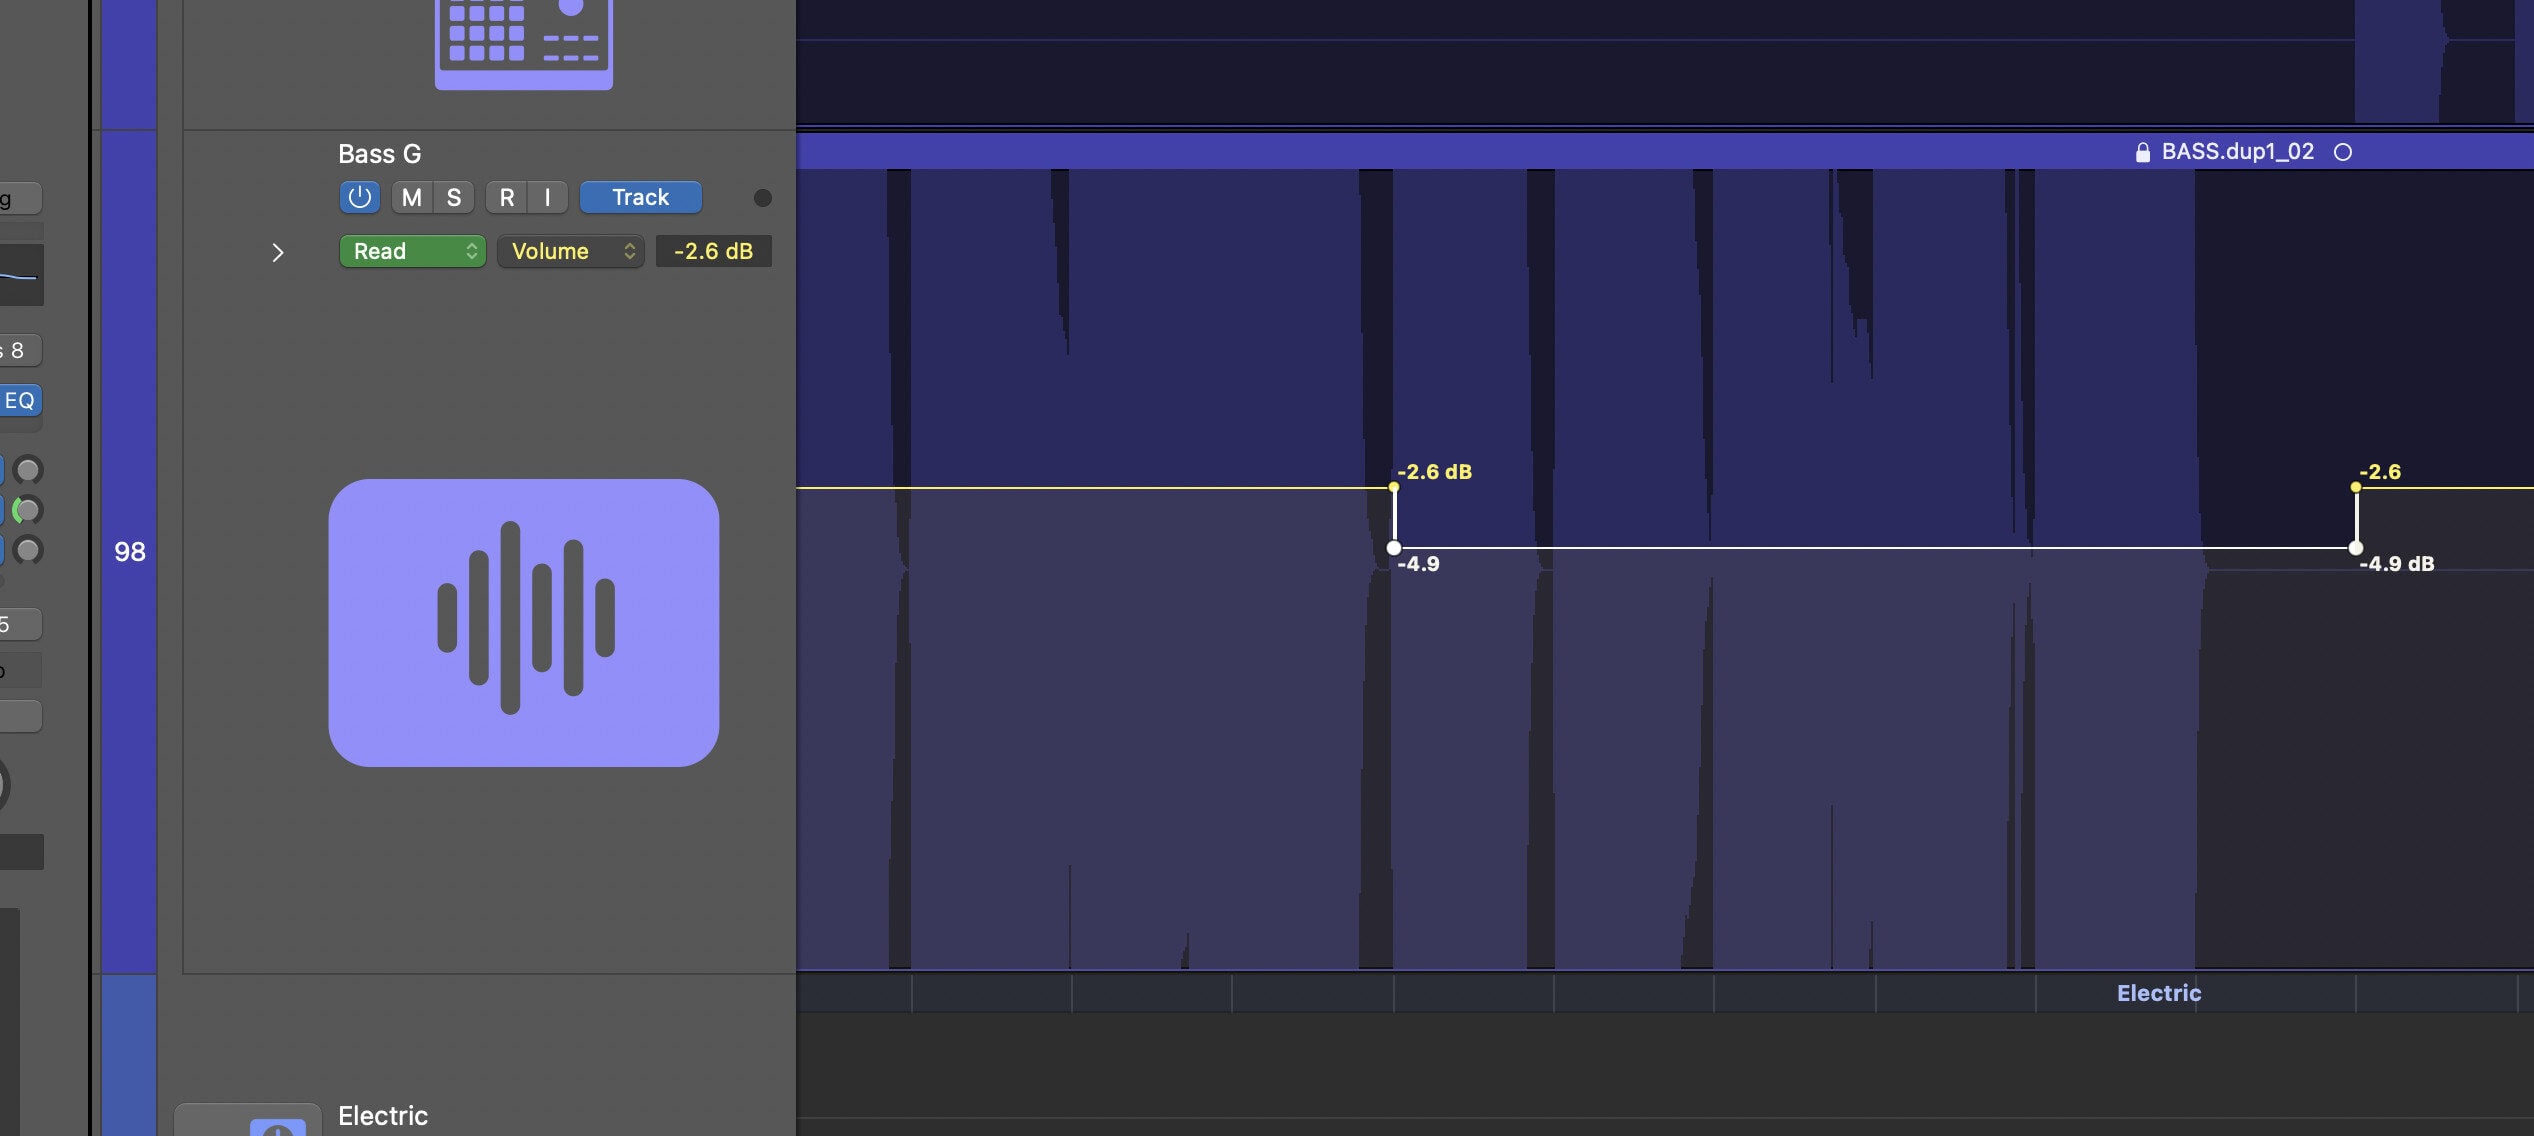
Step 4 – Draw in or record your automation.

Now you automated the level while keeping your actual volume fader free of any automation. So, when you want to turn that channel up or down… you can!
Just be aware the the level going into any subsequent plugins will now be different. Often, this is a good thing e.g. the volume going into your compressor is now more consistent. Other times, it could cause undesirable changes e.g. the level going into a clipper has now changed and more/less clipping is now being applied.
If you want to dive deeper into volume automation in general, and get a better understanding of how it works (and why it’s such an essential part of the mixing process)…
Check out our free 16-hour mixing course.
Until next time,
Rob